Customer Locations
Customer Locations display whether or not they have a Pro device on-site and a Control4 subscription at the top of the page. If the customer has multiple Locations, click their name in the breadcrumbs at the top of the page to return to the Location list.
Click the tabs below to learn more about them.
-
 Dashboard
 -
 Categories
 -
 Rooms
Rooms -
 Devices
 -
 Client Services
 -
 Notes
Notes -
 Settings
The Customer Dashboard displays helpful information about the location and how well the connected devices are performing.
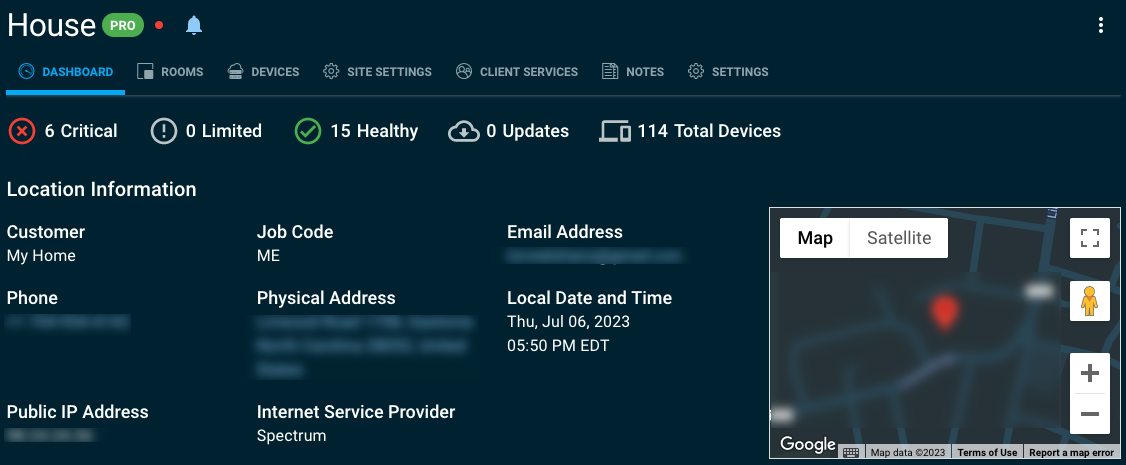
Use Linked Resources to upload any documents or helpful information that will help a technician servicing the site.
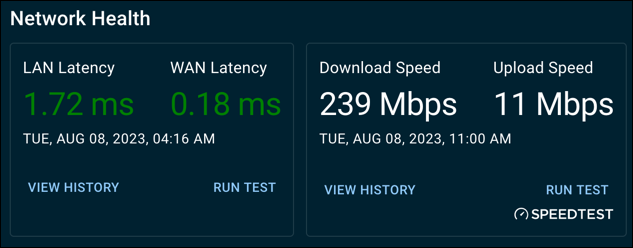
If there's an OvrC Pro device on site, there's a Network Health section that displays the latest LAN & WAN latencey and SPEEDTEST results. Read Network Scan & Internet Test Settings for more information and how to configure the device that runs the test.
OvrC organizes the Location's devices and services by the Categories listed below. Click the category name learn more about the devices and configurable services associated with them.
Note: Categories was recently only available to Control4 users. To enable this feature, enable the What's New toggle.

-
Control & Automation — Control4 controller registration, customer handoff, project management settings and tools, invite to Connect, and Routines configuration.
-
Entertainment — A device list specific to MoIP. Click the Configuration option for MoIP system management and upcoming configuration options for Ryff and Episode Business Music Service.
-
Networking — A device list specific to Araknis, Access Networks and Pakedge devices. Click the Configuration option for OvrC Wi-Fi Managment.
-
Power — A WattBox device list and configuration options.
-
Remote Management & Monitoring — OvrC Pro settings and Pro Tools previously available under the Site Settings tab.
-
Surveillance — Luma site and device configuration options. Including Luma Insights.
-
Discovered — A list of configurable third-party devices found by the OvrC Pro agent.
Use Rooms to organize the location's devices for more efficient navigation. You can create rooms for different building floors, business departments, or other spaces on-site, making it easier to find and manage specific devices and provide a better overview of the device layout on-site.
Select a Customer, then the Rooms tab to get started.

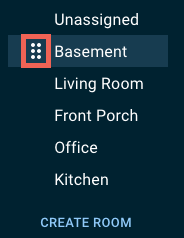
By default, OvrC places all devices under Unassigned. Use this room for devices that regularly leave the network and don’t need to be monitored.
Click Create Room to add a new Room to the site.
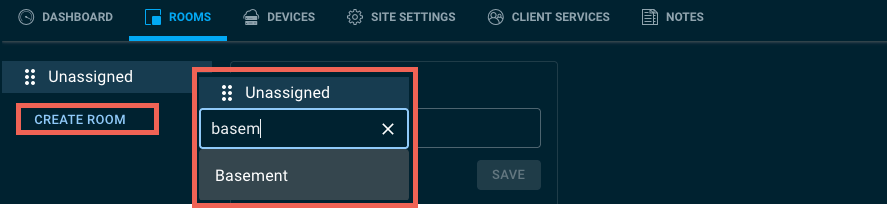
OvrC makes suggestions as you type to provide quick and accurate entries. Press the Enter key to add the Room.
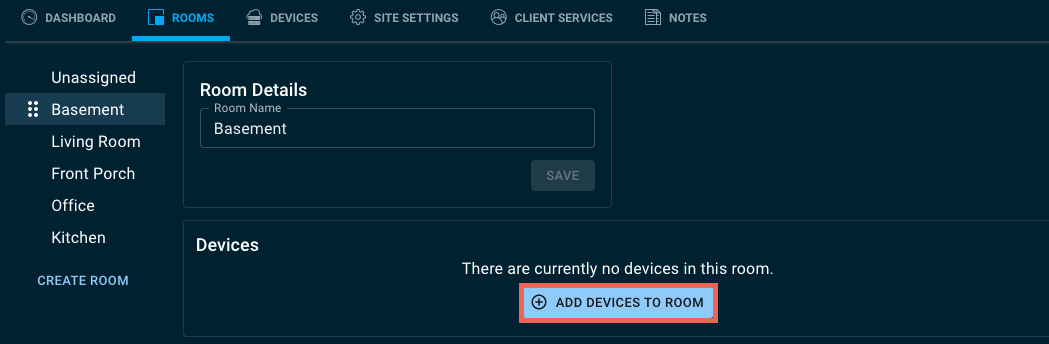
Adding Devices to a Room
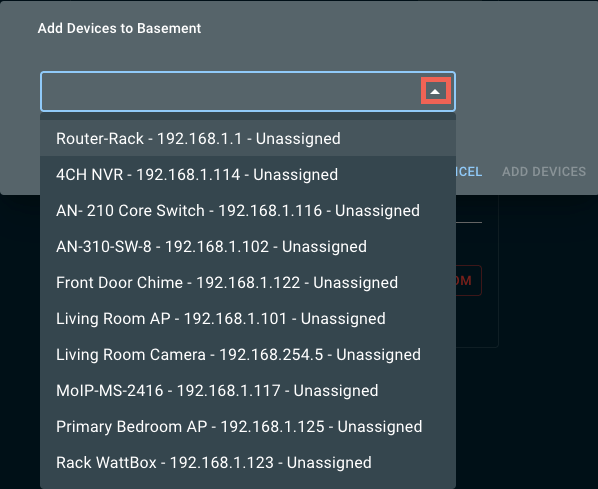
On the Rooms tab, click the Add Devices to Room button. This opens a new window with search and auto-fill functionality. Select the devices you’d like to add, then click Add Devices.
Either start typing the name of the device(s) you’d like to add or click the expansion icon to see a list of unassigned devices. Click Add Devices when finished.
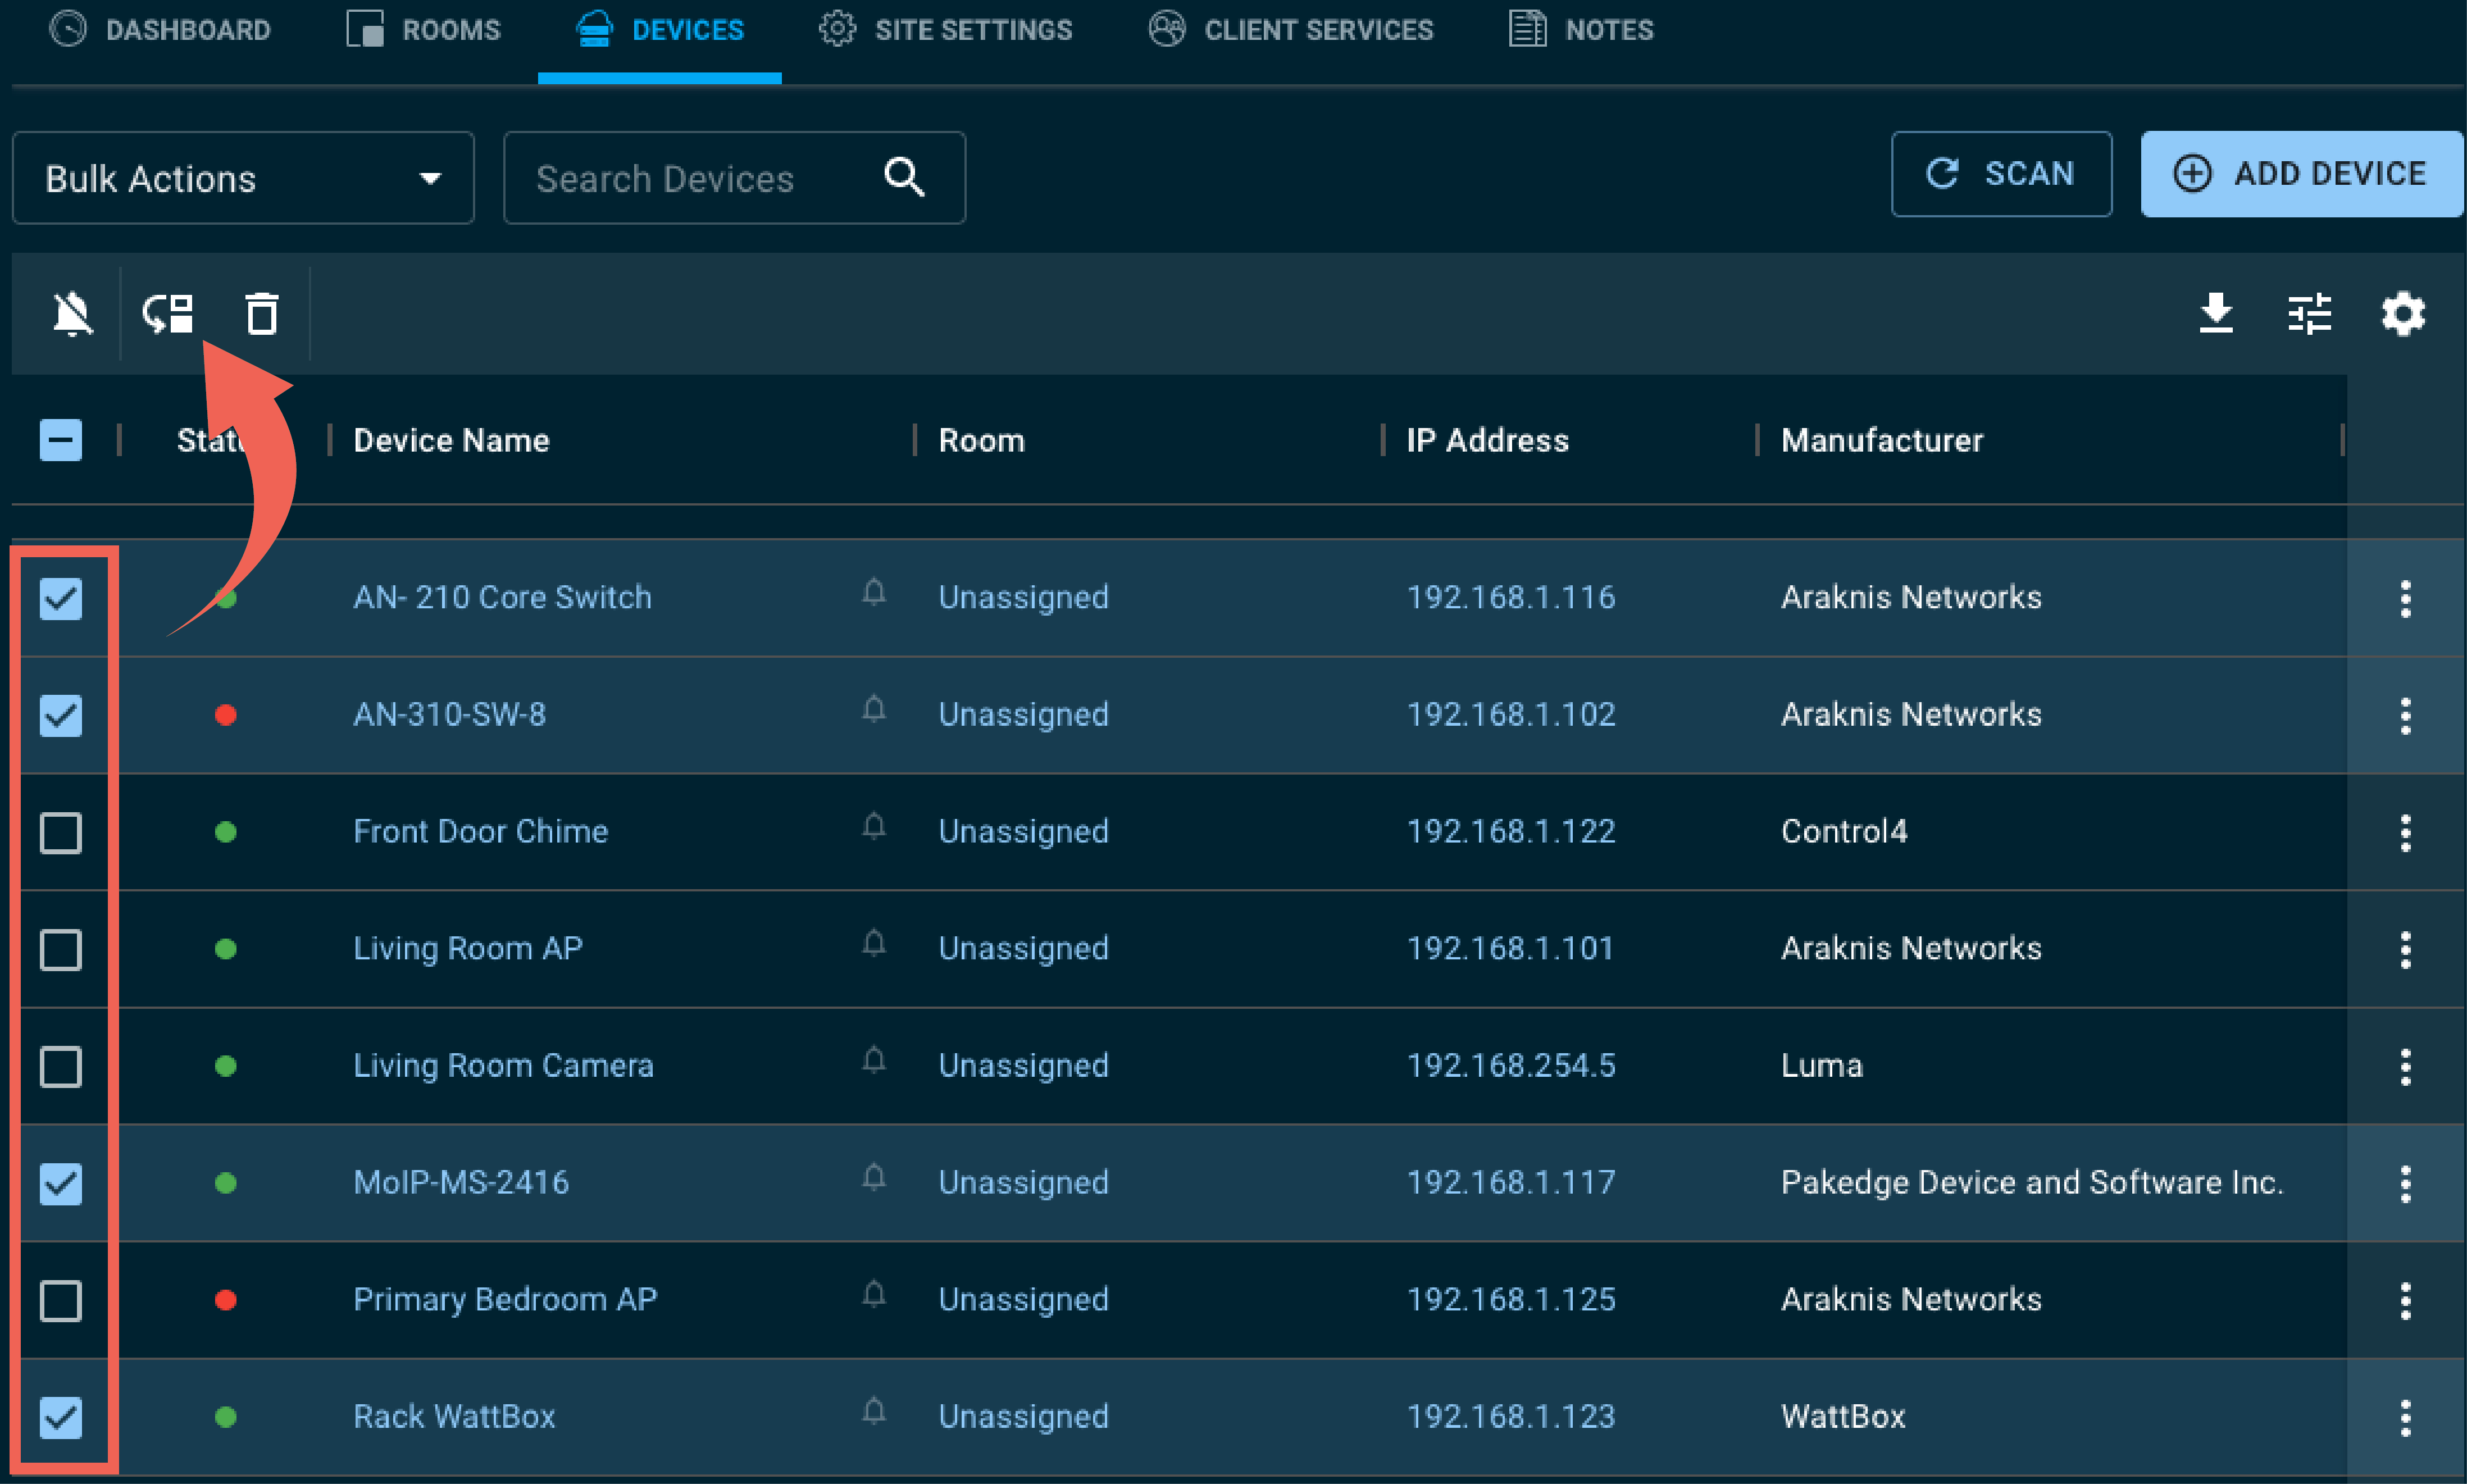
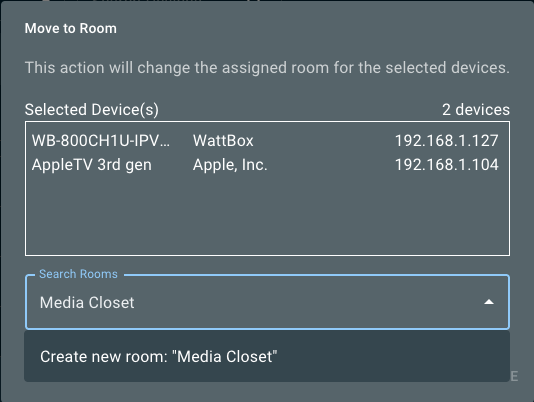
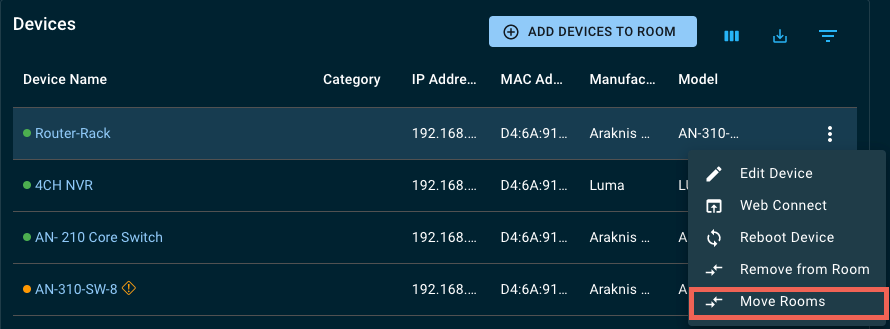
From the Devices tab, click the checkboxes to the left of the appropriate devices, then click the Move to Rooms icon.
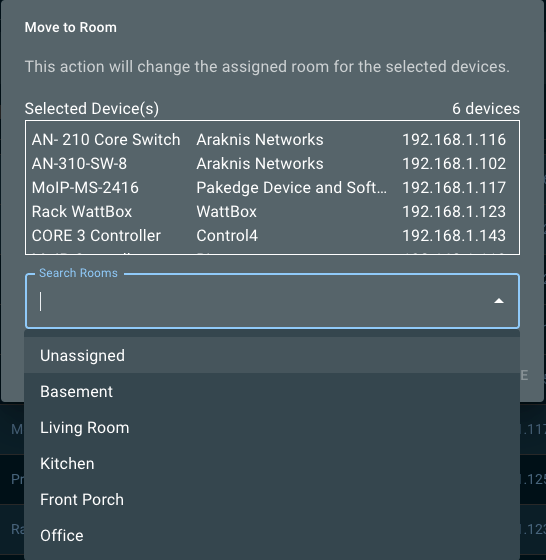
A new window appears giving a summary of the selected devices. You can start typing to search for a Room, select a Room from the dropdown, or type the name of a new Room you’d like to add. Click Continue to move the devices.
Pro Tip: If you’re organizing an existing project into Rooms it may be easier to select devices from the device list first, then create the room using this method. Try it and see if it improves your workflow.
Removing devices from a Room
To move a device to a room, you can either use the Move Rooms action from the Devices tab or select the device from the Rooms device list and click Move Rooms.
Editing and organizing Rooms
To edit a Room name, select the Room and click in the Room Name field. Click Save, to apply the change.
If the Room is no longer needed, click Delete Room at the bottom of the page.
Note: When you delete a Room it moves all the devices to Unassigned.
To re-order the Room list, click the drag handle and move the Room up or down the list.
Read Devices for more information about the Device list in each room.
Devices displays all of the devices added or scanned into the Customer's location. Quick links have been provided to access the local user interface (UI), the device's configuration options in OvrC, or to go directly to the room in which a device is located. Read Understanding device statuses to learn how to read the overall health of connected devices at a glance.
Note: The device list in Rooms contains all the functionality described below, except the ability to add a device or scan for new devices.
Adding devices
At the top right of the page is the option to Add Device. If there's an OvrC Pro device on-site, you'll also have the option to Scan for new devices. Read Adding devices for specific instructions on that process.
Searching the device list
The device list now allows the user to search across all columns. Go to the search bar in the top right of the list and enter the search term. For example, a user can search for MAC, IP, partial names, rooms, etc.
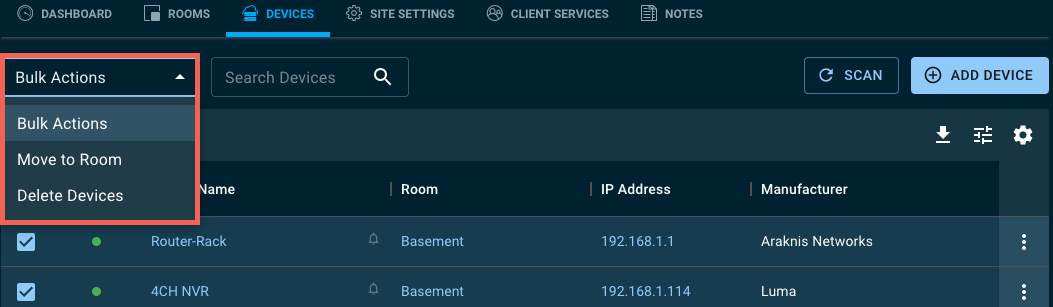
Bulk Actions
OvrC has provided the following bulk actions to quickly perform common tasks:
-
Turn On/Off Notifications (
 )
) -
Move to Rooms
-
Delete Devices
To perform a bulk action, select the devices’ checkboxes and use the dropdown at the top of the table or the quick action buttons below the dropdown. This opens a confirmation window to perform the action.
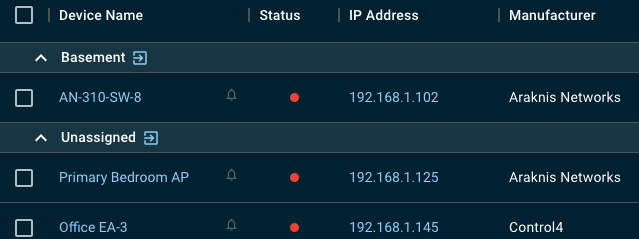
Filters
Click the filters icon in the top right corner of the device list to focus on the information you need the most.

To reset the filter, click the icon again and select Reset or click the x on the filter description at the top of the page.
![]()
Filters use case
By using filters, devices can be grouped by status within a room group or without.
For example, your customer calls and says they can’t see any media on their living room television. In the device list, you can filter by View By > Room and Filter By > Critical to quickly see what’s happening in that room.

Sorting the list
One-click sorts A-Z, a second click sorts by Z-A, and a third click clears the sort order. Any column can be sorted by clicking.

Resizing and reordering the columns
All columns can be resized to a desired length. Click and hold the vertical pipe to drag the column size to the desired length.

To reorder columns, click and hold the column header, then drag the column to the desired order.
'
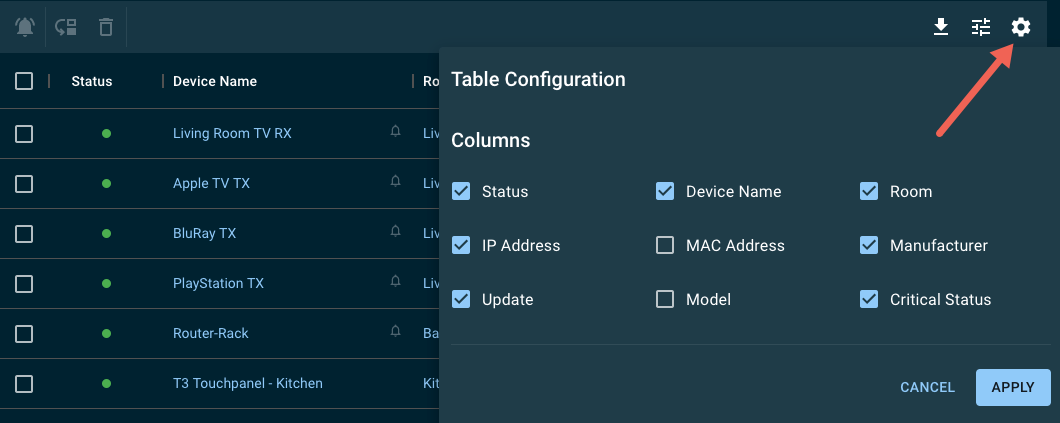
Adding and removing columns
To hide or show certain columns, click on the table settings icon on the top right. Click the check boxes next to the columns you want to be displayed and click Apply.
Note: This only affects your user account. Not the entire company.
Client Services are OvrC Connect commands and network controls you can create and grant customer access to.
OvrC Connect is a customer-facing app that empowers customers to fix small issues on their own through a series of pre-configured commands. You can even customize the app with your company logo and contact information.
OvrC Connect users can:
Getting the most out of the notes feature
1: Create a template
Decide which information your company wants to capture, then create a structure for that data so all your notes are consistent. You can create this template in any word processor.
You also need to create an online place to hold this information so everyone at your company can access it easily. The best option is to create a special location for your company in OvrC as follows:
-
If you haven't done so yet, claim your own company as an OvrC customer.
-
Click your company's OvrC entry. At the top right, click the Menu button, and select Edit.
-
Scroll down and click Add Location. Name the location "Notes Template".
-
Click Save.
If needed, you can add two locations, one each for business and residential templates.
2: Format and save the template
From your company's dashboard, click the More button.
Select the Notes Template location, then click the Notes tab.
Copy the template from your word processor and paste it into the text box.
OvrC copies the formatting from many word processors, but if you need to, you can format the text right in OvrC. The drop-down at the top sets text heads and subheads to organize things. The buttons format text similar to most word processors. You can make text bold, italic, underlined, make numbered or bulleted lists, or remove all formatting. You can even add a hotlink to your notes by selecting text, clicking the link button, and filling in the URL.
Click Save when your template is complete.
3: Train your staff
Of course, best practices only work if everyone uses them. Train your staff to use the Notes feature properly.
-
Whenever a new location gets added, go to the text from the template, select it all, and copy.
-
Navigate back to the location's notes page, paste the text, then fill in the information. For the best results, be sure everyone knows to add birthdays, pet names, and other such information as you learn them.
Repeat this for any device to which you add notes.
This simple procedure ensures that every location your company handles has all necessary information, as well as extra data that can be used to create that personal touch. This ensures that your techs never seem unprepared, even if they're never been to the site before.
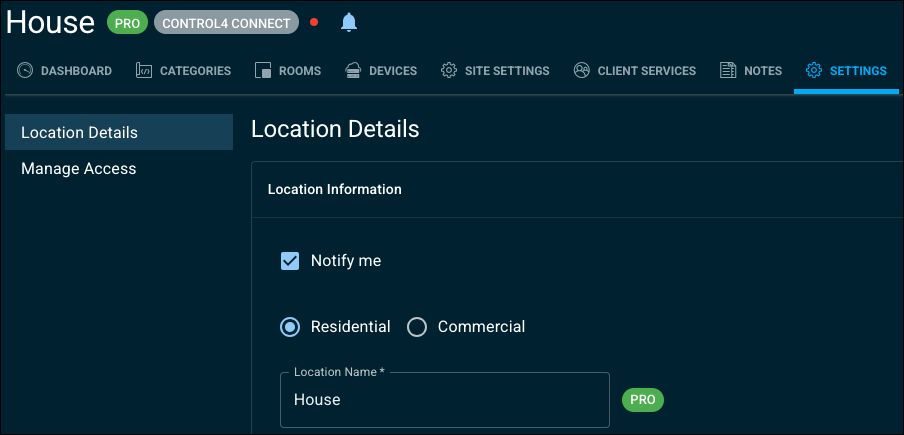
The Location Details tab displays and allows you to edit the information entered during the creation of the location.
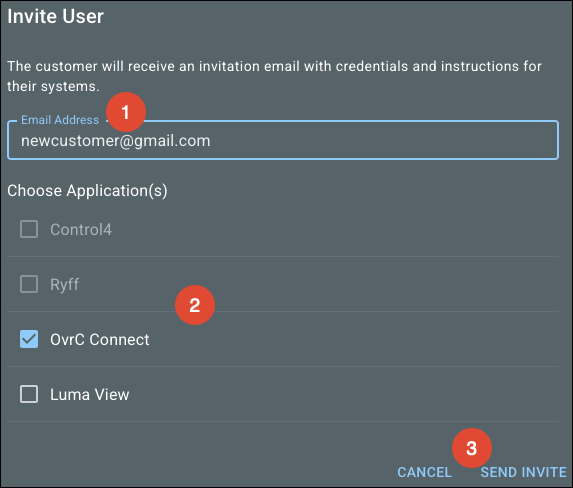
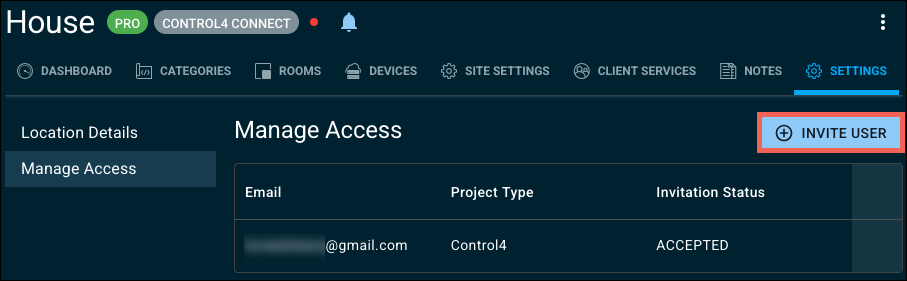
Manage user access for OvrC Connect, Luma services, and Control4 subscriptions with the Manage Access tab. Click the Invite User to add a new user.
Note: Control4 customers can add or remove users from their system using the Control4 mobile app.
Enter the customer's email address, choose the applications to give them access to, then click Send Invite.