VMS - Resource management
The Resource Management tab allows you to add, modify, or delete decoding devices, set device areas, import/export devices, upgrade devices, and set channel groups.
Contents:
Add, Edit or Delete Device page
This page has four tabs down the left column.
Encoding Device tab
This lists the cameras and NVRs in the VMS system.
At the top are several command buttons:
-
+ Add lets you Add a device.
-
Delete removes all selected devices from the VMS.
-
Import/Export allows you to Batch import or remove devices by the batch using a CSV or XLS file.
-
Change Area lets you change the assignment for the selected devices.
-
Upgrade updates the firmware for all selected devices. You can update multiple devices simultaneously, but all such devices must be the identical.
-
Save Form exports an XLS of all selected devices that can be used to import them to a different VMS.
-
Refresh the OvrC Device queries OvrC to ping all selected devices to update their status.
-
The Search dialog lets you find specific devices easily.
The table is interactive. Click on any column number to sort by that column (click again to inverse sort). Click and drag on columns to change their display order. Click and drag on any column divider to change the column width.
Within each device's listing:
-
Click on the Edit icon to open a dialog box that lets you change some of its data.
-
Click the trashcan icon to delete the device.
-
Click the HDD icon in an NVR's entry to get disk information.
At the bottom, the Default Password button lets you set the default user name and password for each device based on its manufacturer and series.
Add a device
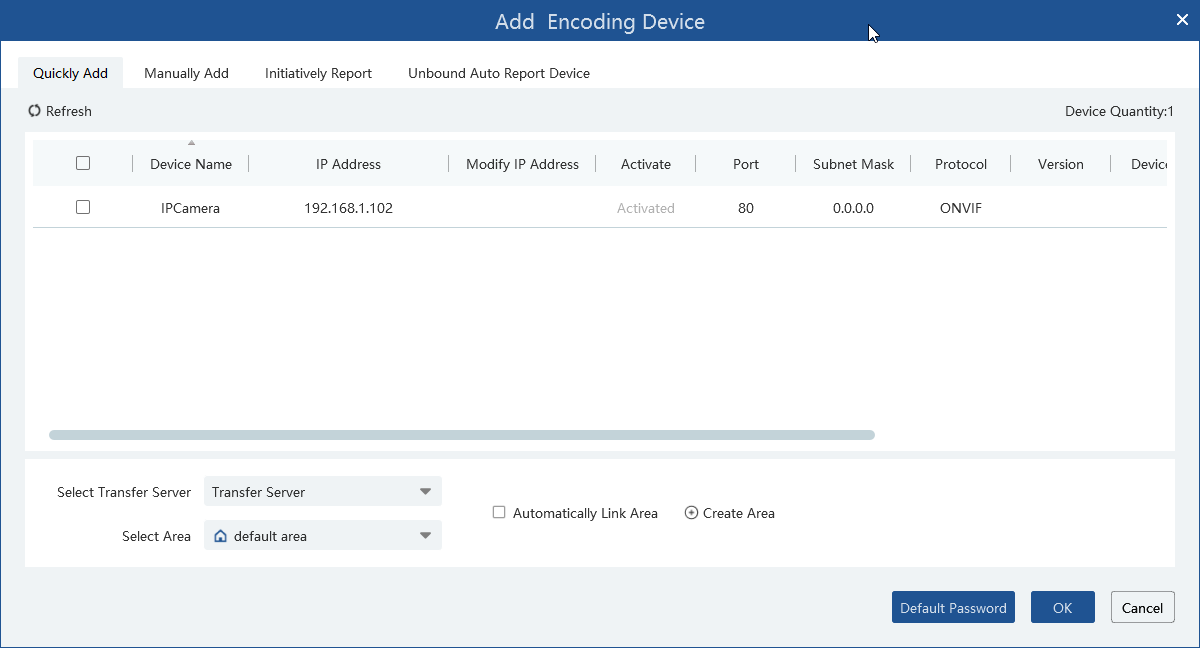
Click the + Add button. An Add Encoding Device dialog opens with several tabs.
The Quickly Add tab displays a list of available devices. Click Refresh at the top to refresh the list.
Select a device to add by using its checkbox. Set its transfer server and area. Click OK.
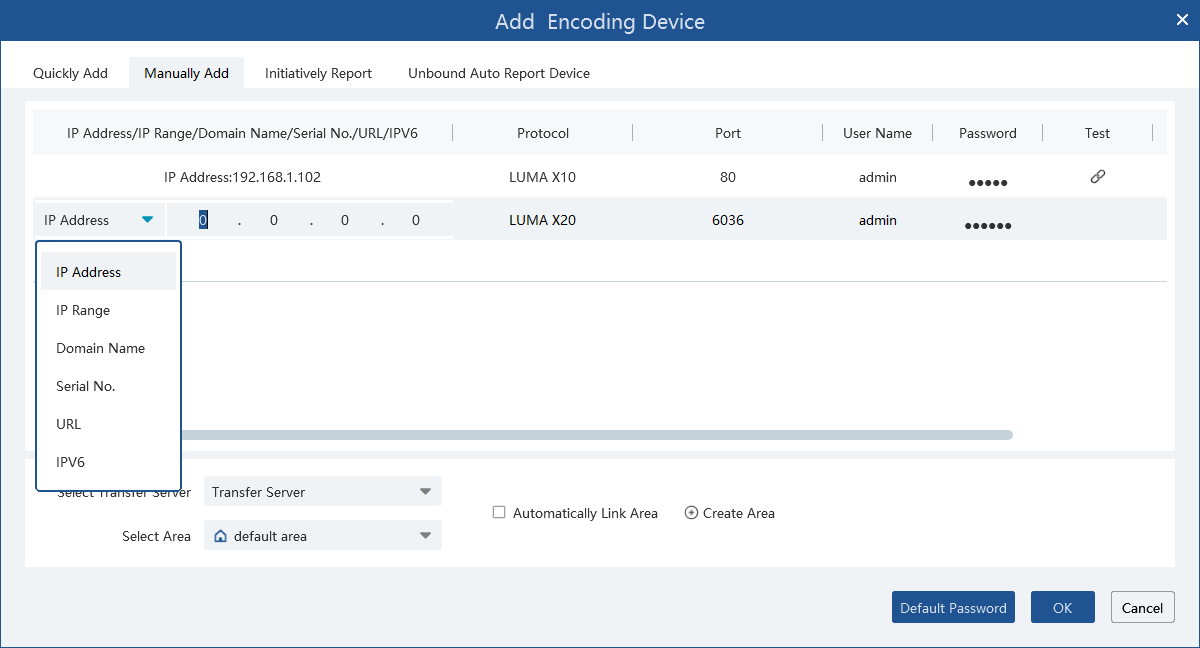
The Manually Add tab lets you add a device using its IP address or URL.
Pro Tip: You can add a batch of similar devices by specifying a range of IP addresses.
To add a device via IP address, click in each cell of a row, adding the device's data (manually for some cells, using a drop-down for others). Note that the IP address cell has a drop-down for several different IP formats.
Once all data has been specified, click the Test icon. If the test was successful, select the transfer server and area for the devices. Click OK.
Adding a device by URL/RTSP protocol will be added at a later date. Documentation forthcoming.
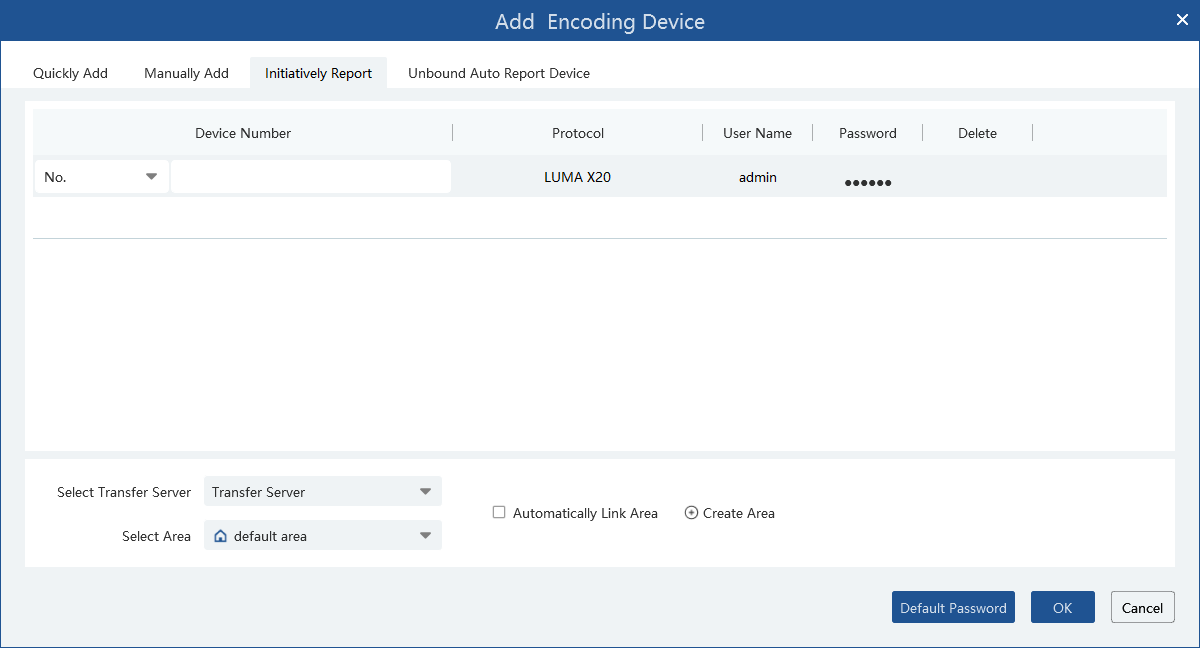
The Initiatively Report tab allows the addition of cameras through a remote NVR using its platform access settings. Documentation forthcoming.
The Unbound Auto Report Device tab fetches devices that have had auto-reboot information already configured.
Documentation forthcoming.
Batch import
To import a large number of devices using a spreadsheet, perform the following steps:
Click Import/Export and select either Export Template option to download the template. Open the file. It should look like this:
Enter all information for each device you want to import.
-
IP: Enter the IP address of the encoding device.
-
Port: Choose from 80, 554, 6036, or 9008.
-
Protocol: Choose LUMA X20, LUMA X10, Dahua, or ONVIF.
-
UserName: Enter the user name of the encoding device.
-
Password: Enter the password of the encoding device.
Save the file. Click Import/Export, choose Import from the list, and select the saved file.
Intelligent Analysis Server tab
This lets you view the status of and edit the data for the Intelligent Analysis Server. Unless you change it, this runs on your PC and evaluates surveillance images independently of the cameras and NVRs.
Media Transfer Server tab
This lets you view the status of and edit the data for the Media Transfer Server. Unless you change it, this runs on your PC and handles all images and streams sent to the VMS.
Alarm Server tab
This lets you view the status of and edit the data for the AlarmServer. Unless you change it, this runs on your PC and handles sending and receiving alarms in the VMS.
Device Setting page
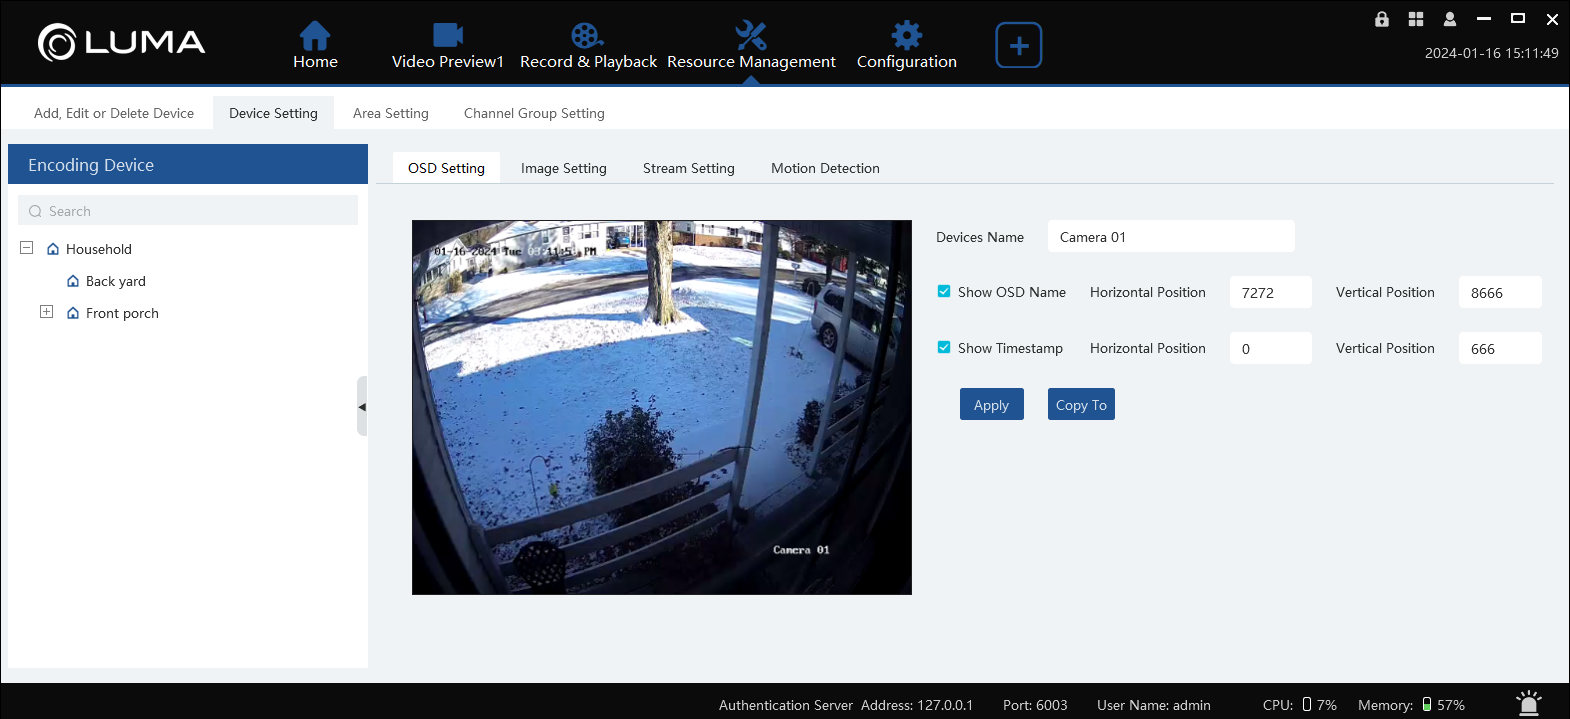
The Device Setting page allows you to configure the OSD for the devices.
Select a device from the list on the left. Settings specific to the device appear on the right. If you click the top level device entry, you can edit a wide range of settings. If you click the subordinate entry for the device, you can edit its OSD settings.
Click Apply to keep the changes made. Click Copy To if you wish to use those same settings with other eligible devices.
Area Setting page
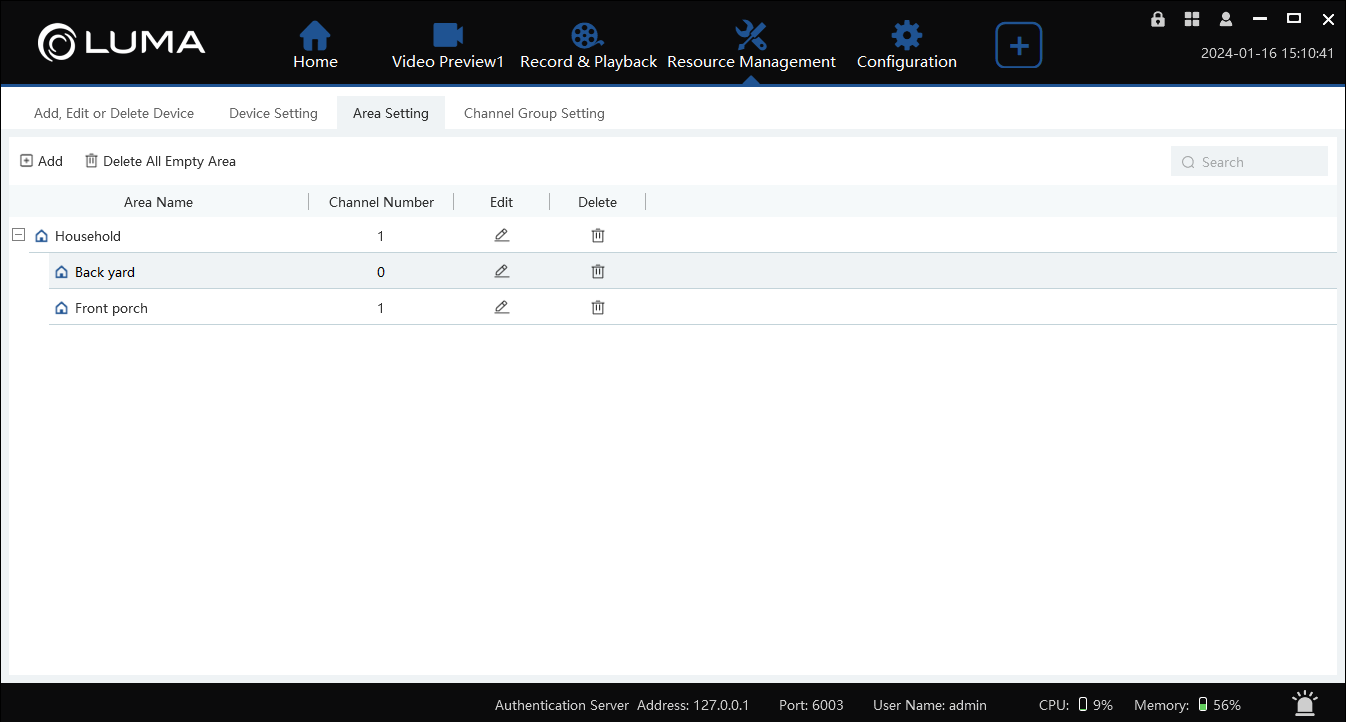
This provides area settings and displays the available areas.
To add a new area, click Add. The Create Area dialog box appears. Select a parent area, then input the name for the new area. Click OK.
To rename an area, click Edit.
To delete an area, click Delete.
Channel Group Setting page
The Channel Group Setting page allows you to add, edit, or delete channel groups, which are a selection of cameras that you want to view together.
To add a channel group, click Add. To modify an existing channel group, click its Edit icon.
To delete a channel group, click Delete.
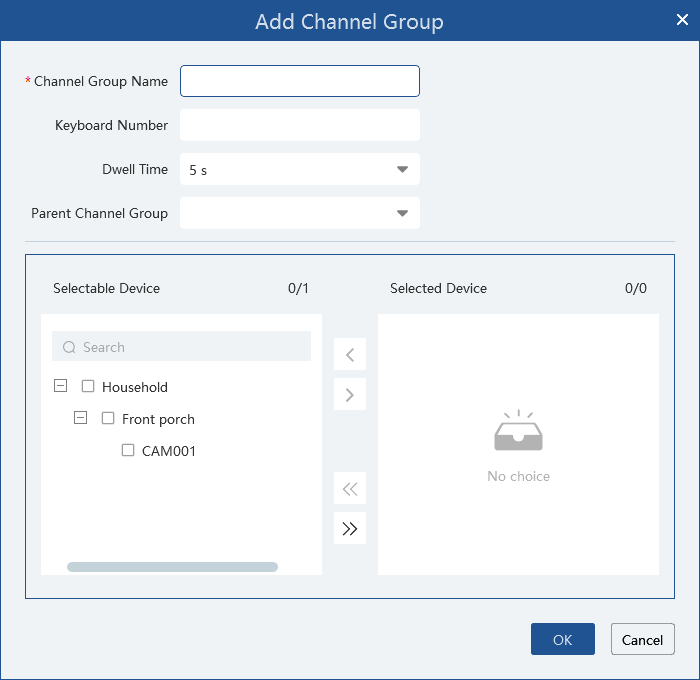
The dialog boxes for adding and editing are the same.
Enter the channel group name, keyboard number, dwell time, and parent channel group (if any).
Select the devices you want to move into (or out of) the group. Then, use the > or < buttons to move the selected devices. To move all devices at once, use the >> or << buttons.
