NVR web interface - Function: Record
This section handles the system's HDDs.
- Record
- Encode Parameters
- Record Status
Record
Mode Settings
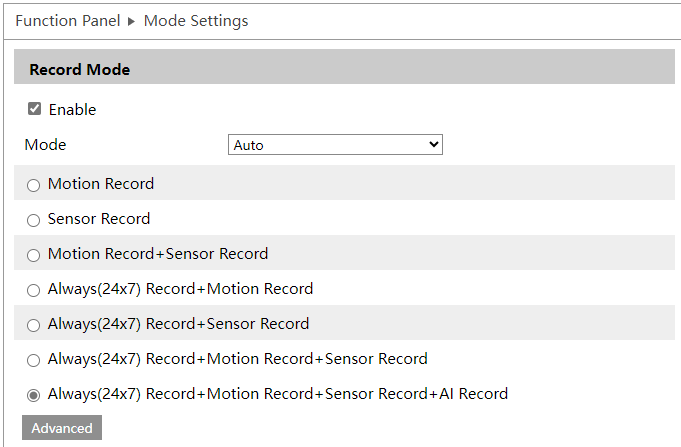
Here you set which types of recordings the NVR uses, and when. You must enable record mode to create any recordings.
If you select Auto in the mode dropdown, the system uses the selected recording type(s) 24/7.
Choosing Customization in the Mode dropdown lets you set different schedules for each type of recording.
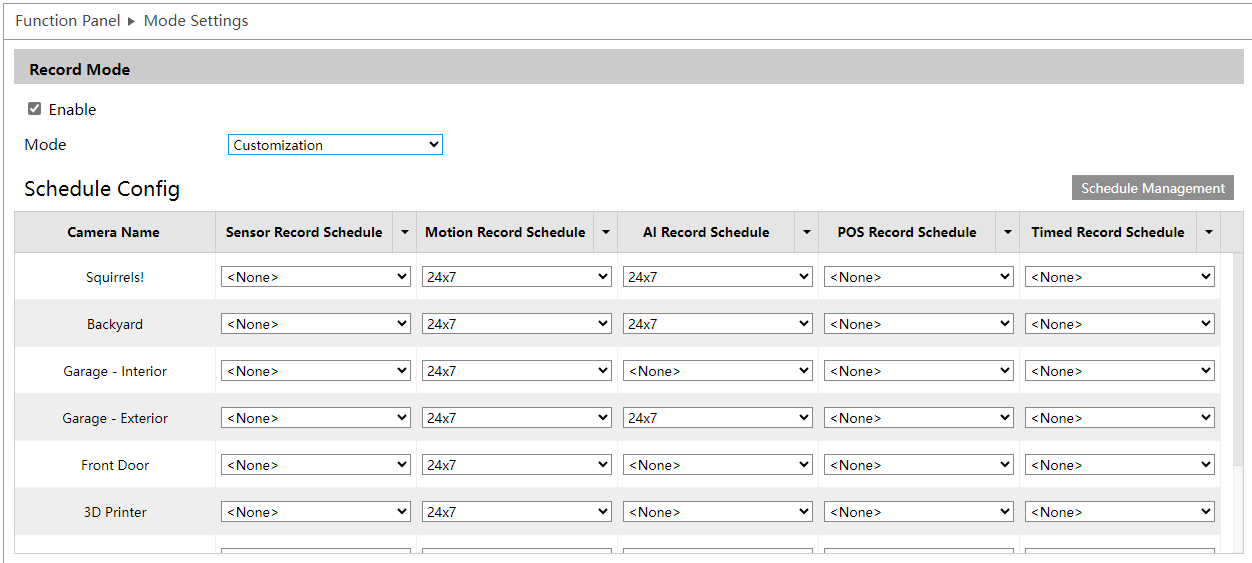
Schedule Management: This opens the Schedule dialog. Three schedules are preset for the system. The first is the default 24×7 schedule. This cannot be edited or deleted.
The other two default to weekdays (24×5) and weekends (24×2), but can be edited and renamed to fit install needs. Click Add above the schedule list to add a new schedule.
Click Edit to open the Edit Schedule dialog. Rename the schedule at the top. Click Erase or Add to modify the schedule bars. Click and drag in a schedule bar to add or erase times.
Use the radio buttons to select which sorts of recordings you want. If the mix you want doesn't appear, click Advanced to pick and choose the recording types.
Under Manual Record Settings, set the time for which manual recording is enabled.

Advanced
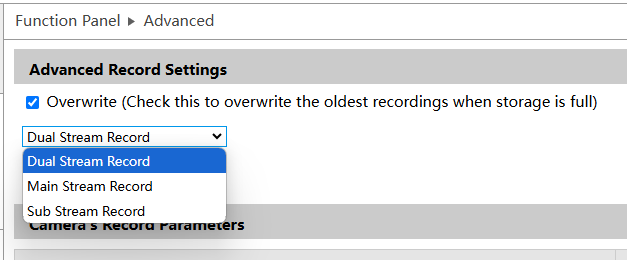
Advanced Record Settings
In the dropdown, check which of the cameras' streams to which these settings apply.
Check the Overwrite box if it's acceptable for new recordings to overwrite old ones. The frequency with which this happens depends on factors including disk size, activity, resolution, etc.
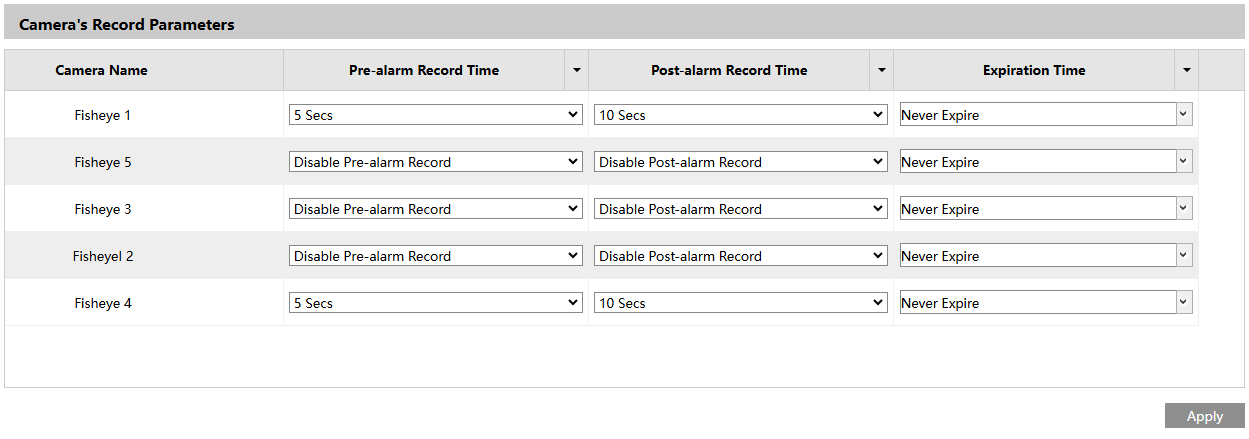
Camera's Record Parameters
In the table, set pre-record and post-record times for each camera. The camera adds this footage to the start or end of any event recording to provide better context. Also set the time that must pass before a surveillance file expires and is automatically deleted from the system to free up disk space.
Click Apply to save all changes. This reboots the system.
Encode Parameters
Event Recording Settings
Here you define the settings for the main stream of each camera when it is recording an event (for example, motion was detected or an alarm triggered a recording).

A few tips:
-
Encode: We recommend H.265+
-
Bitrate Type: Use VBR (variable bitrate) if the scene is largely static, or CBR (constant bitrate) if the scene is constantly changing.
-
GOP: Group of Pictures is basically the same as i-frame interval. Lowering this value increases the quality of your video, but makes the stream larger.
At the bottom, Remain Bandwidth shows how much traffic your cameras are using with their current settings, compared to how much traffic your NVR can handle.
Click Apply to save all changes.
Schedule Recording Settings
Here you define the settings for the main stream of each camera when it is operating under a scheduled recording.

A few tips:
-
Encode: We recommend H.265+
-
Bitrate Type: Use VBR (variable bitrate) if the scene is largely static, or CBR (constant bitrate) if the scene is constantly changing.
-
GOP: Group of Pictures is basically the same as i-frame interval. Lowering this value increases the quality of your video, but makes the stream larger.
At the bottom, Remain Bandwidth shows how much traffic your cameras are using with their current settings, compared to how much traffic your NVR can handle.
Click Apply to save all changes.
Record Substreams
Use this section to record substreams in addition to the main streams. Use the dropdown to create separate settings for automatic and manual recording. Click Advanced to create a custom calendar for substream recording.
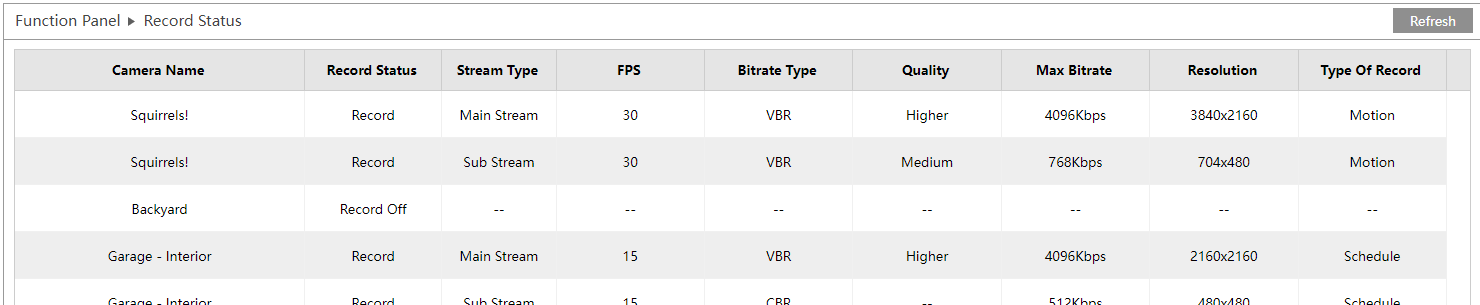
Record Status
Record Status
This gives basic information on each camera's surveillance streams to assist with troubleshooting. You cannot edit anything, but you can refresh the data by clicking the button in the upper right-hand corner.