NVR web interface - Function: Disk
This section handles the system's HDDs.
- Disk Management
- Storage Mode
- Information
Disk Management
This gives data on each hard drive in your system, and a button to format a newly added drive.

Unlock: If you have transferred an encrypted disk from another NVR to this NVR, its status reads "locked". Select the locked disk by clicking on its row, then click Unlock. Enter the password for its encryption, and the disk status changes to “Read Only”. This allows you to read and export the data of this disk (you still cannot write to it).
Storage Mode
Storage Mode Settings
Disk groups restrict which cameras can record to which disks.
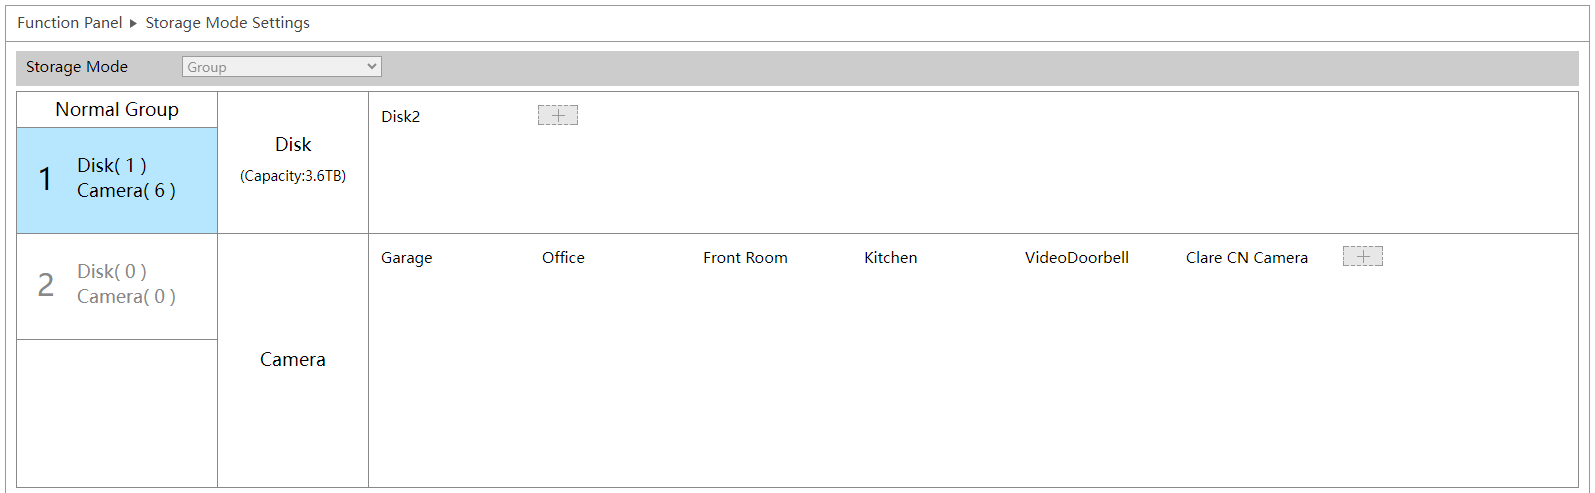
During installation, all disks and cameras are added to group 1 automatically.
Each group can add disks and cameras from other groups. To create a new group, select a disk group by clicking on it in the left column and then click the + button in the disk or camera row. This opens a pop-up where you select disks or cameras and then click Add.
To delete disks and cameras from a group, select a disk group and then click on the top right corner of the added disk or camera to delete it. Deleted disks and cameras move into group 1 automatically, which means you cannot delete them from group 1.
Pro Tip: Each HDD and each camera can only be in one group.
Information
View Disk Information
This gives basic information on the NVR’s available disk drives to assist with troubleshooting.

You cannot edit anything, but you can refresh the data by clicking the button in the upper right-hand corner.
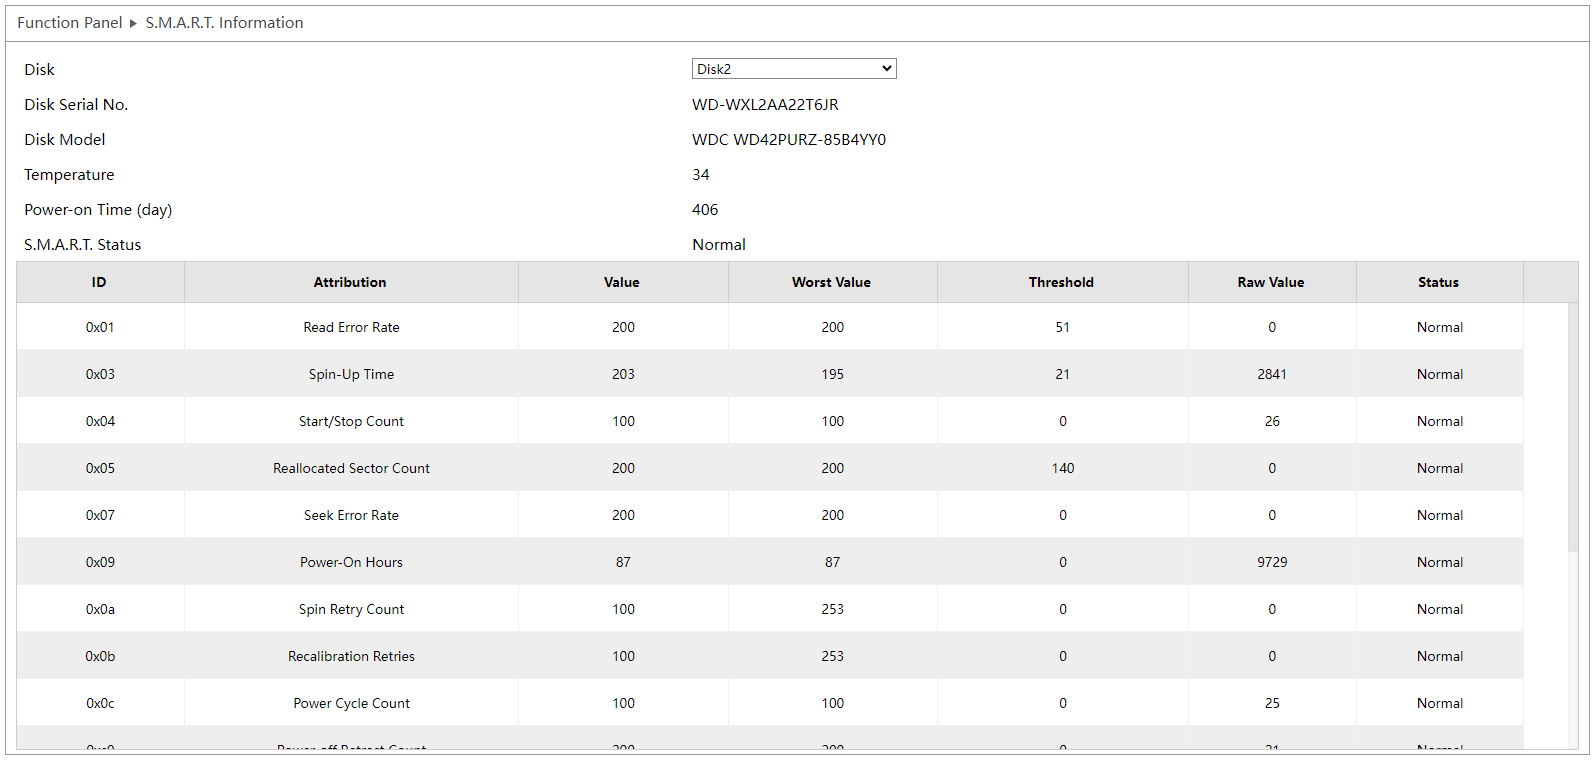
S.M.A.R.T. Information
SMART stands for Self-Monitoring, Analysis, and Reporting Technology.
This page shows detailed information for the disk selected in the dropdown menu.