NVR local interface - Settings: Account and Authority
Here you handle user accounts.
- Account page
- Security page
- User Status page
Account page
Here you adjust what users can (and cannot) do in the system.
Edit User tab
User accounts allow individuals to use the system within assigned parameters.
Pro Tip: Give each user a unique account for the best security and flexibility.
-
Permission group list
-
Operation permissions
-
Camera permissions
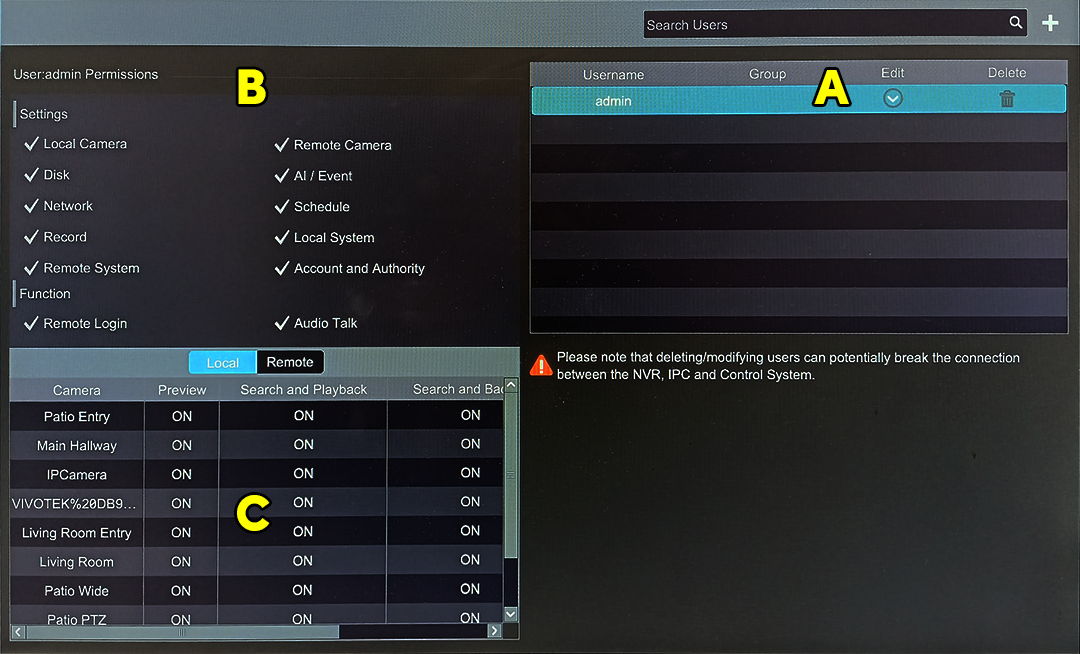
Click on a user to review the permissions for that account. Users cannot be edited from this screen; you must click the Edit icon for that user.
Click a trashcan icon to delete the associated account. The primary admin account (shown) cannot be deleted, nor can its permissions be changed, but you can edit its password.
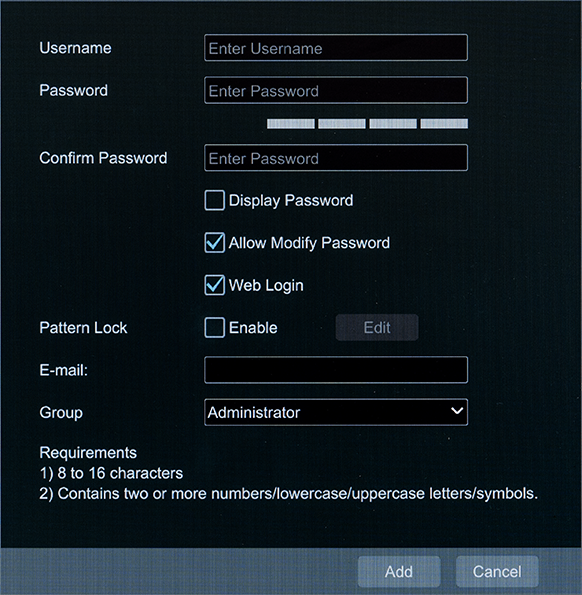
Add a user
To open the Add User popup, click the Add User link at the top left of the Settings window, or click the + icon at the top right of the Accounts window (next to the search tool).
Set the credentials and the user's email, Other options include:
-
Allow Modify Password: Let the user modify their own account password.
-
Web Login: Allows the user to log in when not on the same network.
-
Pattern Lock: Lets the user log in by using a mouse rather than a keyboard.
-
Group: Sets the default permissions for the user. You can create a new permission group to allow the user to get the exact permissions required (see below for details).
Only the admin and users with Account and Authority permission can manage the system’s accounts. Administrator details and permissions cannot be changed.
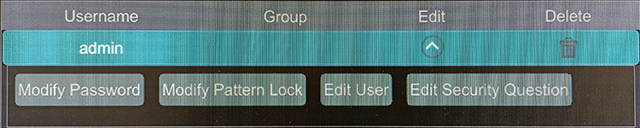
Edit a user
Double-click a username or click the down arrow in the Edit column of the username user to adjust the account details. Click the trashcan to delete the user (the user admin cannot be deleted).
Only the admin and users with Account and Authority permission can manage the system’s accounts. Administrator details and permissions cannot be changed.
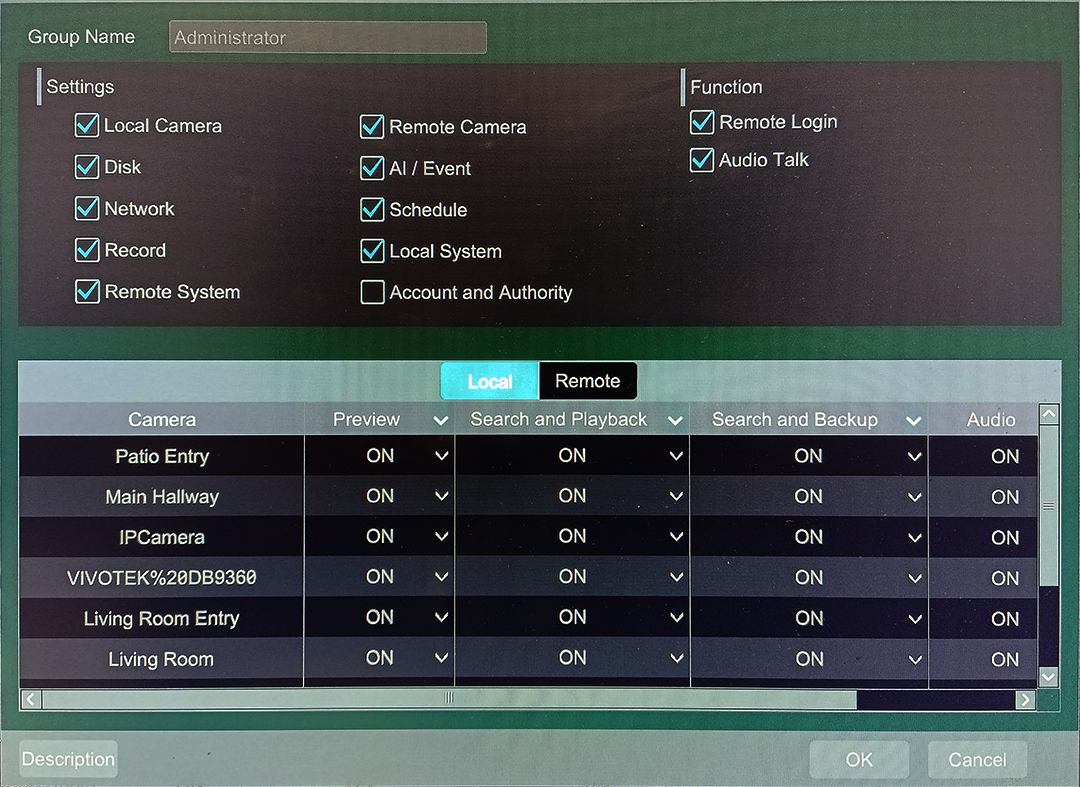
Edit Permission Group tab
Permission groups are the foundations for the user accounts. They provide a quick way to grant a suite of permission to individual accounts.
-
Permission group list
-
Operation permissions
-
Camera permissions
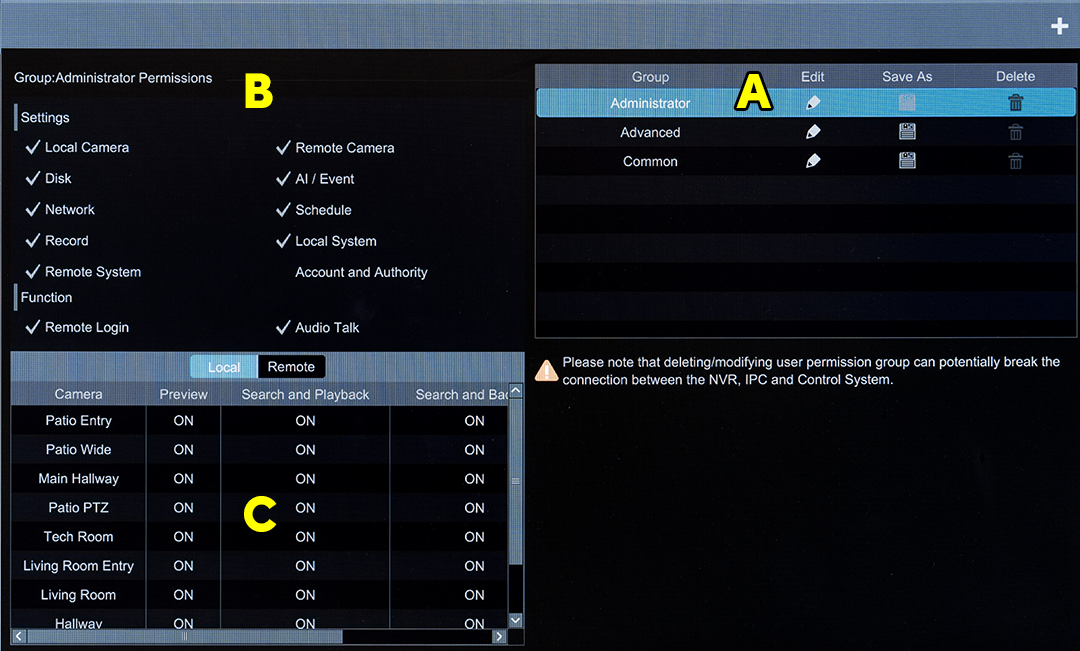
Click on a permission group to review the permissions for that group. They cannot be edited from this screen; you must click the Edit icon for that group.
Click a trashcan icon to delete the associated permission group. The three default permission groups (shown) cannot be deleted.
To create a new permission group, click the + icon at the top right, or click the Save As icon in an existing permission group. Both of these actions, plus clicking the Edit icon, open a pop-up with the same features.
Set the group name, check the operation permissions as required and then set the permissions for local and remote cameras.
Security page
Block and Allow List tab
Click Enable to use this feature, then select either:
-
Enable Allow List (only the devices in the list are allowed in to the system; all others are blocked)
-
Enable Block List (the devices in the list are excluded from the system, all others are allowed)
At the bottom, click Add IP or Add MAC to open a dialog in which you can add a filter by IP address (or range of addresses) or device's MAC address.
Click the edit icon to adjust that entry, or the trashcan to delete it.
Save the settings by clicking Apply.
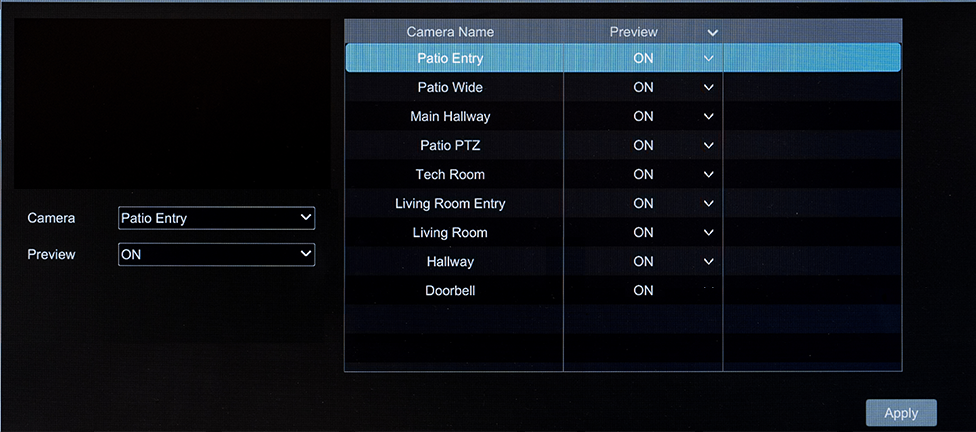
Preview on Logout tab
This allows (or prevents) the VMS from displaying individual cameras when a user is not logged in.
Select a camera in the dropdown to the left. Below that, set that camera's preview on or off.
The table at right displays all current camera settings.
Network Security tab
Here you can set security for your NVR's ports. Consult your network admin for necessary details.
ARP Guard: Enabling address resolution protocol guard can protect your network from APR attacks and make it run more stably. If ARP guard is enabled, you can set the NVR to detect the gateway MAC automatically, or set the gateway MAC manually. Finally, detection defense also can be enabled as needed.
Password Security tab
In this interface, you can set the required password strength:
-
Weak: requires one each uppercase letter, lowercase letter, number, and symbol.
-
Strong: requires two each of the above.
-
Stronger: requires three each of the above.
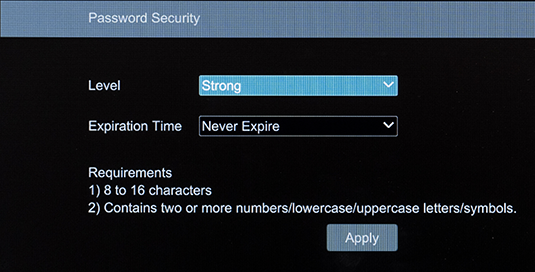
Remember, though, length is strength, so always use all 16 characters if possible.
Set an expiration if you want users to change their passwords on a regular basis.