NVR local interface - Playback
Here you can review recorded video.
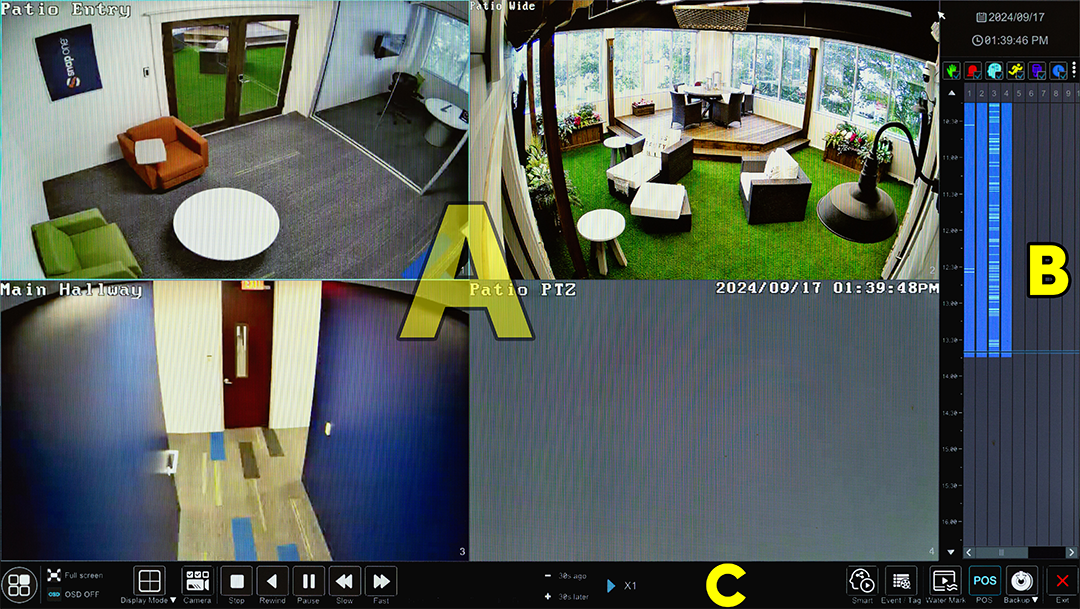
- (A) The camera area
- (B) The timeline
- (C) The control bar
(A) The camera area
The main portion of this area has windows to view the various camera feeds. If a channel is empty, click the + icon in the center to add a camera to that channel.
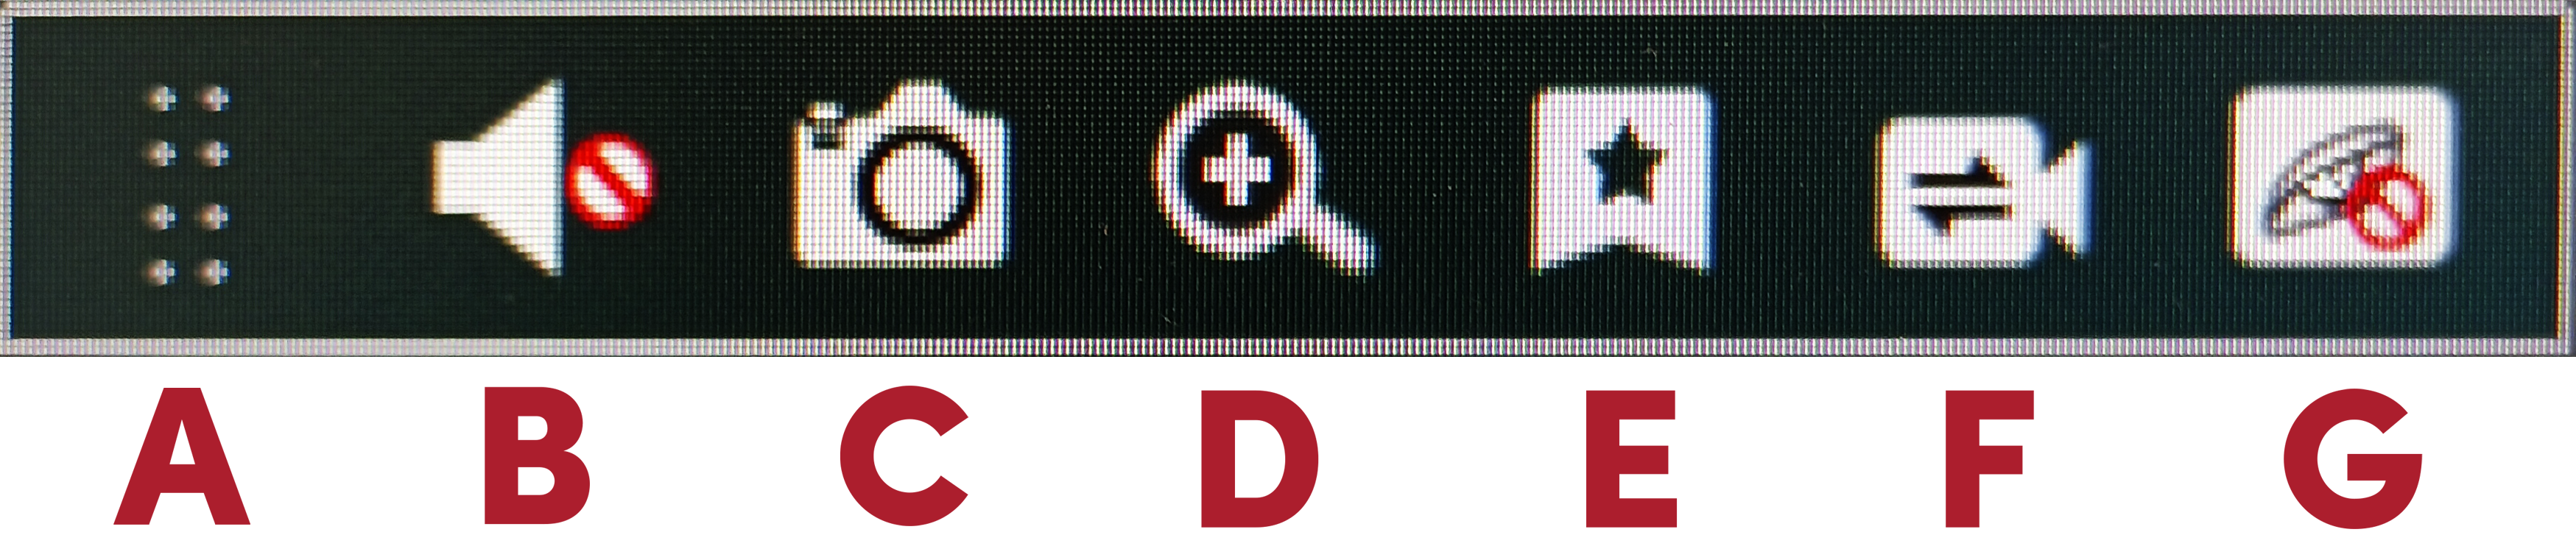
Floating channel menu
If the camera has data for the current time, click on the channel window to reveal a menu.
-
Grip: This lets you move the menu to a more suitable position.
-
Audio Toggle: Controls the sound for the channel.
-
Snapshot: Takes a snapshot of the channel.
-
Digital Zoom: Switches to single-channel mode and zooms in so you can see detail. The lower right show a small image of the entire screen; the blue box shows the zoomed area you are viewing in the monitor. Click anywhere in the small preview window to zoom in on that location. Use the zoom icons to adjust magnification.
-
Add Tag: This functions as a bookmark to make the file's time stamp easy to locate. This allows you to refer back to the video quickly without having to download it.
-
Switch Camera: Opens the Switch Camera dialog, which displays all unused cameras so you can change the camera you are viewing.
-
Close Camera: Shuts off the camera feed for that camera. You can add it back using the + button.
Popup channel menu
Right-click on a channel to open a pop-up menu.
-
Enable Audio: Toggles whether you can hear audio picked up by the camera's microphone (if any).
-
Original Proportions / Overspread Window: Select whether the camera image stretches to fill the channel window or shrinks to fit .
-
Snapshot: Takes a snapshot of the channel. This opens a dialog to export the image over the network or save it to the NVR.
-
Zoom In: Switches to single-channel mode so you can see additional detail (up to the camera's resolution). Click (or click and drag) in the thumbnail in the lower right of the screen to select an area to investigate. Click the zoom in and zoom out icons as needed. Use the dropdown to switch to a different camera. Click Back to return to the live view.
-
Add Tag: This functions as a bookmark to make the file's time stamp easy to locate. This allows you to refer back to the video quickly without having to download it.
-
Switch Camera: Opens the Switch Camera dialog so you can change the camera you are viewing.
-
Close Camera: Shuts off the camera feed for that camera. You can add it back using the + button.
(B) The timeline
At the right, a timeline displays the various channels in the NVR and their various recordings, color-coded by type. An index line crosses the timeline to mark the current playback position.
At the top of the timeline, the NVR displays the date and time being shown in the playback windows.
Below that, you can click the colored buttons to show or hide various types of recordings. Click the ︙ menu to the right of the buttons to switch the button display between (top) ordinary recording types with all AI recordings batched together, or (bottom) all AI recordings with ordinary types batched together.
To change the time frame shown, click and drag on the time track at the left of the timeline, or use the mouse wheel to scroll the timeline.
Click anywhere in the timeline to begin playback at that time.
At the bottom of the timeline, in the lozenge, are buttons to zoom in or out of the timeline, and to toggle between 12-hour and 24-hour time formatting.
Backing up from the timeline
You can back up recordings directly from the timeline.
Click and drag in the timeline, then right-click in the selection area. This pops up an information window with data about your selection. Click the Backup button to save files from all the channels you selected for the times noted.
This opens the Record Backup dialog box. From the local interface, you can only save the file to the USB; you cannot save to a network drive.
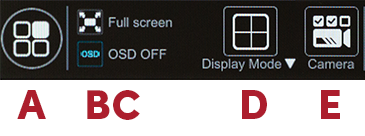
(C) The control bar
Display section
-
Menu: This lets you switch to the Intelligent Analysis, Search and Backup, and Live Display windows.
-
Full Screen: This hides the controls and timeline. Move the mouse to the bottom of the screen to pop these tools back up.
-
OSD: This toggles the on-screen display text that is applied by the NVR. It has no effect on camera-added OSD text.
-
Display Mode: Set the display to show 1/4/9/16 channels
-
Camera: This opens the Select Channel popup. Click the checkboxes for the cameras you want added to the playback. or use the dropdown at top right to select a group of cameras.
Video control section
-
Stop: Ceases playback.
-
Rewind: Plays the video file in reverse at 1× speed.
-
Play/pause: Plays the video file normally.
-
Slow: Decrease playback to half speed. Each click halves the speed again, down to 1/32×.
-
Fast: Doubles playback speed. Each click doubles the speed again, up to 32×.
-
Normal: Sets the playback speed to normal.
-
Previous/next frame: Advances (reverses) the video file by one frame.
-
30s ago/later: Rewinds (advances) the playback by 30 seconds.
-
Next/Previous Event (not pictured): If there are multiple events in the selected cameras' timelines, use these buttons to cycle through the video files.
-
Current play status and speed

Playback controls
Specialty control section
-
Smart: Engages smart controls.
-
Event/Tag: This lists all recent events with their event types.
-
Water Mark: Toggles the visibility of the watermark that you've set up for your system.
-
POS: Toggles visibility of POS info.
-
Backup: Here you open the Backup Status window, or begin a backup of the cameras and times you have selected by clicking and dragging on the timeline.
-
Exit: Sends you back to the live view.
