420 Floodlight Wireless Setup
When using your phone or a wireless camera, ensure that the device can communicate effectively with the network.
Note: Connect your phone and wireless camera to the 5 GHz wireless band for optimal performance. The 2.4 GHz band is also supported.
|
Performance |
RSSI |
Signal |
Description |
|---|---|---|---|
| Stable (Excellent) | -60 dBm or better | 80% or better | Connection is stable and excellent. Provides optimal performance, suitable for continuous connection and high-quality streaming. |
| Acceptable (Usable) | -61 to -70 dBm | 58% to 79% | Signal strength is sufficient, and general functions operate normally. However, during continuous connection or HD streaming, slight stuttering or delay may occur. |
| Poor (Insufficient) | -71 dBm or worse | 57% or worse | Weak signal and unstable connection causes serious issues. May cause long waiting times or disconnections. |
1. Locate the camera’s SSID under your computer or phone's Wi-Fi settings. It will begin with LUM-420-W-FLS.
2. Connect, and enter the default security key when prompted. The default security key is 12345678.

3.Open a browser and enter the camera’s default IP address: 192.168.200.5.
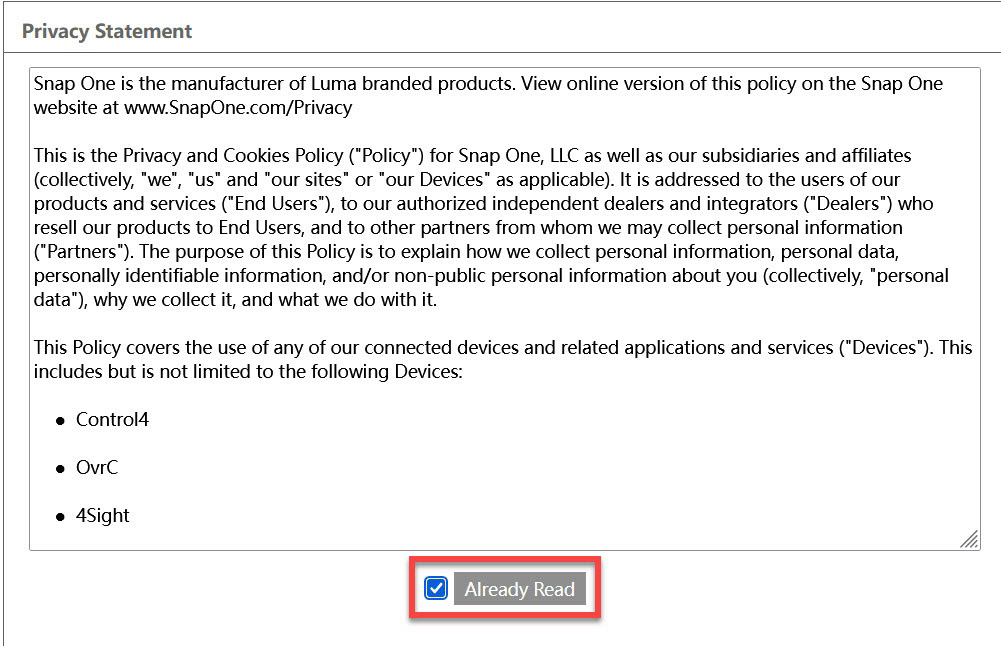
4. Review the Privacy Statement and click Already Read.
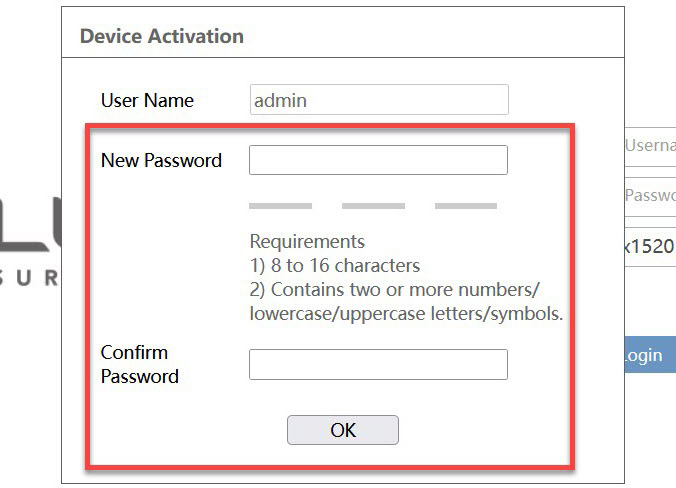
5. Activate the device by creating a password.
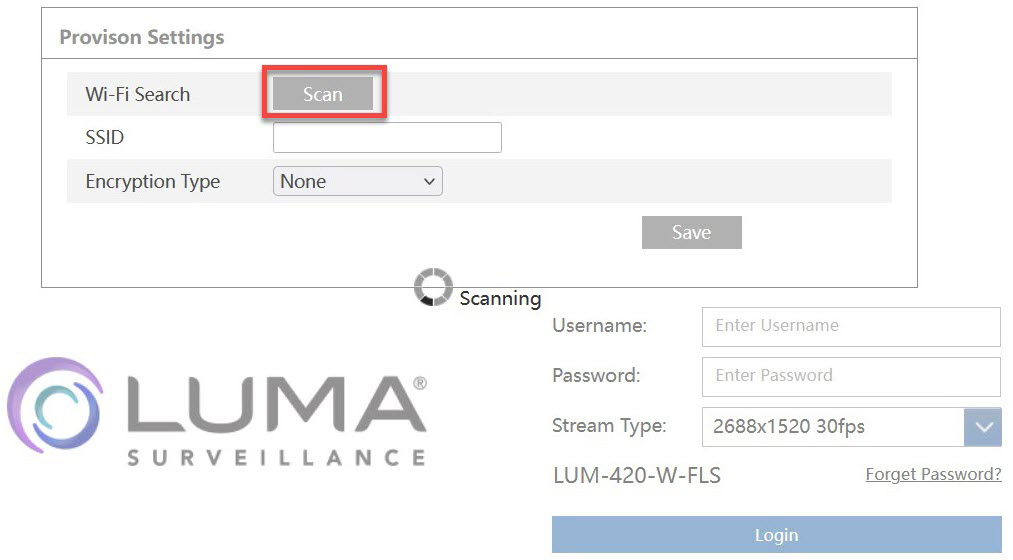
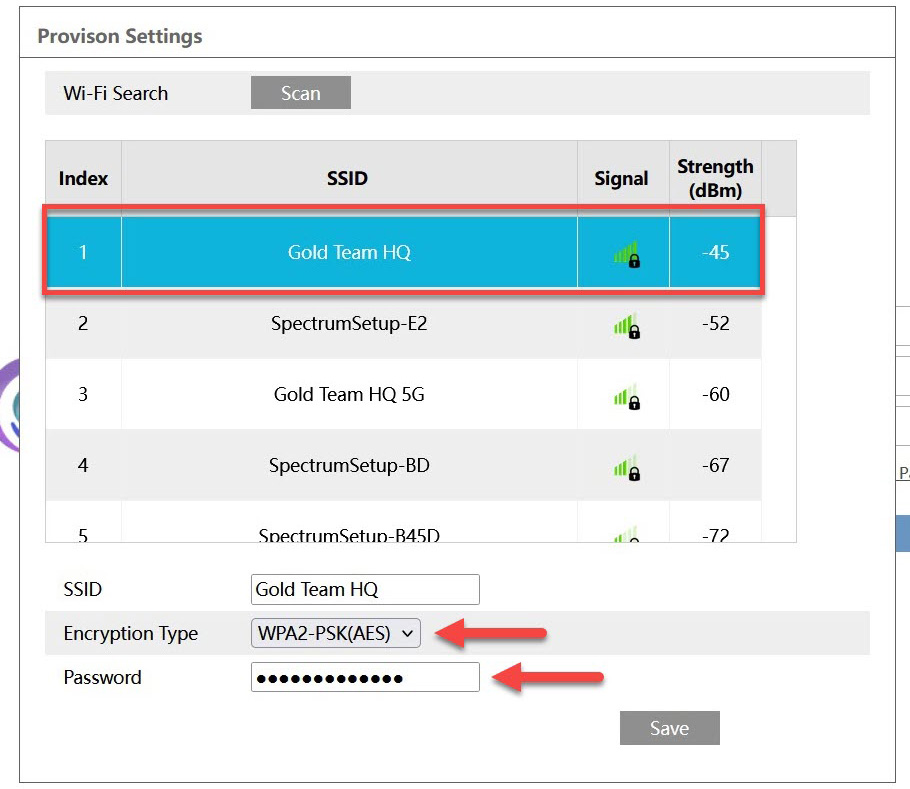
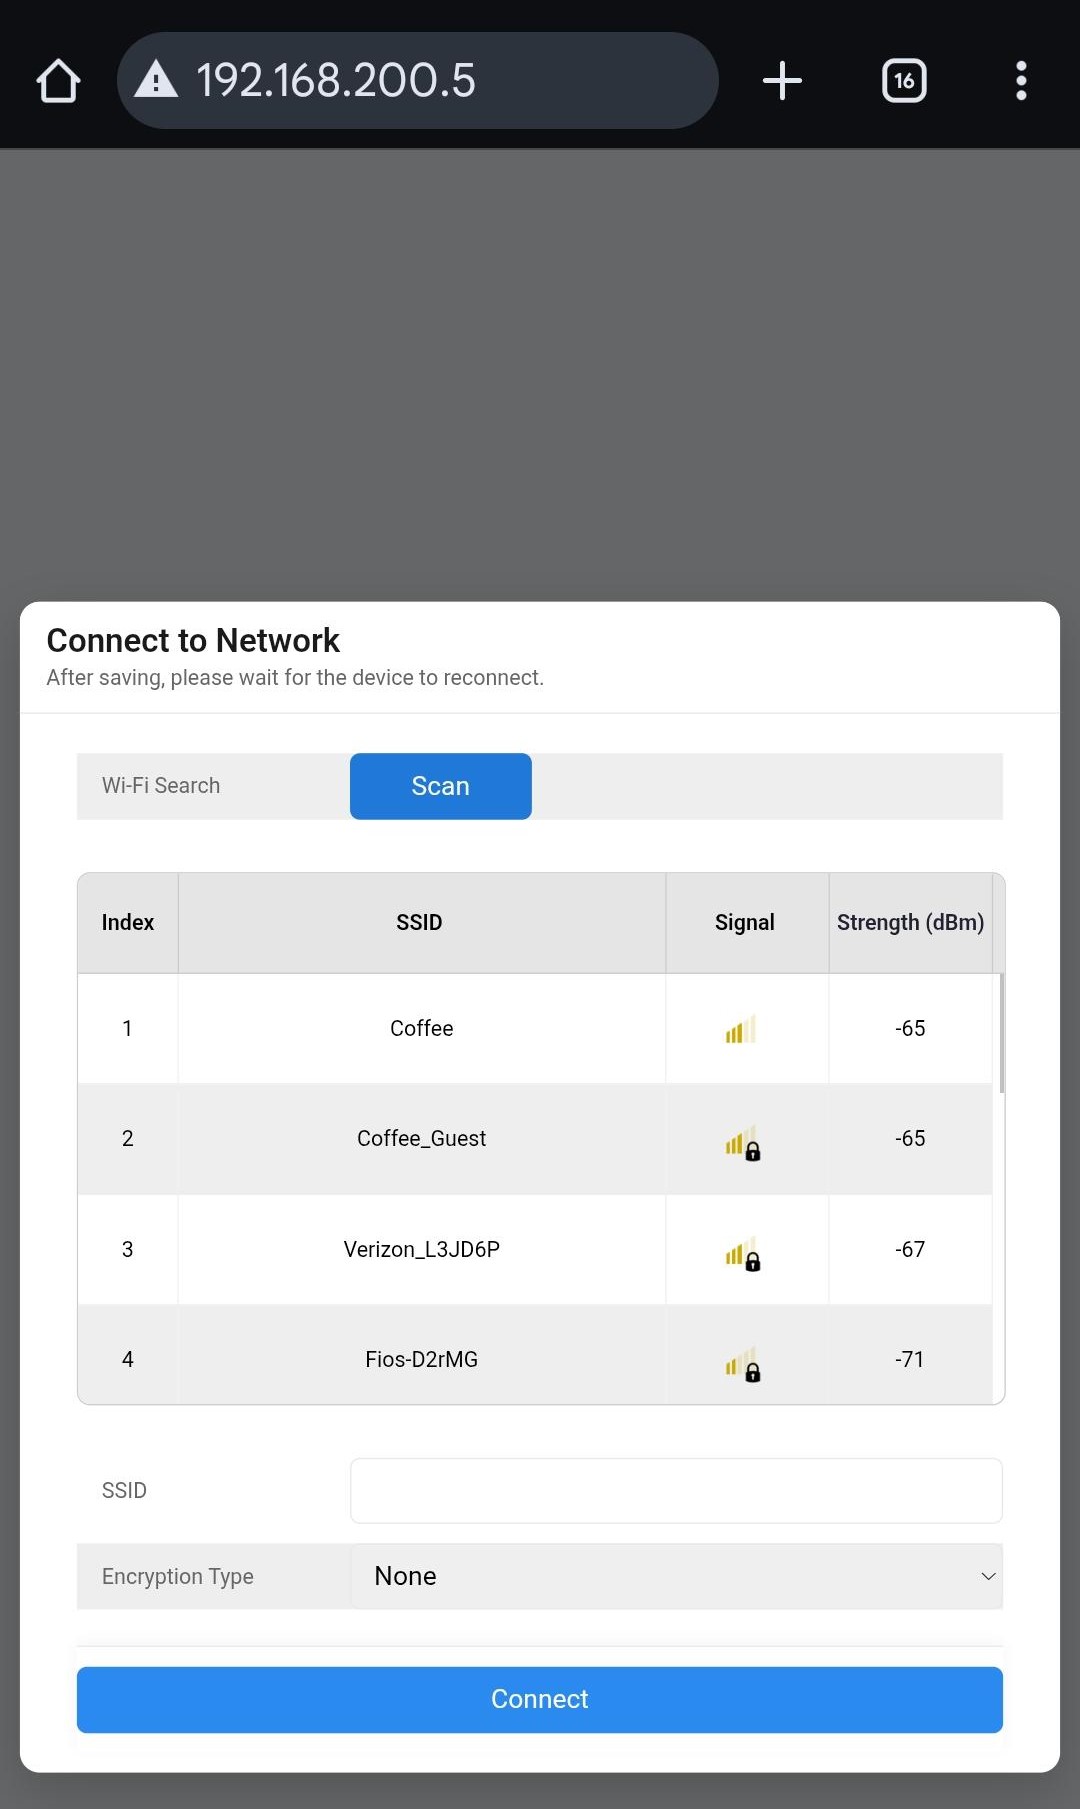
6. Using the Provision settings dialogue box, click Scan to locate the SSID of the local Wi-Fi.
(Desktop)
(Mobile view)

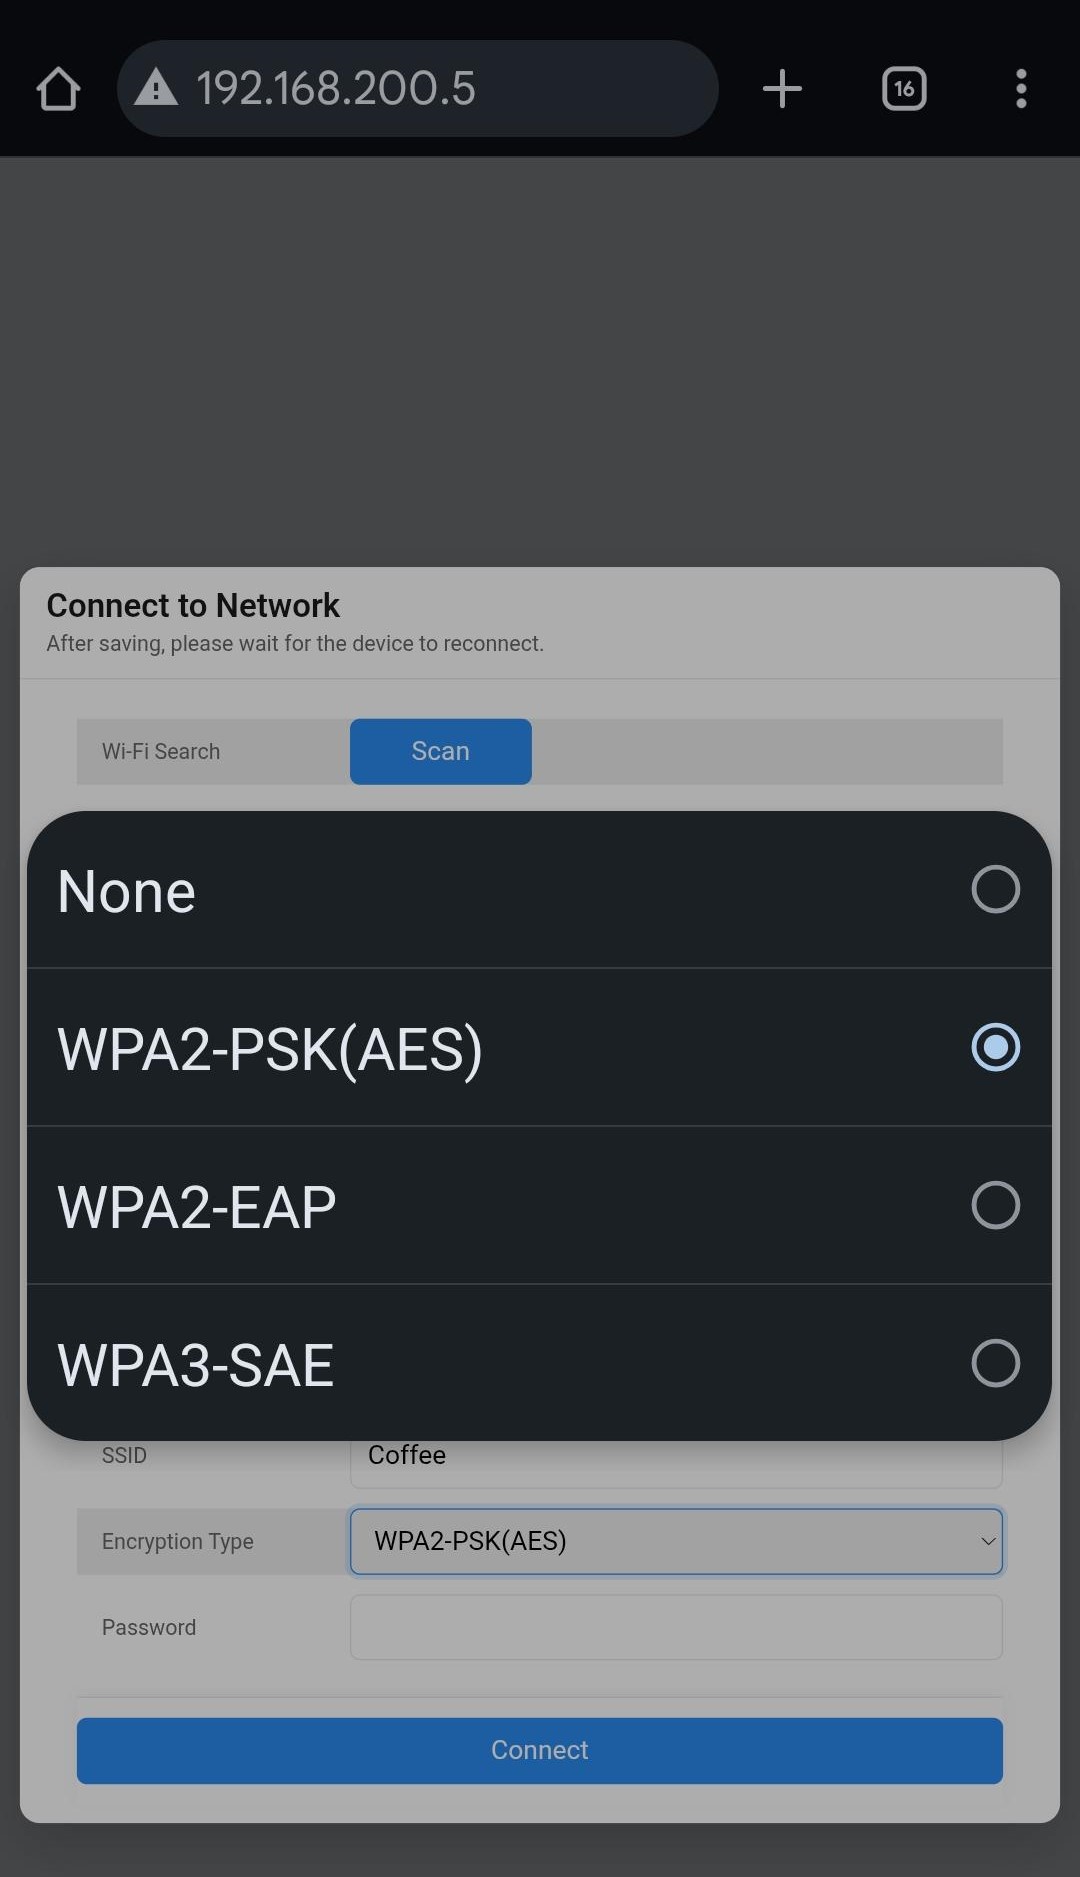
7. Select the network's SSID from the list and enter the Wi-Fi password. Select the same encryption type as the wireless network.
Note: Manually type in your network's SSID if it does not automatically populate in the list.
Note: Connect your device and wireless camera to the 5 GHz wireless band for optimal performance. The 2.4 GHz band is also supported.
Desktop:
Mobile view
8. Connect your computer or phone to the same SSID you chose or entered.
9. Locate the camera's new IP address with the Luma Utility tool or OvrC scan.
10. Enter the IP address of the camera in a browser, and log in using the credentials you created in Step 5.
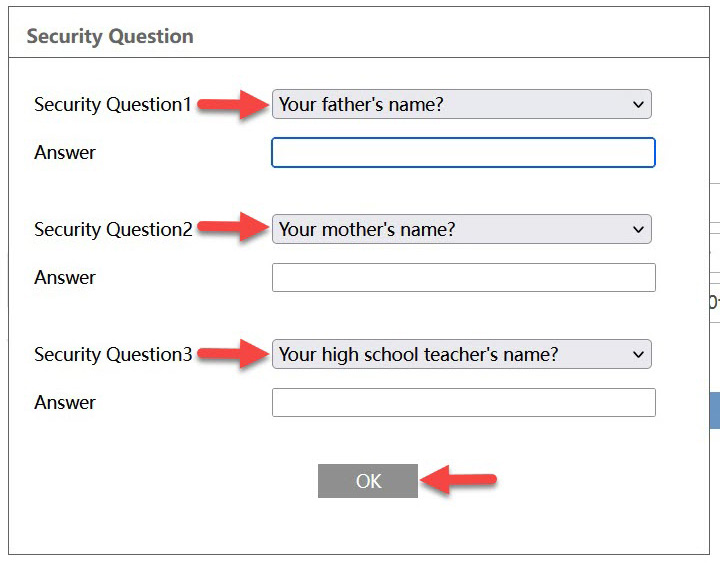
11. Choose three security questions and enter their answers. Click OK.
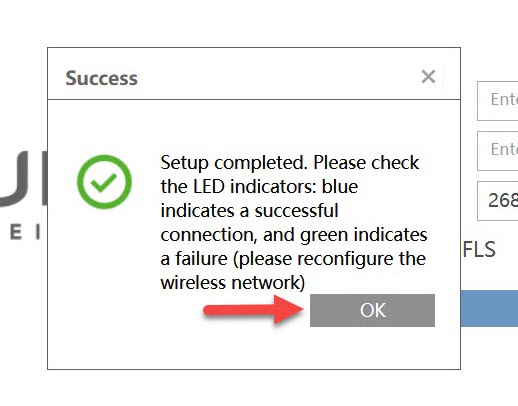
12. Setup is complete.
Manage wireless network settings post setup (Desktop):
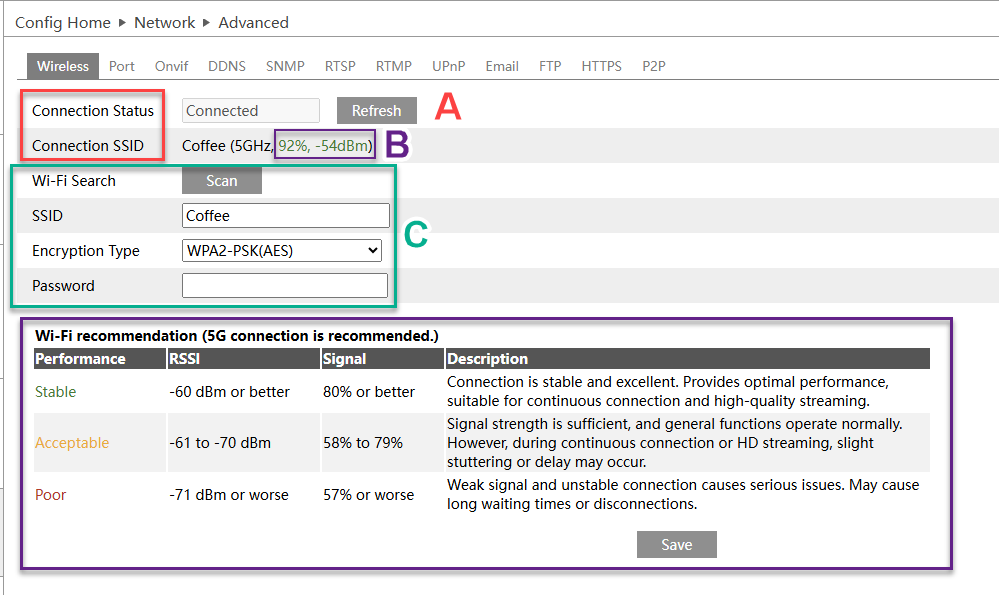
1. Log in to the camera and click Config.
2. Click on Network and view Wireless.
A. View and refresh Connection Status and Connection SSID.
B. View connection performance.
C. Scan the network to connect to a new SSID, change the Encryption Type, and change the connection Password.