Camera interface - Config: PTZ tile
This page covers Luma x20 PTZ camera settings and fisheye camera ePTZ settings.
Pro Tip: If the PTZ is having issues with tracking, check its installment height. We recommend PTZ cameras be placed 15 feet / 4.5 meters above ground level. PTZ auto-tracking works best at heights of 19 feet / 6 meters.
PTZ function
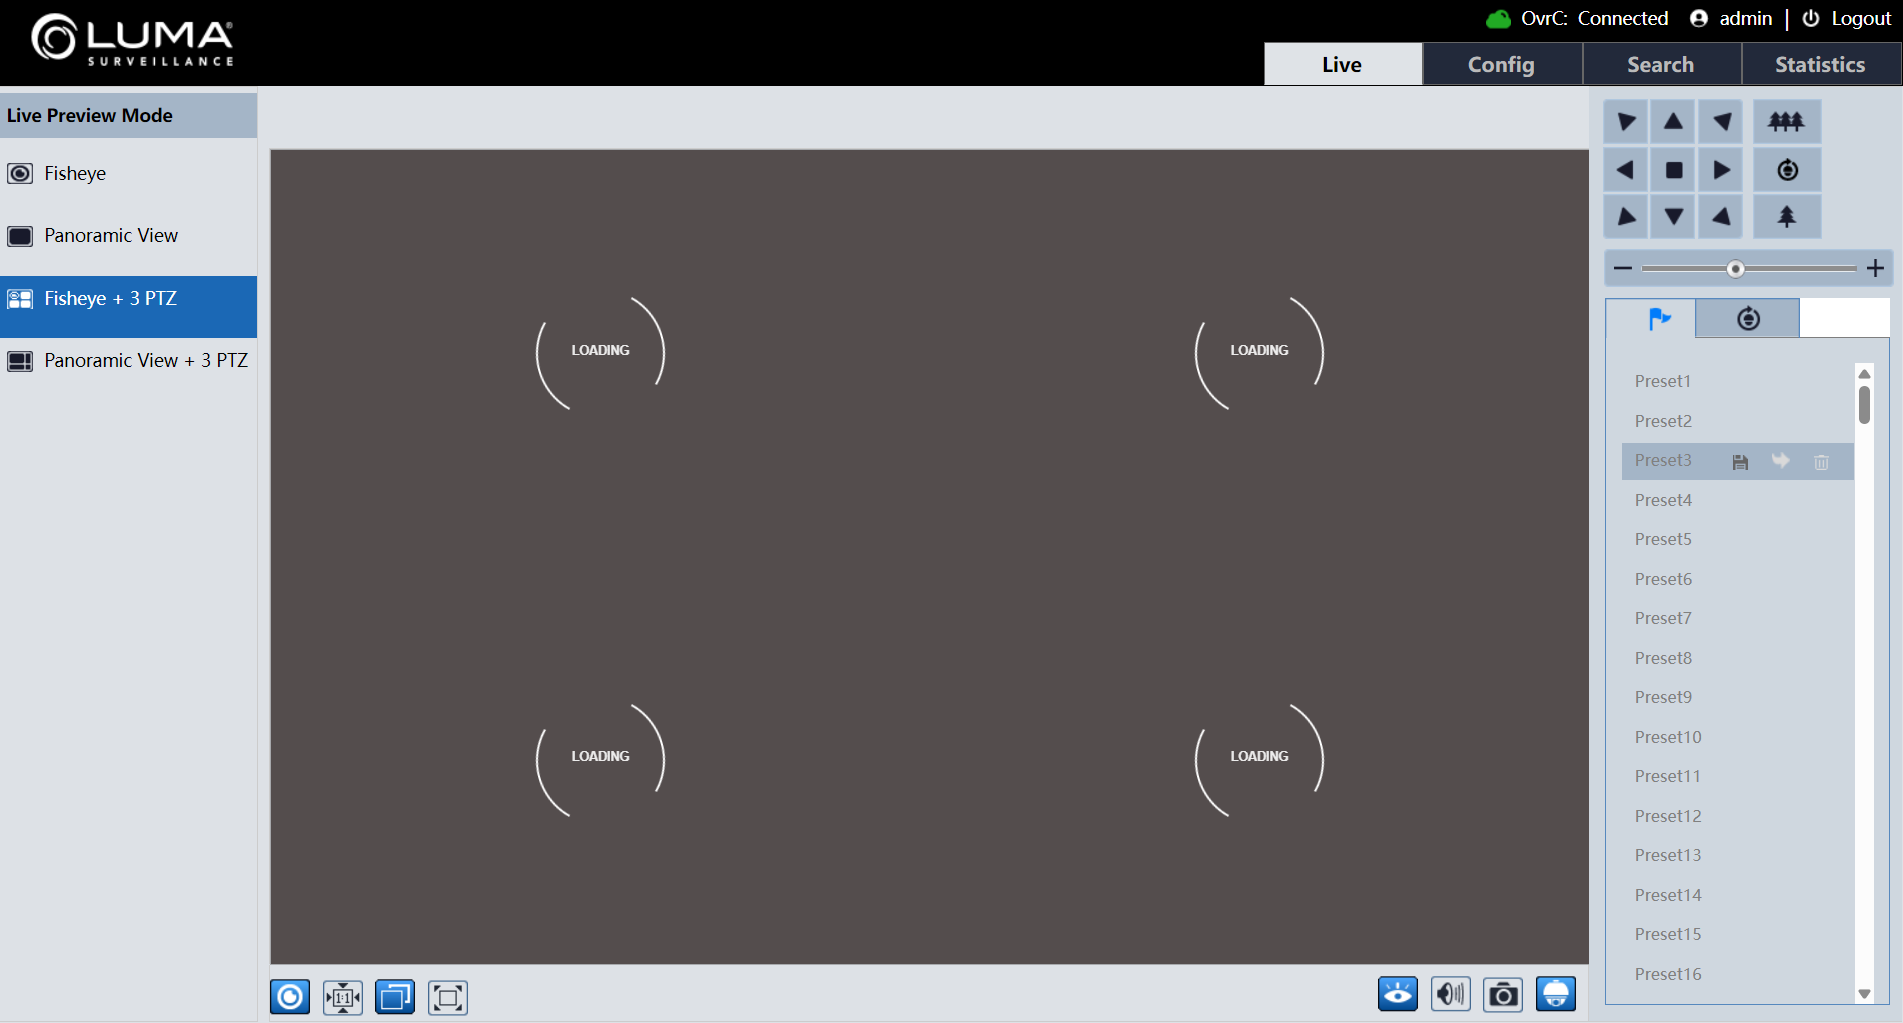
Every page contains the camera's view, as well as the PTZ control panel, discussed here.
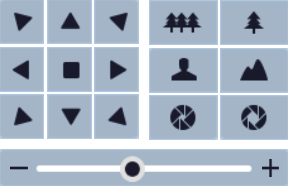
On the left side, the rosette moves the camera. The square in the center stops the camera if it is moving, for example when executing an automated patrol.
On the right, paired buttons zoom in and out (top), focus near or far (middle), and tighten or open the aperture (bottom).
On the bottom is the camera speed slider, which sets the maximum speed.
Preset tab
A preset comprises a camera's aim, zoom, focus, and iris.
To generate a new preset, move the camera to the desired position and click Create. Name the preset (up to 10 characters), then click OK.
Once a preset is generated, three buttons appear in the preset's line in the table. Click Call to move the camera to that preset, click Save Position to update the preset to the camera's current values, and click Delete to remove the preset. You can also click a preset's entry and click Modify Name at the top to edit the preset's name.
Trace tab
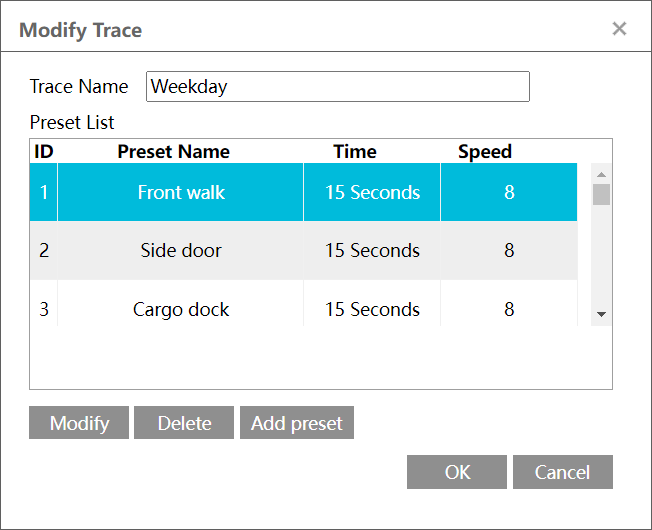
A trace cycles the camera through a series of presets, pausing at each one. The camera comes with one trace already loaded. Click Create to generate a new one, or Modify to edit one that already exists. Both options use the same interface.
Within the dialog, click on a preset to select it (it shows in blue). Click Modify to edit that preset by changing which preset to use or adjusting the dwell time, or click Delete to remove that preset. Click Add Preset to append a new one to the end of the trace.
Group tab
A group is a series of traces executed in a specific order. The system has only one group available, with assigned traces shown in the list below. Click Run and Stop to review the camera's activities. Delete clears all traces from the list.
Within the trace list, click Add Trace to insert a trace on its associated line (the line shows in blue). Click Edit Trace to change or remove that trace.
Patrol tab
A patrol is a recorded series of actions up to three minutes in length. The camera can have up to four patrols; click to select a given patrol (it shows in blue). Click Run and Stop to review the selected patrol. Delete clears the selected patrol from the list.
To record a patrol, click Add on any empty slot, or Edit to save the new patrol over an existing one. As soon as you click either, a timer appears at the bottom right of the preview screen, counting down the remaining time from 180 seconds. Use the PTZ controls to move the camera as desired, then click Save or Cancel. If you run out of time, the system automatically saves the patrol.
Task tab
A task is an activity that you want the PTZ to perform at specific times throughout the day.
When you click Create, the system opens a dialog that asks for a starting and ending time for the task, which function you want the PTZ to run at that time, and (where applicable) the function number (e.g., which preset to run). Click Add to finish creating that task.
To adjust a task, click to select it (it turns blue) and click Modify or Delete.
Click Run (if the check box in the button is checked) to review the activity.
Alarm tab
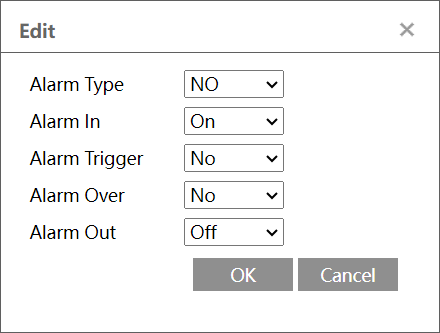
The table gives a brief summary of the camera settings. Click Edit to adjust them.
In the popup, you set the following:
-
For the incoming alarm, whether it is normally open or closed.
-
For the incoming alarm, whether you can it active.
-
Which activity the incoming alarm triggers.
-
When the alarm ends, which activity the camera uses.
-
Alarm Out is for the camera's outgoing alarm., Here you set which action the outgoing alarm triggers (e.g., a flashing light).
Home Position tab
This is where you set the default action for the camera.
Set the default activity for the camera using the dropdown(s). Set the wait time, which is how long the camera wait after manual control or auto-tracking to revert to its default. Click Save.
Click Run (if the check box in the button is checked) to review the activity.
Smart Tracking
Under Tracking Mode, specify whether the camera's auto-tracking or manual control should have priority when there are conflicting signals.
Still Time: When enabled, if the camera has been tracking but detects no motion for this amount of time, it returns to its normal function.
Fisheye ePTZ
Warning: Occasionally, ePTZ controls may not behave as expected. If you experience this, try using the diagonal controls instead.
PTZ Control
Click ![]() to display the PTZ control panel.
to display the PTZ control panel.
|
Icon |
Description |
Icon |
Description |
|---|---|---|---|
|
|
Move upper left |
|
Move upper right |
|
|
Move up |
|
Stop movement |
|
|
Move left |
|
Move right |
|
|
Move lower left |
|
Move lower right |
|
|
Move down |
|
Speed adjustment |
|
|
Zoom out |
|
Zoom in |
|
|
Automatic cruise |
|
Preset |
|
|
Create and call cruise |
|
|


Preset Configuration
-
Select the Preset from the preset list on the right.
-
Click
 to save the preset position.
 -
Click
 to call the set preset.
 -
Select the set preset and click
 to delete the preset as needed.
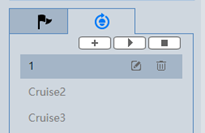
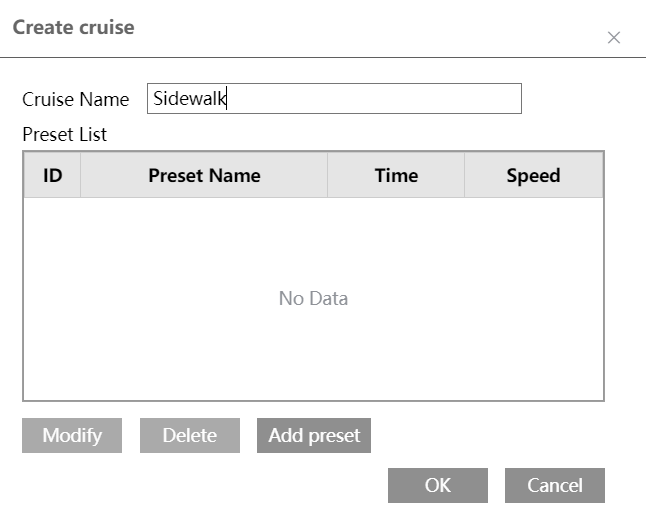
Cruise Configuration
- Click the
 tab to begin cruise creation.
 - Click
 to add the cruise.
 - Enter the cruise name and click Add Preset.
- Select the preset name and time and click OK.
- Click OK again to save the settings.
- Select the cruise and click
 to begin the cruise.
 - Click
 to stop the cruise.
 - Click
 to modify the cruise and to delete it.
See all fisheye special features here.