Camera interface - Config: Event tile
This tile organizes how the camera reacts to noteworthy situations.
- Video Exception
- Line Crossing
- Region Entrance (PTZ only)
- Region Exiting (PTZ only)
- Target Counting by Line
- Region Intrusion
Video Exception
Exceptions are events that the camera deems abnormal.
Detection Config tab
In this tab, determine which exceptions the camera should monitor for:
-
Scene Change Detection: Sends an alert if the camera’s view abruptly changes, for example if the camera is knocked or blocked.
-
Video Blur Detection: Sends an alert if the image loses focus.
-
Video Tampering Detection: Sends an alert if the camera detects an abnormal feed, or someone trying to interfere with a feed.
Next, configure how the camera reacts to the selected events.
Alarm Holding Time: This continues the alarm even after the event that triggers it ends (for example, if someone opens and quickly shuts a door sensor).
Alarm Out: If your camera is equipped with physical alarm out connections, enabling this has the camera send the alarm.
Trigger SD Card Snapshot (if an SD card is present): Sends a photo of what triggered the alarm to the SD card.
Trigger SD Recording (if an SD card is present): Records to the SD card for the duration of the alarm.
Trigger Email: This opens a dialog in which you can list email addresses to receive the alert, set that email’s subject line and body text, and decide whether to attach a photo of the incident.
Trigger FTP: Add the server address for the FTP site, and the camera uploads any alert recordings to that site for remote viewing.
Click Save when finished.
Sensitivity tab
This determines how easily the camera decides whether or not one of these exceptions has occurred. Higher sensitivity means smaller changes create an alert.
Line Crossing
Pro Tip: Line crossing is easily configured in the OvrC interface. However, OvrC does not configure differing sensitivities based on target type.
The camera can use AI to determine whether something crosses a line. Line crossing cannot be used if area intrusion (above) is being used.
Detection Config tab
This configures how the camera reacts to the events.
Enable: This box must be checked to use anything else on the page.
Save Original Picture to SD Card: This saves the fullscreen image of the moment the event is triggered.
Save Original Picture to SD Card: This saves an image cropped to the object that triggered the alarm.
Below that, select whether the camera looks for people, motor vehicles (like cars), and/or non-motor vehicles (like bicycles). Each option has its own sensitivity setting.
Alarm Holding Time: This continues the alarm even after the event that triggers it ends (for example, if someone opens and quickly shuts a door sensor).
Alarm Out: If your camera is equipped with physical alarm out connections, enabling this has the camera send the alarm.
Trigger PTZ Smart Tracking: If this is a PTZ camera, set it to start tracking the intruder.
Trigger Audio Alarm: If this camera has active deterrence, this arms the camera to emit an audio warning. Follow this link for details on Set up active deterrence.
Trigger Light Alarm: If this camera has active deterrence, this arms a flashing light alarm. Follow this link for details on Set up active deterrence.
Trigger SD Card Snapshot (if an SD card is present): Sends a photo of what triggered the alarm to the SD card.
Trigger SD Recording (if an SD card is present): Records to the SD card for the duration of the alarm.
Trigger Email: This opens a dialog in which you can list email addresses to receive the alert, set that email’s subject line and body text, and decide whether to attach a photo of the incident.
Trigger FTP: Add the server address for the FTP site, and the camera uploads any alert recordings to that site for remote viewing.
Click Save when finished.
Area tab
Pro Tip: Line crossing is more easily configured in the OvrC interface.
Under Alarm Line, select which of the 4 lines you want to modify. Click Draw Area. Click and drag in the camera view image to create the line. Click and drag one end of a line to edit it.
Note the arrow in the camera image, and the selection in the Direction dropdown. The camera counts line crossings in that direction only. Change the dropdown selection to reverse the direction.
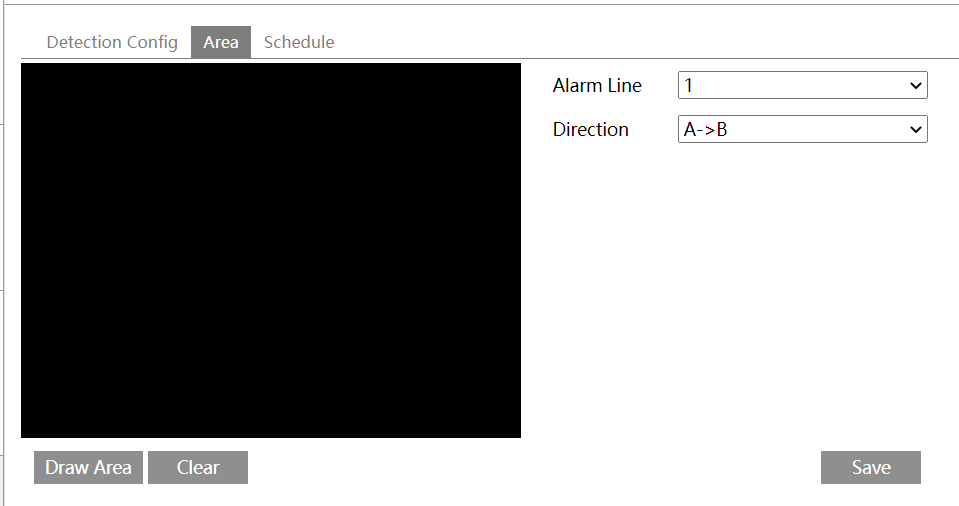
Click Clear to delete the selected line.
Click Save before exiting.
Schedule tab
This opens the schedule tool for line crossing.
Target Counting by Line
Here you track how many people, cars, etc., cross the line. This line is different from the lines used in the Line Crossing alarm. Unlike line crossing, you can only have one counting line.
Detection Config tab
This configures how the camera reacts to the events.
Enable: This box must be checked to use anything else on the page.
Save Original Picture to SD Card: This saves the fullscreen image of the moment the event is triggered.
Save Original Picture to SD Card: This saves an image cropped to the object that triggered the alarm.
Below that, select whether the camera looks for people, motor vehicles (like cars), and/or non-motor vehicles (like bicycles). Each option has its own sensitivity setting.
Staying Threshold: Each target has a threshold that needs to be met before triggering an alarm. When this is set to zero, every crossing sets off the alarm. When set to higher numbers, the camera only triggers the alarm if it sees excess traffic.
Counting Reset: In the middle of the alarm section, the Counting Reset section tells the camera when to start its count over. You can choose daily, weekly, monthly, or not at all. Click the Reset button to restart the count manually.
Alarm Holding Time: This continues the alarm even after the event that triggers it ends (for example, if someone opens and quickly shuts a door sensor).
Alarm Out: If your camera is equipped with physical alarm out connections, enabling this has the camera send the alarm.
Trigger PTZ Smart Tracking: If this is a PTZ camera, set it to start tracking the intruder.
Trigger Audio Alarm: If this camera has active deterrence, this arms the camera to emit an audio warning. Follow this link for details on Set up active deterrence.
Trigger Light Alarm: If this camera has active deterrence, this arms a flashing light alarm. Follow this link for details on Set up active deterrence.
Trigger SD Card Snapshot (if an SD card is present): Sends a photo of what triggered the alarm to the SD card.
Trigger SD Recording (if an SD card is present): Records to the SD card for the duration of the alarm.
Trigger Email: This opens a dialog in which you can list email addresses to receive the alert, set that email’s subject line and body text, and decide whether to attach a photo of the incident.
Trigger FTP: Add the server address for the FTP site, and the camera uploads any alert recordings to that site for remote viewing.
Click Save when finished.
Area tab
On the left side, you control the detection area.
Click Draw Area. Click and drag in the camera view image to create the line. Click and drag one end of a line to edit it.
Note the arrow in the camera image, and the selection in the Direction dropdown. The camera counts line crossings in that direction only. Change the dropdown selection to reverse the direction.
Click Clear to delete the selected line.
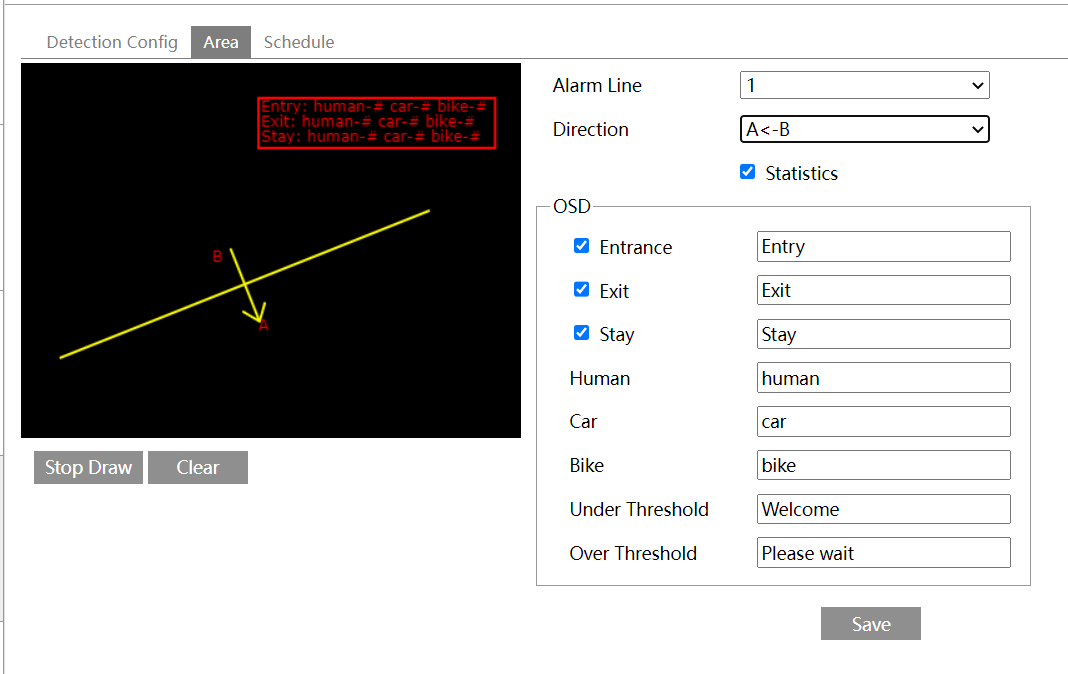
Click Save before exiting.
On the right side, enable Statistics to add information text to the screen, as specified in the OSD area. Click Save once you’ve customized the data.
Schedule tab
This opens the schedule tool for target counting.
Region Intrusion
This lets you define an area. The camera watches for anything entering or exiting that area.
Detection Config tab
This configures how the camera reacts to the events.
Enable: This box must be checked to use anything else on the page.
Save Original Picture to SD Card: This saves the fullscreen image of the moment the event is triggered.
Save Original Picture to SD Card: This saves an image cropped to the object that triggered the alarm.
Below that, select whether the camera looks for people, motor vehicles (like cars), and/or non-motor vehicles (like bicycles). Each option has its own sensitivity setting.
Alarm Holding Time: This continues the alarm even after the event that triggers it ends (for example, if someone opens and quickly shuts a door sensor).
Alarm Out: If your camera is equipped with physical alarm out connections, enabling this has the camera send the alarm.
Trigger PTZ Smart Tracking: If the camera is a PTZ camera, you can set it to follow the subject.
Trigger SD Card Snapshot (if an SD card is present): Sends a photo of what triggered the alarm to the SD card.
Trigger SD Recording (if an SD card is present): Records to the SD card for the duration of the alarm.
Trigger Email: This opens a dialog in which you can list email addresses to receive the alert, set that email’s subject line and body text, and decide whether to attach a photo of the incident.
Trigger FTP: Add the server address for the FTP site, and the camera uploads any alert recordings to that site for remote viewing.
Click Save when finished.
Area tab
Pro Tip: Region intrusion is more easily configured in the NVR Configure tab.
The camera uses AI to determine whether someone enters the marked area. Intrusion cannot be used if line crossing (below) is being used.
Under Alarm Area, select which of the 4 zones you want to modify. Each zone has six corners; click in the camera view image to add each corner one at a time. If you want fewer than six corners, make the corners you want, then click Stop Draw. The camera completes your shape when you click Save.
You cannot edit a zone; you must instead click Clear and start a new one.
Click Save before exiting.
Schedule tab
This opens the schedule tool for region intrusion.