VMS - Alarm Central
The alarm server is in charge of receiving and recording alarm information from connected devices and then sending the alarm information to the relevant terminal or devices. There is a default alarm server. Go to Resource Management > Add, Edit or Delete Device > Alarm Server to view the online status of the alarm server. If it is not online, check its network connection.
Alarm Log Search
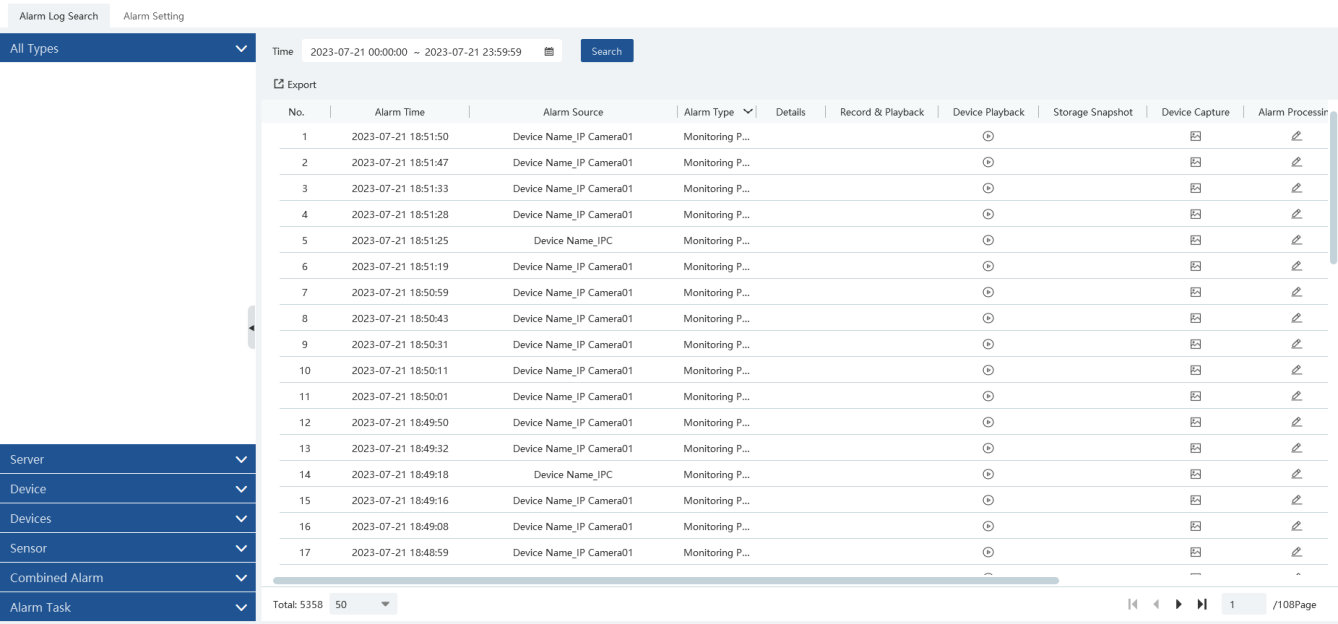
This window lists all the media recorded due to alarm activities. The right pane contains all data for alarm media, while the left pane acts as a quick filter tool.
Search filter pane
In the left pane, click on any blue bar to use that as a filter for the events list. These filters include:
-
All Types: No filter applied.
-
Server: Coming from the Luma VMS server.
-
Device:
-
Devices: Lists all x20 devices that have been detected by OvrC.
-
Sensor: From contact switches, motion sensors, buttons, etc.
-
Combined Alarm: Triggered by a custom alarm set up at the NVR.
-
Alarm Task: Due to area intrusion/extrusion as set up under Alarm Task Settings.
Each filter lists the devices or systems it filters for, with checkboxes to help you further refine your search.
Alarm table pane
In the center between the two panes (between rows 8 and 9 in the image above) is a carat icon. Use that to expand or shrink the alarm log pane.
Beside any entry, click the play icon to begin playing that recording, or the snapshot icon to open the snapshot search window (below) for that record.

Click on each image result you wish, then click “Download” at the top of the pane to download those pictures.
Alarm Setting
To configure an alarm, the alarm must first be enabled on your devices. To enable an alarm, go to the Device Setting page (found under Resource Management) and select the device in question in the left-hand column. Then click the tab of the alarm you want (for example, Motion Alarm Linkage or Exception Detection) and enable it with the toggle. Click Apply.
Alarm Linkage Settings tab
In the Alarm Type column, select the type of alarm to configure. This expands the list. Select an alarm type from the list to enable alarm linkages of that type.
-
Enable all alarm linkages for an individual device by clicking the down carat next to that alarm's name and selecting ON. Note that when devices linkages are enabled, an asterisk appears beside the name.
-
Click the down carat at the top of any column to enable/disable/link all devices for that particular activity.
-
Click the All ON / All OFF buttons at the top to enable/disable all alarm linkages for all devices for the current alarm type and area (schedule excluded).
Pro Tip: Note: Before checking voice broadcast, please upload the voice first (See Audio Uploading for details).
Pro Tip: Before checking Email, please set the sender’s email address and the recipient address first (See chapter 10.5 Email Settings for details).
Pro Tip: Before checking SOP, please set the SOP first (See SOP Settings for details)
In the column Alarm Preview, click the down carat and select “Link to itself (On)”. This sets each camera to be its own alarm preview camera.
Audio column is a simple toggle for using the camera's built-in audio.
The Schedule column lets you choose from any of your established schedules. See The Schedule tool for instructions on creating your own schedules.
All other tabs use a similar interface, and allow you to connect with existing resources. For the SOP column, you must have already set up SOP actions (see SOP Setting tab); and for Voice Broadcast, you must have already uploaded audio files (VMS - Configuration).
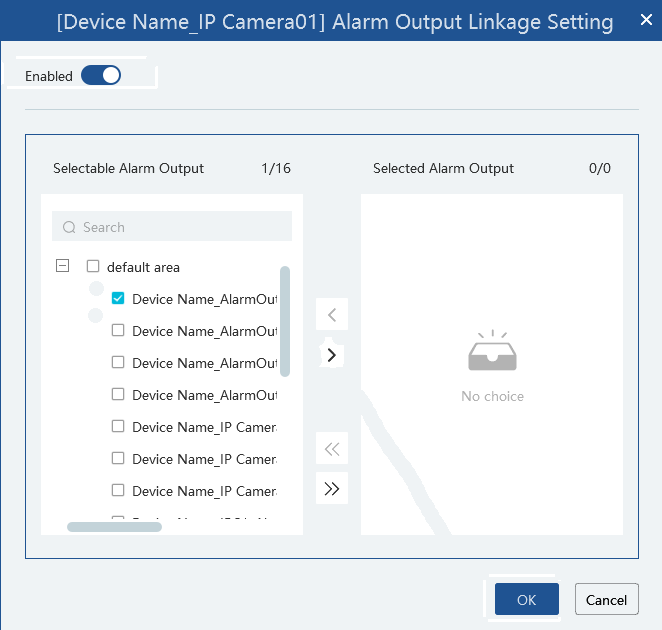
First, enable alarm linkages with the toggle at the top of the dialog. Next, use the checkboxes by each device to select or deselect it. The > button moves all selected devices into the actvie window on the right; the < button removes devices selected in the active window. The >> and << buttons move all devices whether they are selected or not.
Pro Tip: Note: Before checking voice broadcast, please upload the voice first (See Audio Uploading for details).
Pro Tip: Before checking Email, please set the sender’s email address and the recipient address first (See chapter 10.5 Email Settings for details).
Pro Tip: Before checking SOP, please set the SOP first (See SOP Settings for details)
Manual Alarm Out tab
Here you manually activate a device to trigger its attached alarm.
To activate an alarm, select the device(s), set the alarm holding time, and then click Trigger.
Click Clear to manually turn off the alarm from the camera.
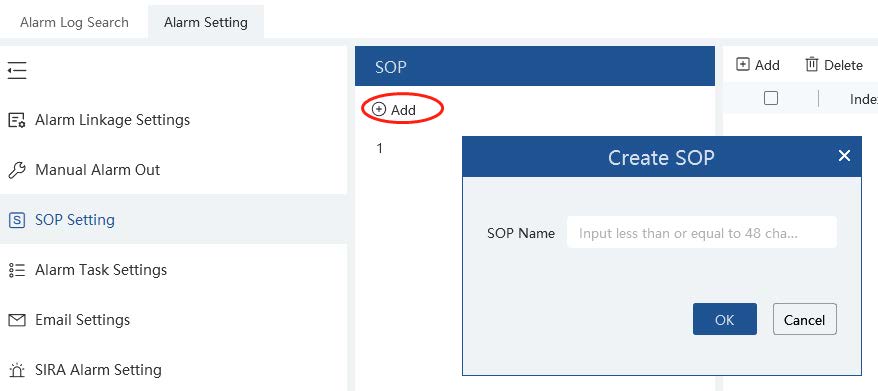
SOP Setting tab
Here you set standard operating procedures for your devices when an event happens. This gives your VMS its own sort of automation.
To create an SOP:
-
Click Add in the SOP column and give the new SOP a name.
-
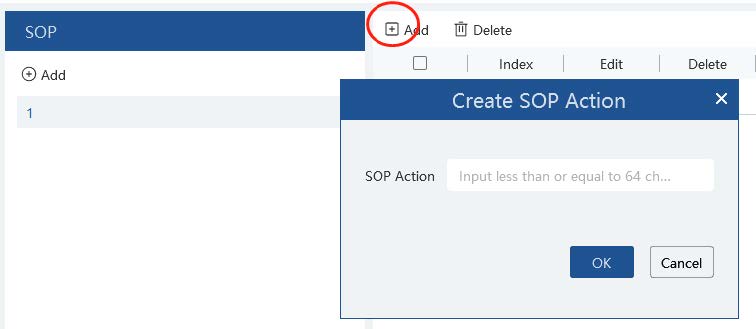
Click the SOP name to edit the name, delete it, or to create SOP actions for it.
-
To the right, the actions list starts out empty for each SOP. To create an action for an SOP, click Add at the top of the actions list. You can edit the name of each action, delete it, or click the checkbox to activate the use of that action for the SOP.

-
To define the activites of that action, go to the Alarm Linkage Settings tab tab. Select the alarm event and enable SOP for that device.
-
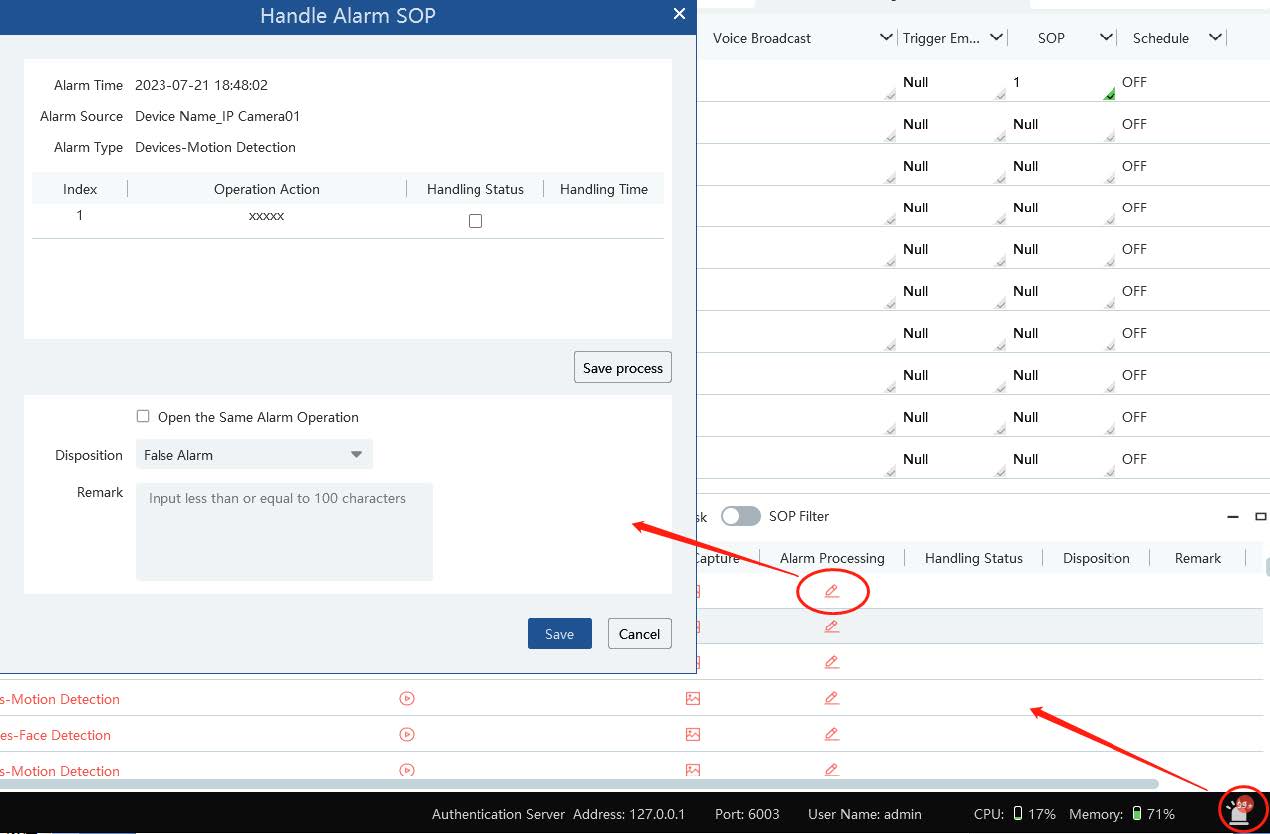
Click the alarm icon in the bottom nav bar to extend the alarm list.
-
In the alarm line of the alarm list, click Edit to handle the alarm. Select the SOP action and then click “Save Process”. After that, choose the disposition and enter any notes as needed.

After the alarm is processed, the alarm handling status and disposition show per normal.

If “SOP Filter” is enabled, the alarm events of the channel set the SOP are listed.
If “Alarm Preview” is set for the monitoring point, select the corresponding alarm items and then right-click to choose “Alarm Preview” to jump to the alarm preview interface.
Alarm Task Settings tab
In this interface, you can set the leaving alarm task.
Leaving alarm: When someone leaves the predefined area and doesn’t come back within the set time duration, the system will perform alarm linkages.
To set a leaving alarm task:
1. Enter the Alarm Task Setting interface.
2. Click [Add] to add the alarm task.
Set the task name, interval time, schedule and choose the camera. Multiple cameras can be added to an alarm task.
3. Set the alarm linkage items. In the alarm linkage settings interface, select the alarm type as “Alarm task-Leaving Alarm”. Then enable the desired alarm linkage (like “Alarm preview”) and set the schedule.
4. Enable Intrusion and set the detected area.
Note:
1. The selected camera must support and enable intrusion function, or leaving alarm will not take effect. If the camera supports vehicle/people classification, please check “Human” as the detection target.
2. After the leaving alarm task is set and intrusion is enabled for the camera, when someone enters the predefined area and stays there, this person will be judged as “ON Duty” so that leaving alarm will not be triggered and the intrusion alarm will not be displayed on the alarm list; but when this person leaves and doesn’t return within the set time duration (interval time) or no one appears in the set time duration, leaving alarm will be triggered.
Email Settings tab
Alarm information can be sent to an email address if its parameters have been set.
Add the sender’s email information in the top gray area. Click Apply to save the changes, and Test to ensure the program can log in to the email server properly.
Below that, click Add to create a new recipient. Enter the recipient's name and email.
Once a recipient is added, use the icons next to the name to edit or remove, or to test that the email reaches the recipient.
The Schedule tool
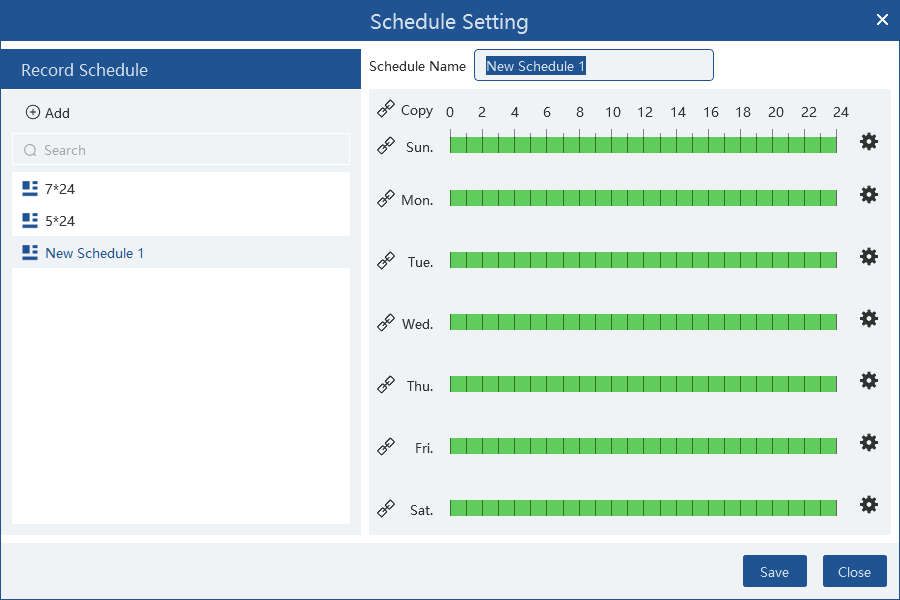
This dialog has two sections: The schedule list on the left, and the active times for the selected schedule on the right.
To create a schedule, click the Add button at the top. To delete a schedule, hover your mouse over the name, and a trashcan icon appears; click that to delete the schedule.
To edit a schedule, click on its entry in the list. In the right section of the window, you can edit the schedule name at the top.
For quick edits in the schedule window, click and drag your mouse to add or erase times to the schedule.
For precise scheduling, click any of the gear icons to open this pop-up:
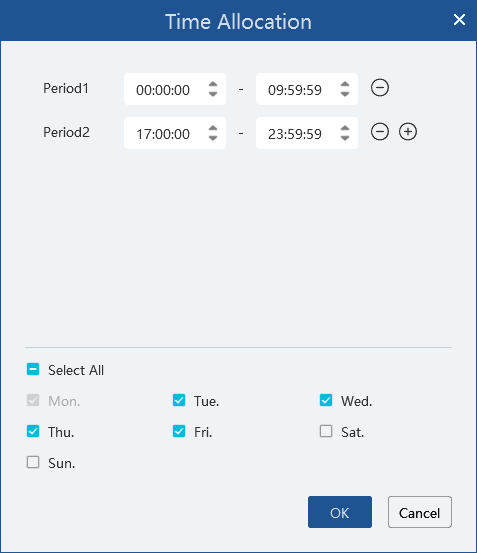
Here you set the periods of activity for the schedule. Press + to add another period, or - to delete that period.
For each period, the up and down arrows adjust the times, or you can click in the text boxes to manually edit the times.
At the bottom, you can copy the schedule to other days. The day corresponding to the gear you clicked is auto-selected for edits, but you can add or remove the other days as needed.