Use a manual screwdriver when installing or removing a hard drive.
Use a grounded anti-static mat and wrist band to ground yourself before servicing the recorder.
Failure to follow these warnings will void your warranty.
We recommend installing hard drives before installing the recorder or powering it up for the first time.
Otherwise, shut down the recorder and unplug the power cable. Unplug all other cabling and remove the recorder from the rack.
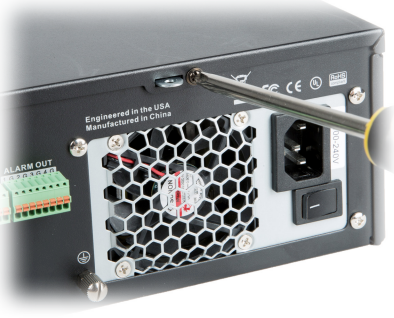
Remove the three small screws from the top edge of the rear panel.
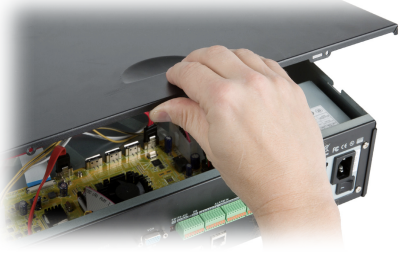
Gently slide the cover about an inch to the rear of the unit, then lift it up. Set it aside where it won’t get scratched.
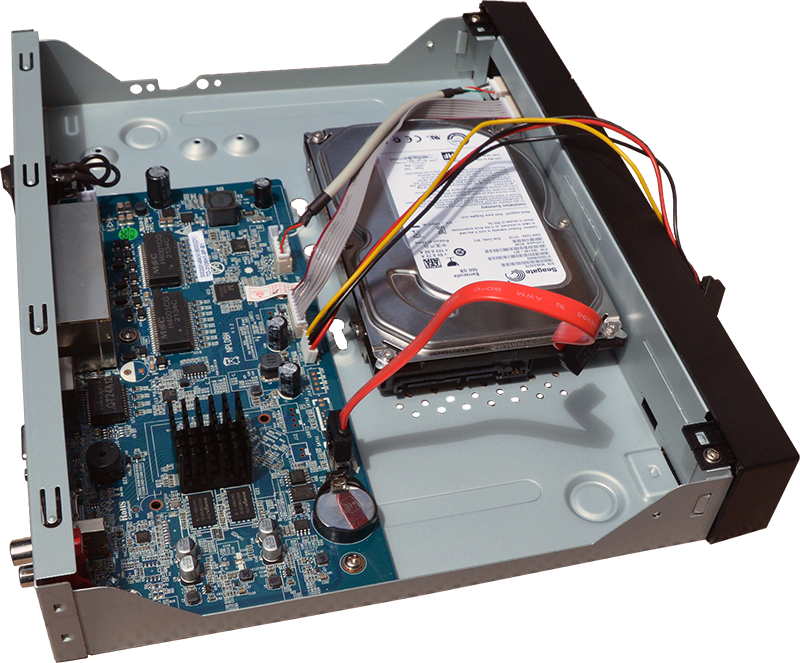
In Luma 120 and 220 NVRs, the hard drives mount directly to the casing.
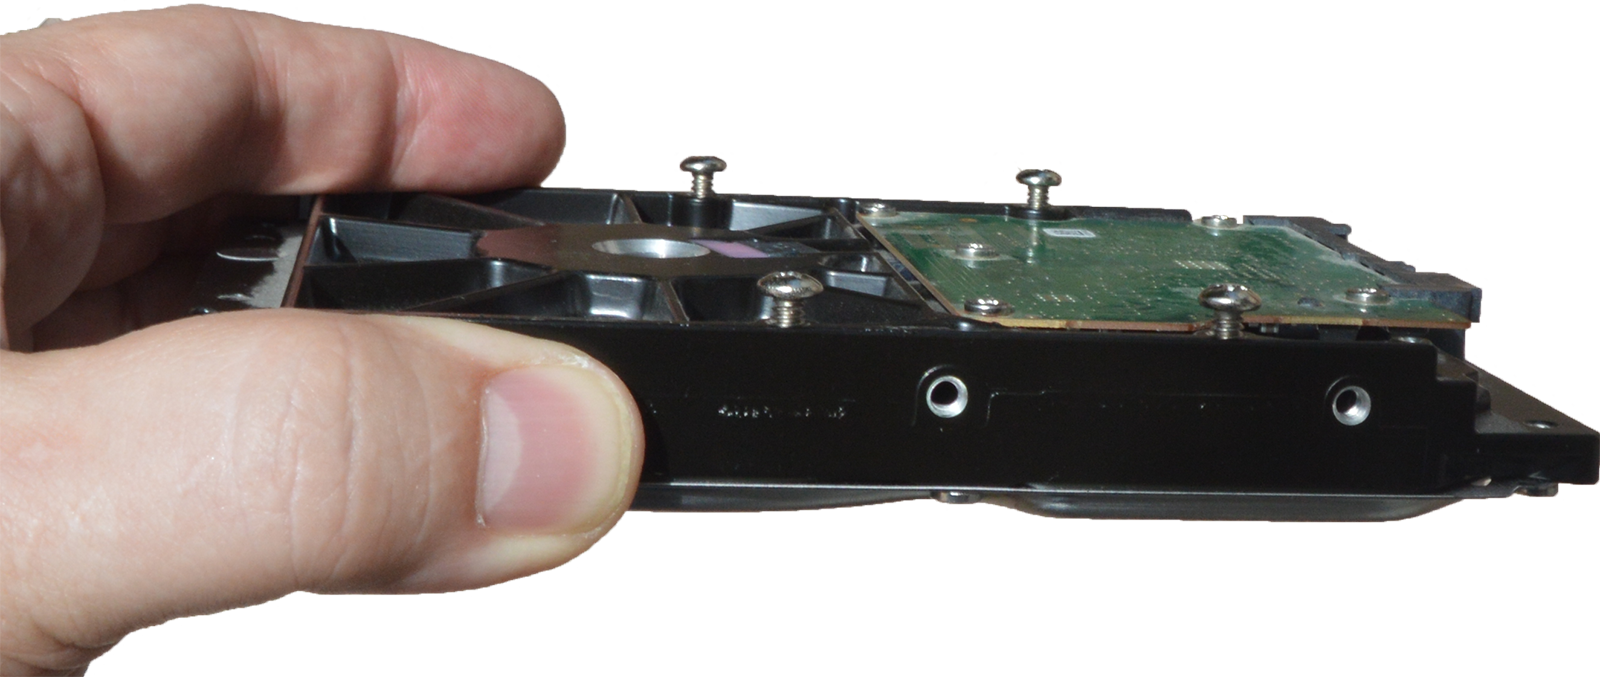
Insert screws lightly into the bottom of the hard drive. 1/2 turn is sufficient.
Slide the hard drive into the NVR casing. Ensure the terminals are on the same side as the motherboard.
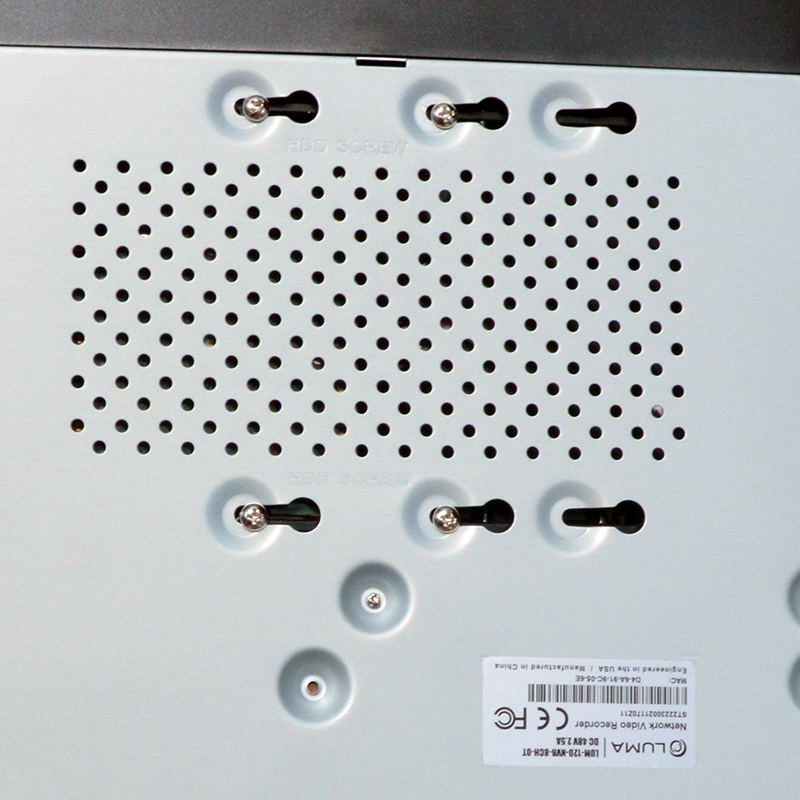
Carefully invert the casing while holding the hard drive in place. Maneuver the hard drive until the screw heads are fully engaged in the keyholes.
Tighten the screws. Do not over-tighten. Connect the hard drive to the motherboard.
Replace the cover in position, and secure it with the three screws on the rear of the unit.
Copyright © 2025, Snap One, LLC. All rights reserved.