Deploying Additional Access Points
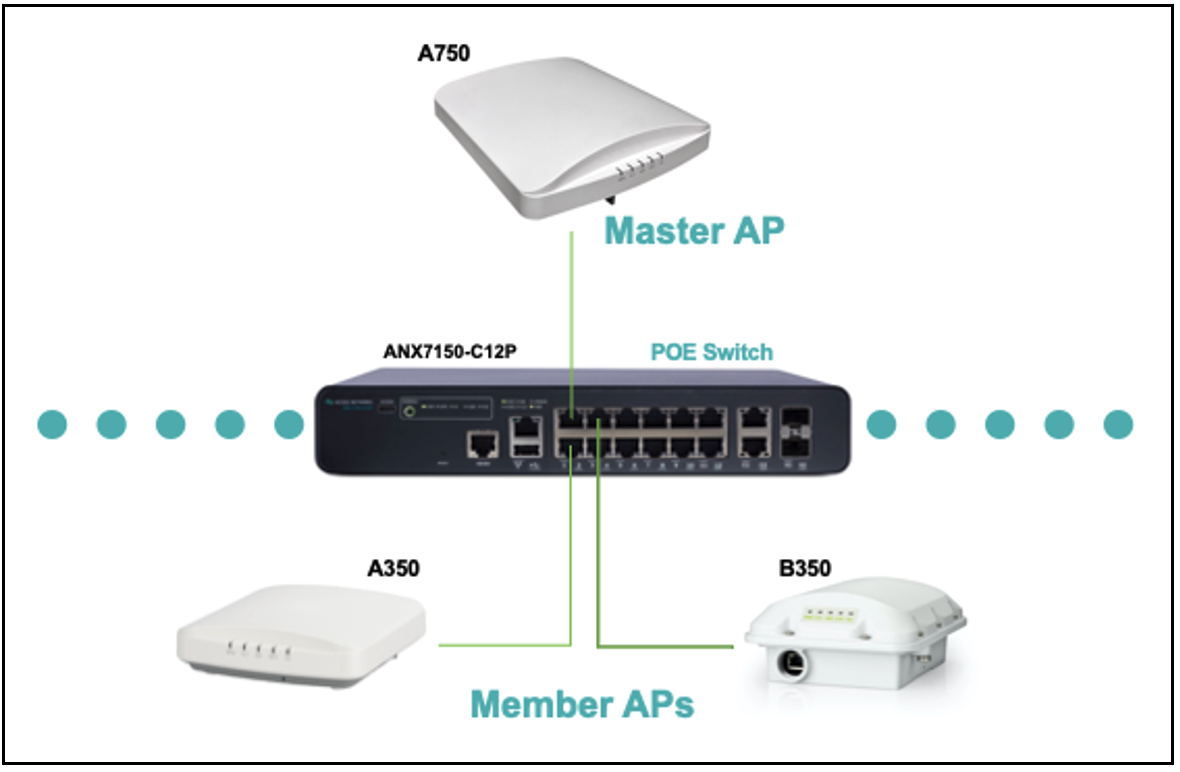
Deploying additional access points is simply a matter of connecting them via Ethernet to the same Layer 2 network switch and providing power. They will discover the Unleashed Primary AP and join automatically. No additional steps are necessary!
The second and any additional APs that join the Unleashed network will automatically assume the role of Member AP. Thereafter, if the Master AP goes offline, one of the hardwired Member APs will become the new Master and assume control of the wireless network.
When a Member AP joins the Master for the first time; if the Member AP is running a different firmware version than the Master, it will automatically download and upgrade (or downgrade) itself to the correct firmware version to match that of the Master. It will then reboot and rejoin the network once the proper firmware is running.
The Master AP must be connected to the switch via Ethernet. Member APs can be Mesh or Ethernet.
Any hard-wired (non-Mesh) AP can become the Master AP if the Preferred Master is offline, but when the Preferred Master comes back online, it will assume the Master role again.
I. Assign Location Names to access points
As a part of the installation procedure, each access point should be labeled with a description of where it is installed.
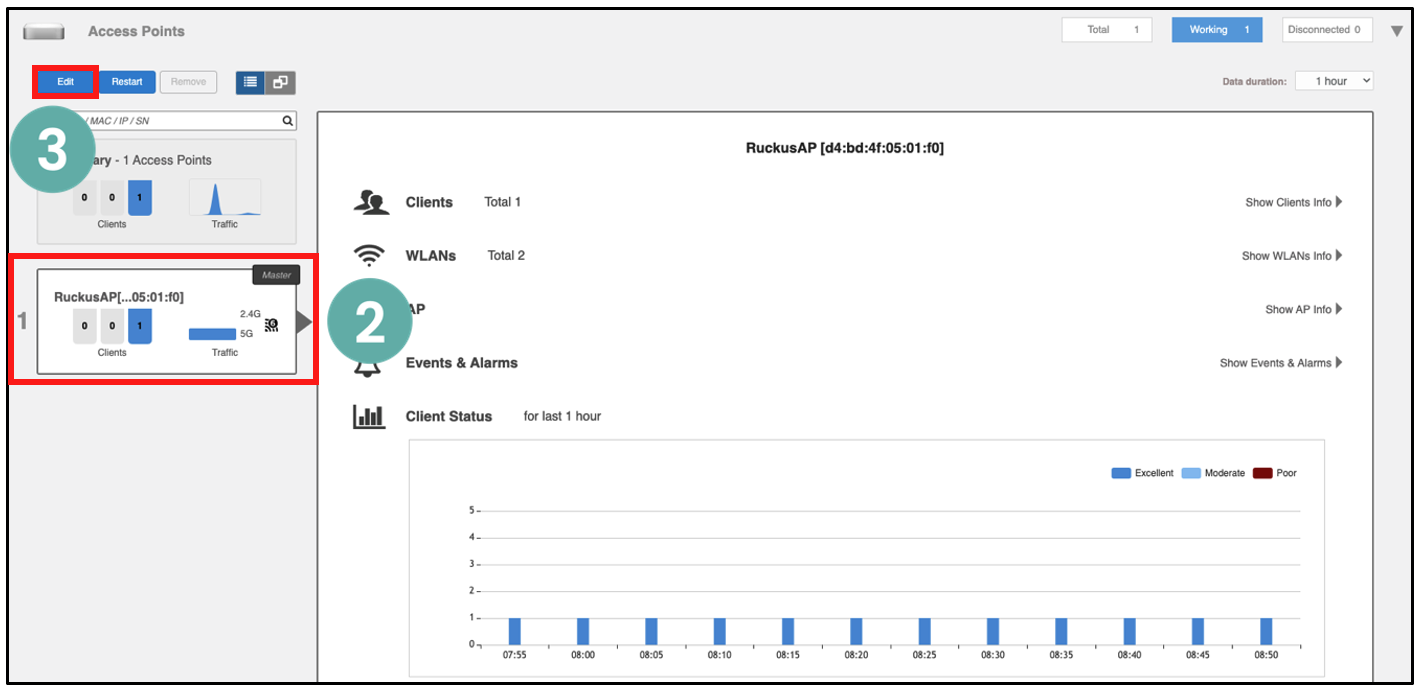
1. To make these changes, proceed by selecting anywhere in the Access Points section to expand the display of the deployed APs.

2. Select the AP that you want to configure.
3. Select Edit.
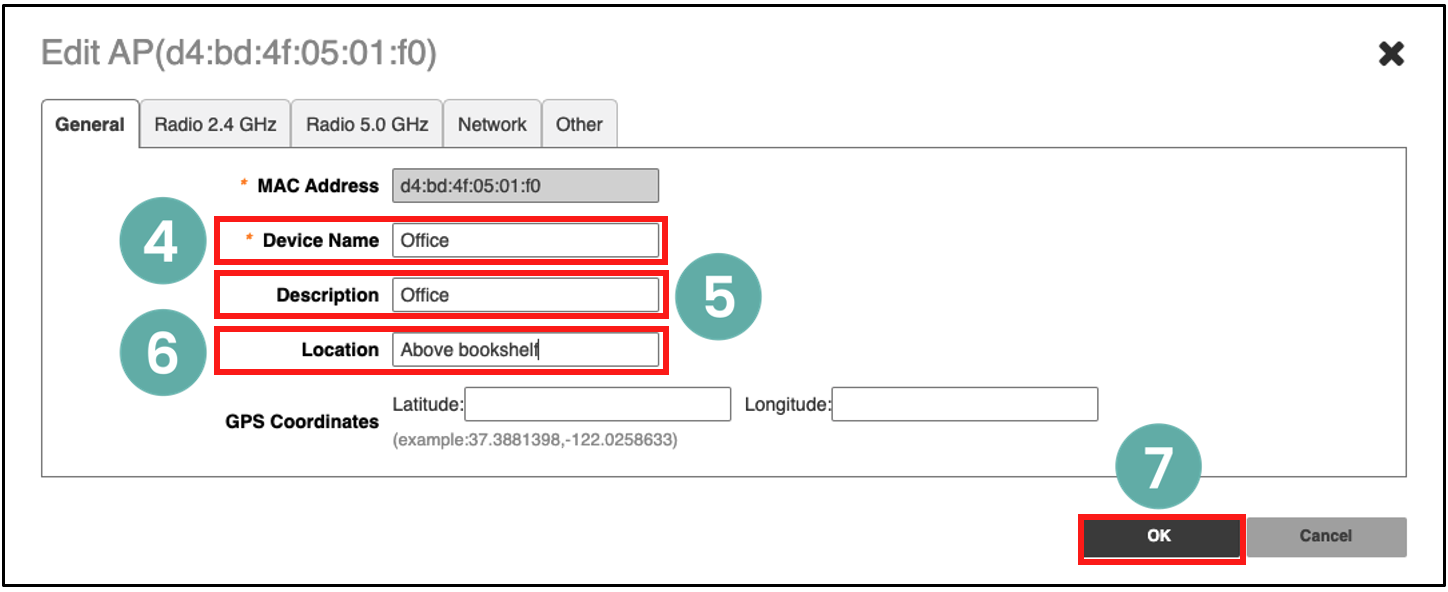
4. Enter the access point’s Device Name.
5. Enter the Description of the access point. It should be the same as the Device Name.
6. Now add a detailed location description of the access point in the Location field. This description will allow anyone that services the Unleashed network to quickly find the location of the access point.
7. Select OK.
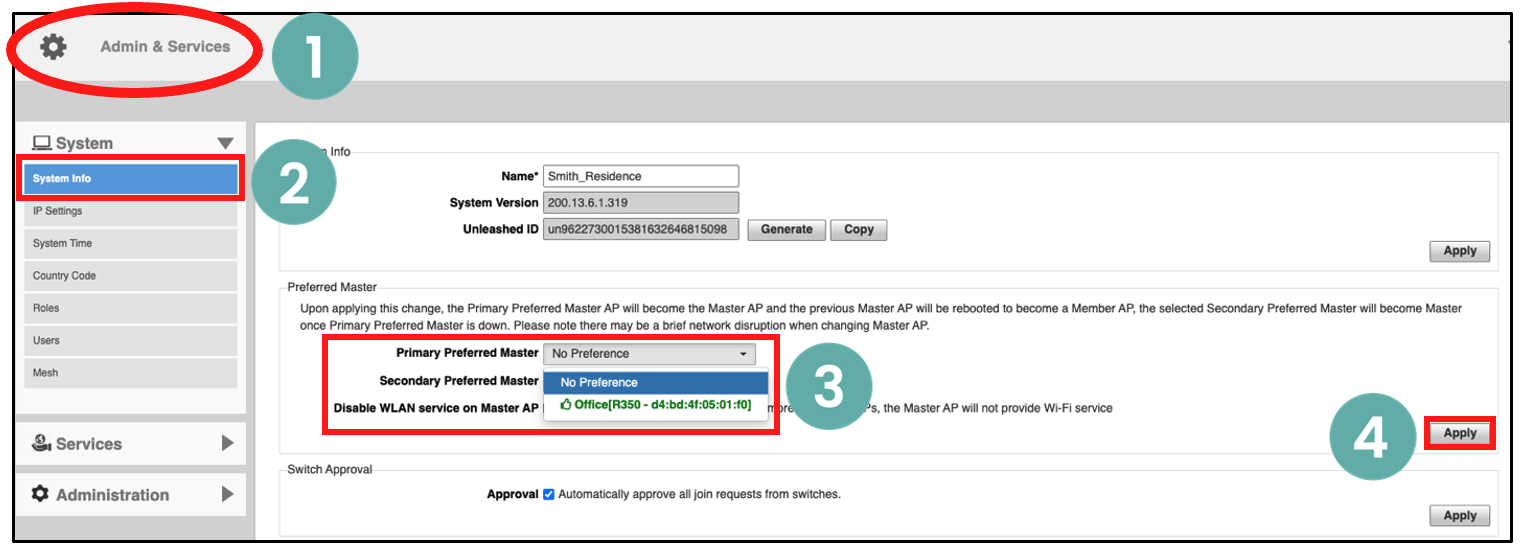
II. Assign an access point as the Preferred Master
By default, there is no preference as to which access point should become the Master AP. The first AP that is deployed automatically becomes the Master AP.
Using the Preferred Master setting, users can configure one AP to have priority. Any (non-mesh) AP can become the Master if the preferred Master is offline, but when the Preferred Master comes back online, it will assume the Preferred Master role again.
1. Select anywhere on the Admin & Services tab to reveal the sub-menus. Select System.
2. Now select System Info.
3. Under Preferred Master, select the drop-down arrow to reveal which AP will be the Primary Preferred Master.
4. Select Apply to continue.