Pole Mounting
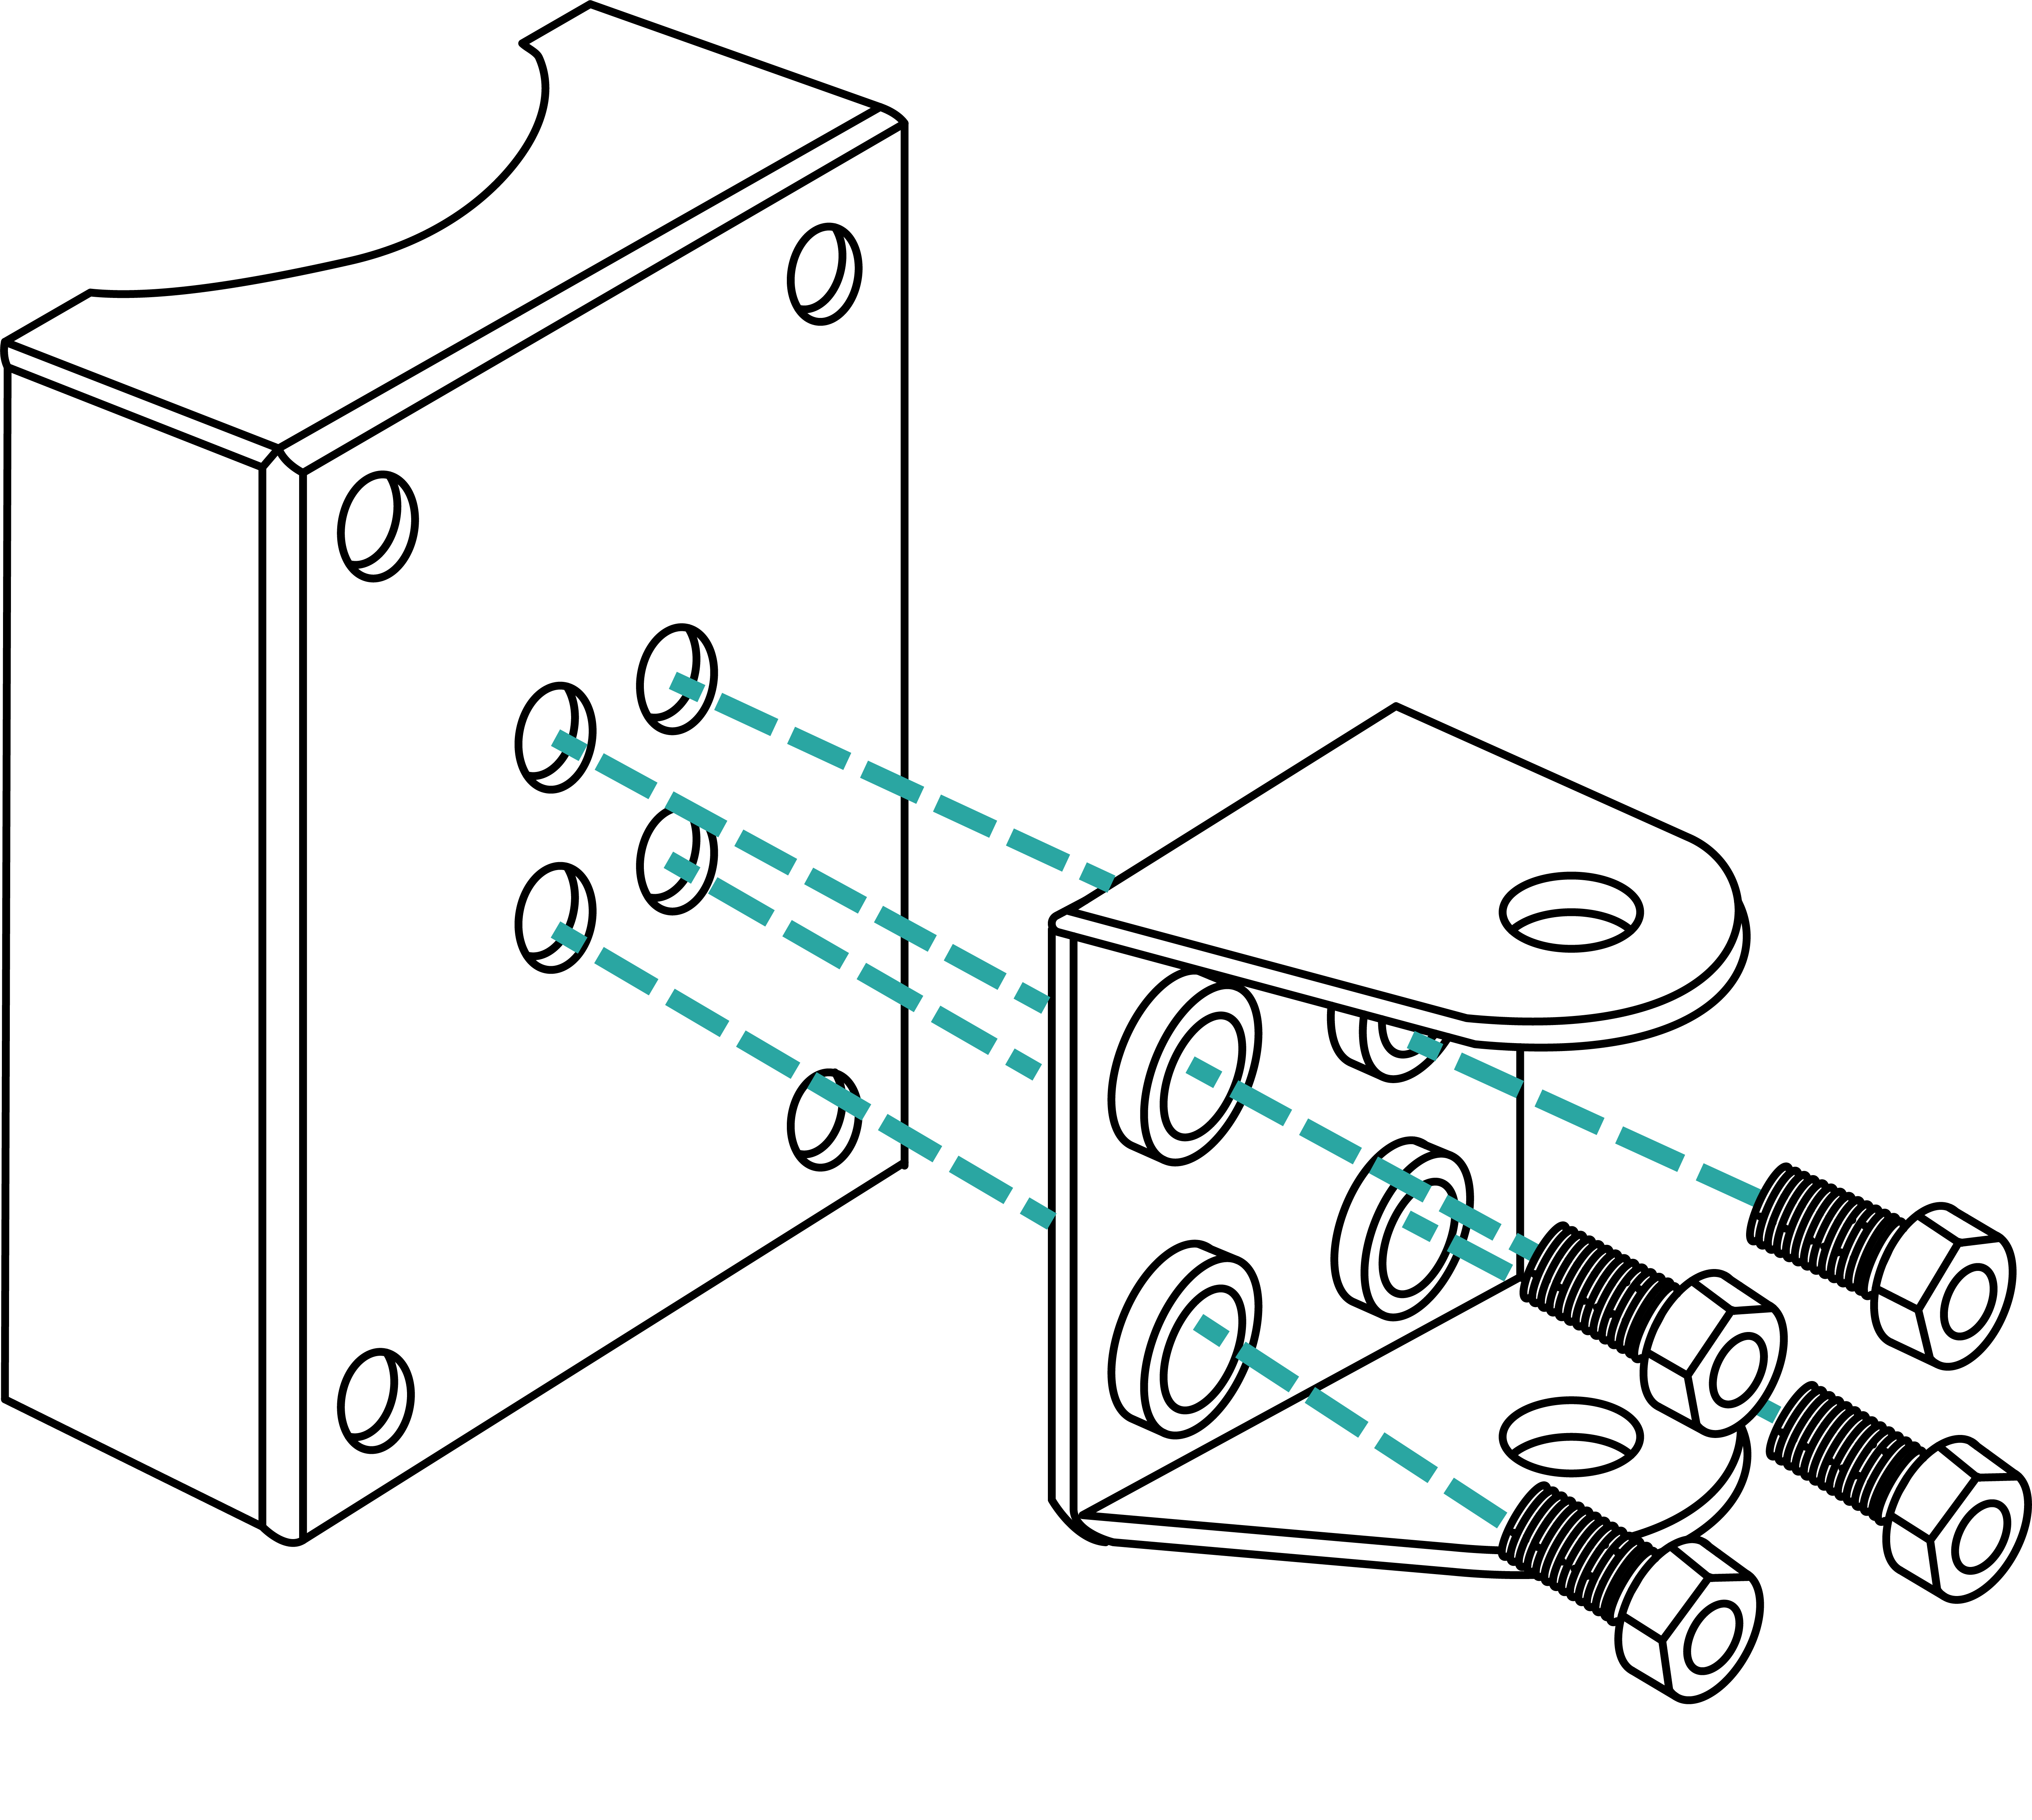
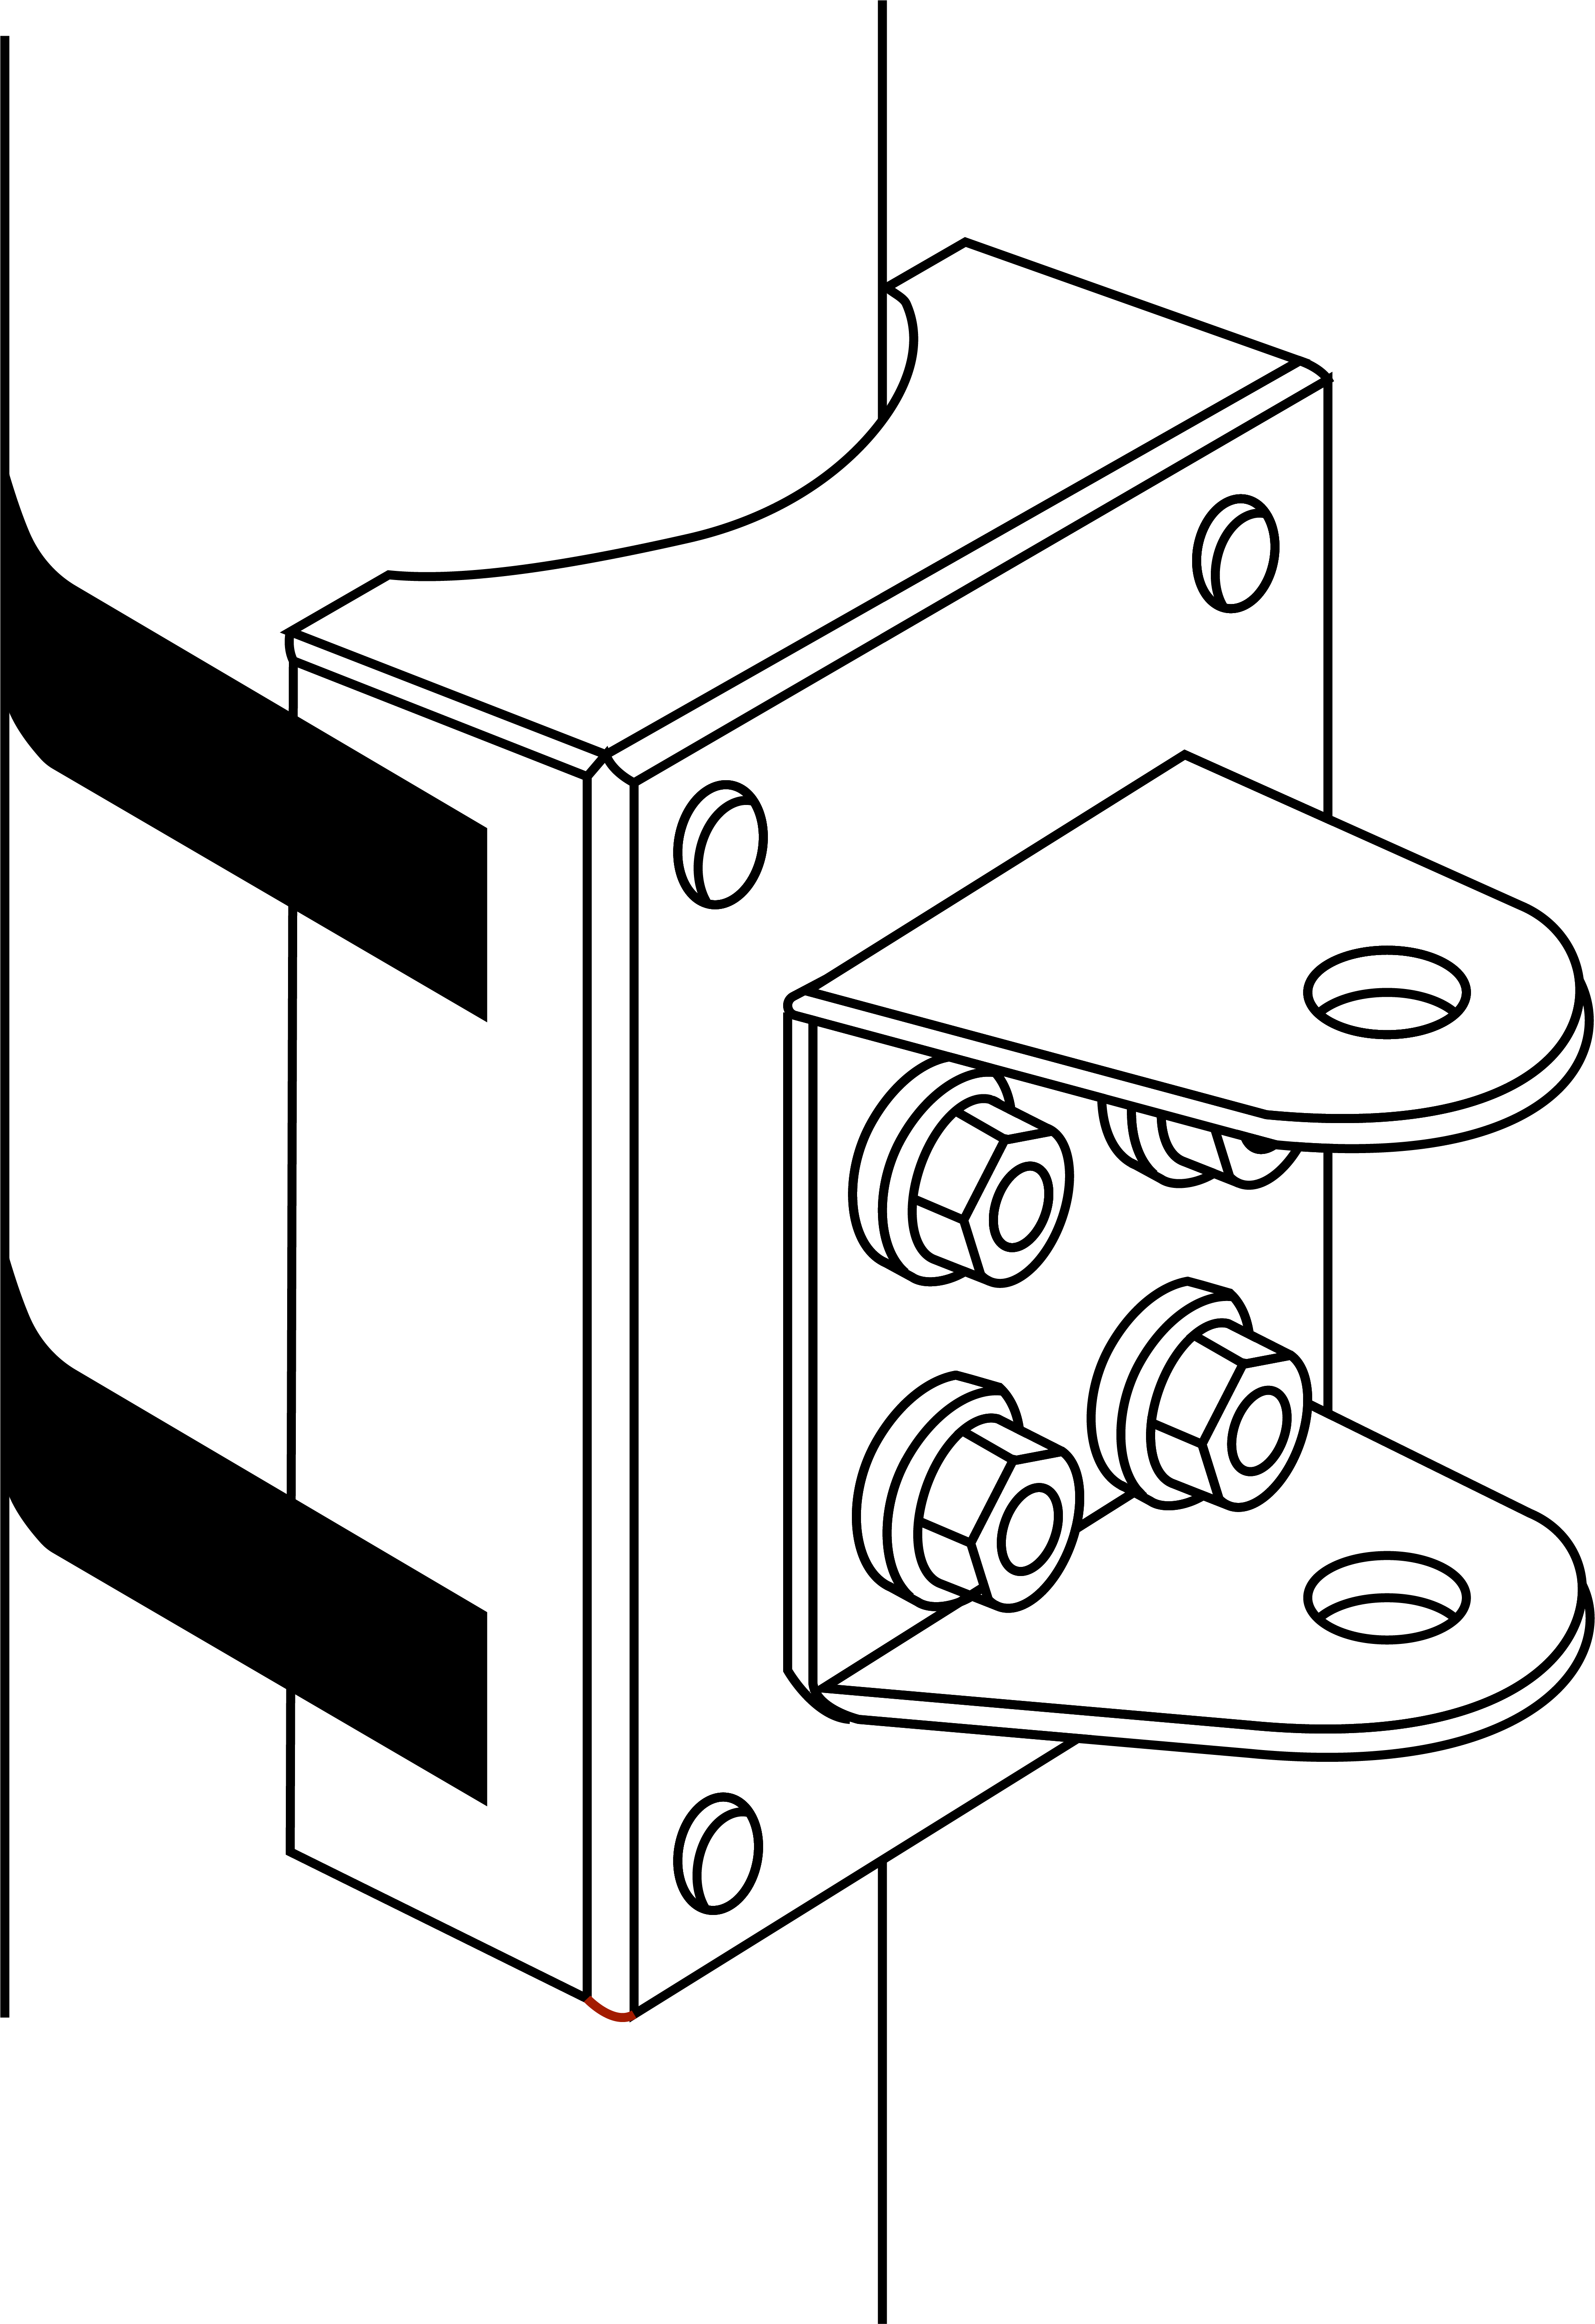
Attach the U-joint bracket
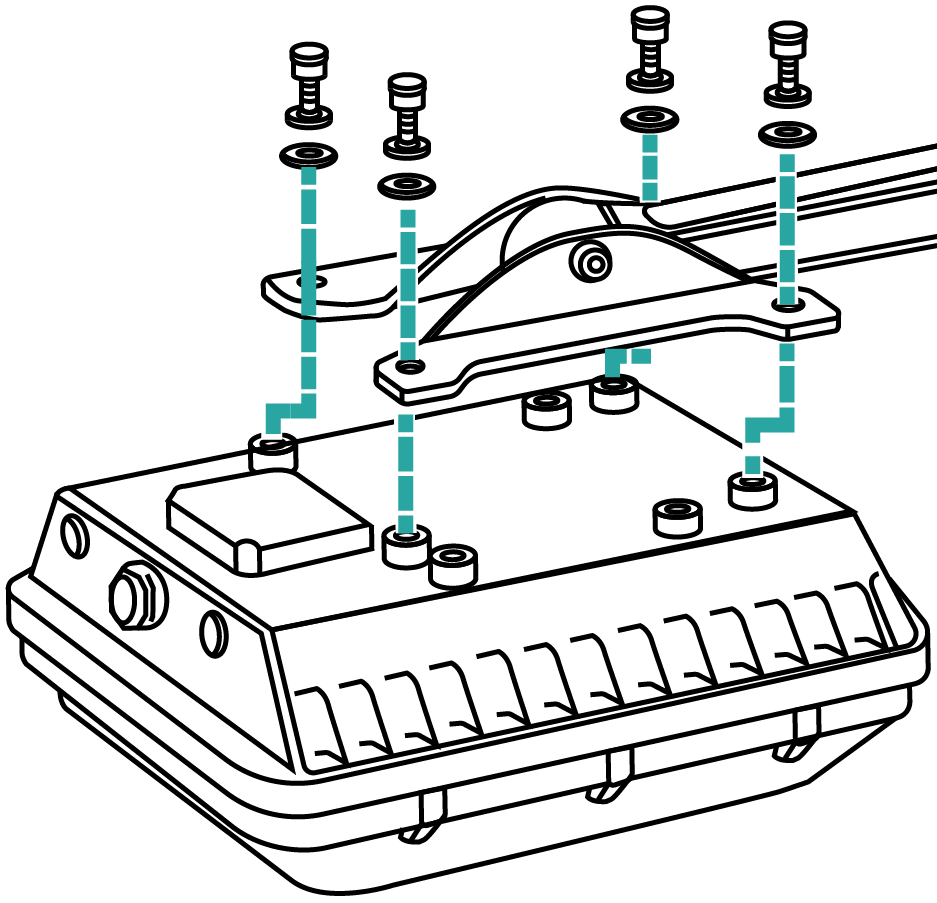
Use the included four ¼ - 28 bolt and washer sets to mount the U-joint bracket to the mounting bracket. Tighten the bolts to 9.5 N.m (84 in-lbs).
Attach the mount to a pole
We provide clamps for pole mounting, but you may need to find longer clamps for larger poles. To attach the mount to a pole:
-
Thread the end of a clamp through the upper two slots of mounting bracket.
-
Thread the other clamp through the bottom two slots of the mounting bracket.
Pro Tip: Daisy-chain clamps for larger poles.
-
Use the clamps to attach the mounting bracket to a pole, tightening them to 3 N.m (27 in-lbs). If you're using another manufacturer's clamps follow their specifications.
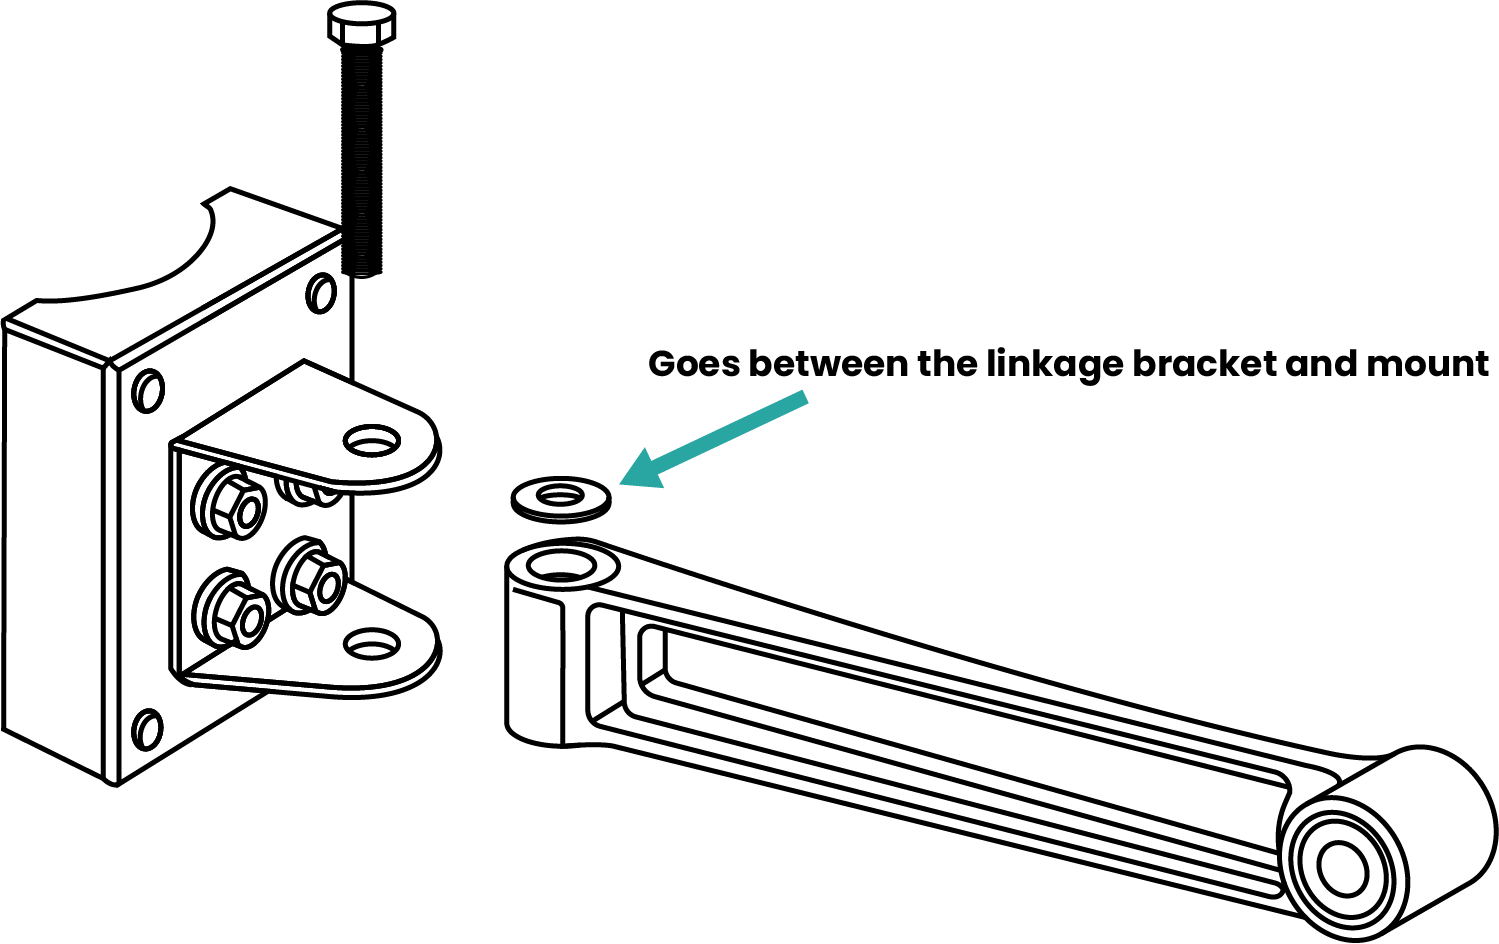
Attach the linkage bracket
-
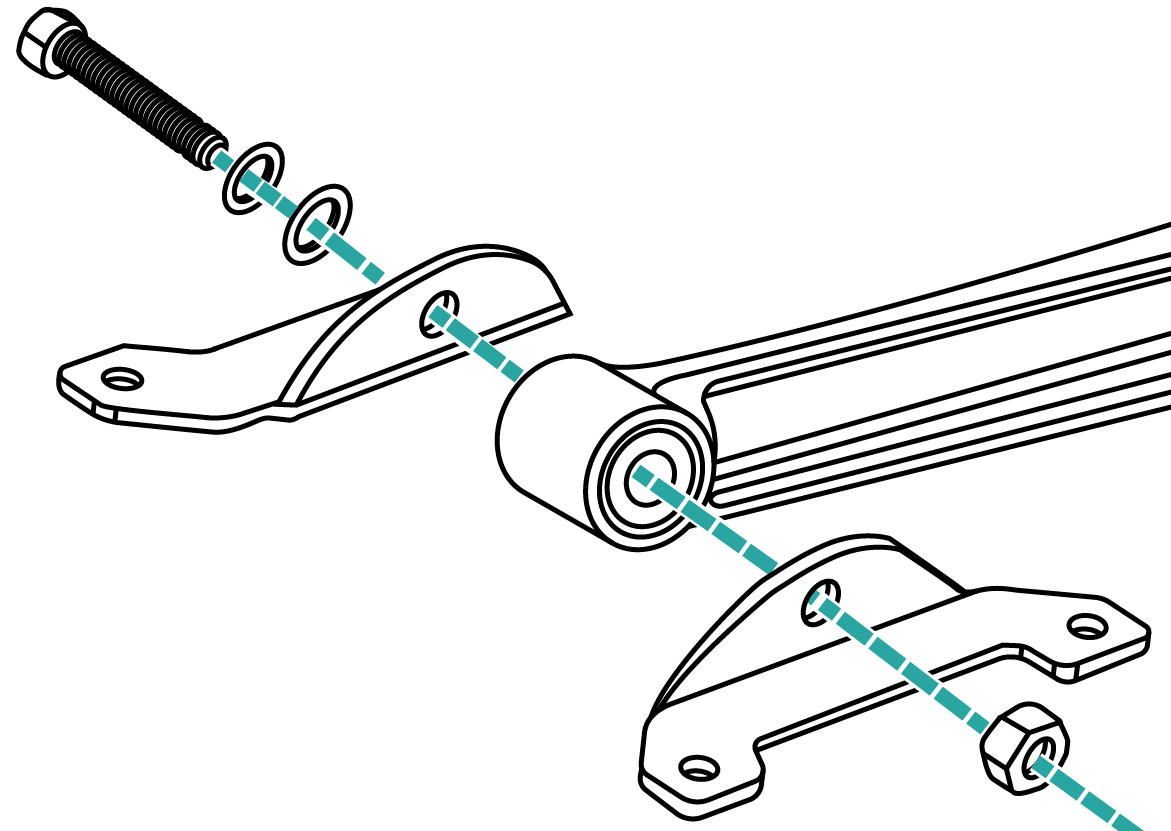
Loosely attach the linkage bracket to the U-joint using the included M8 bolt, washer, and nut. Make sure the serrated washer is on the inside of the U-joint. This keeps the linkage bracket's orientation in place.
-
Adjust the linkage bracket to the desired orientation, then tighten the M8 bolt to 13.6 N.m (120 in-lbs).
Attach the AP bracket
Loosely attach the AP bracket to the linkage bracket with the included M8 bolt, lock washer, flat washer, serrated external-tooth washer, and nut.
Note: The serrated external-tooth washer must be on the inside of the AP bracket flanges to secure the angle of the AP.
Attach the AP
Align the larger screw holes on back of the AP to the AP bracket and attach it using .5"0 × 0.250-28 hex bolts with split lock
and flat washer sets. Tighten the bolts to 2.5-3.0 N.m (22-27 in-lbs).
Caution: Do not use bolts longer than .5" to avoid damage to the chassis.
Set the angle of the AP
Adjust angle of the AP and tighten the AP bracket's M8 bolt to 3.6 N.m (120 in-lbs).