Box contents
-
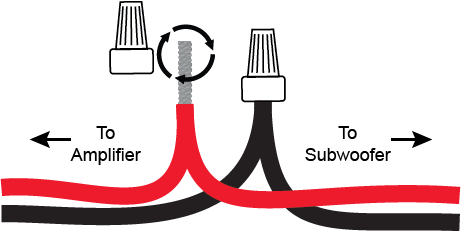
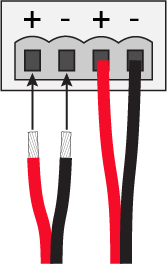
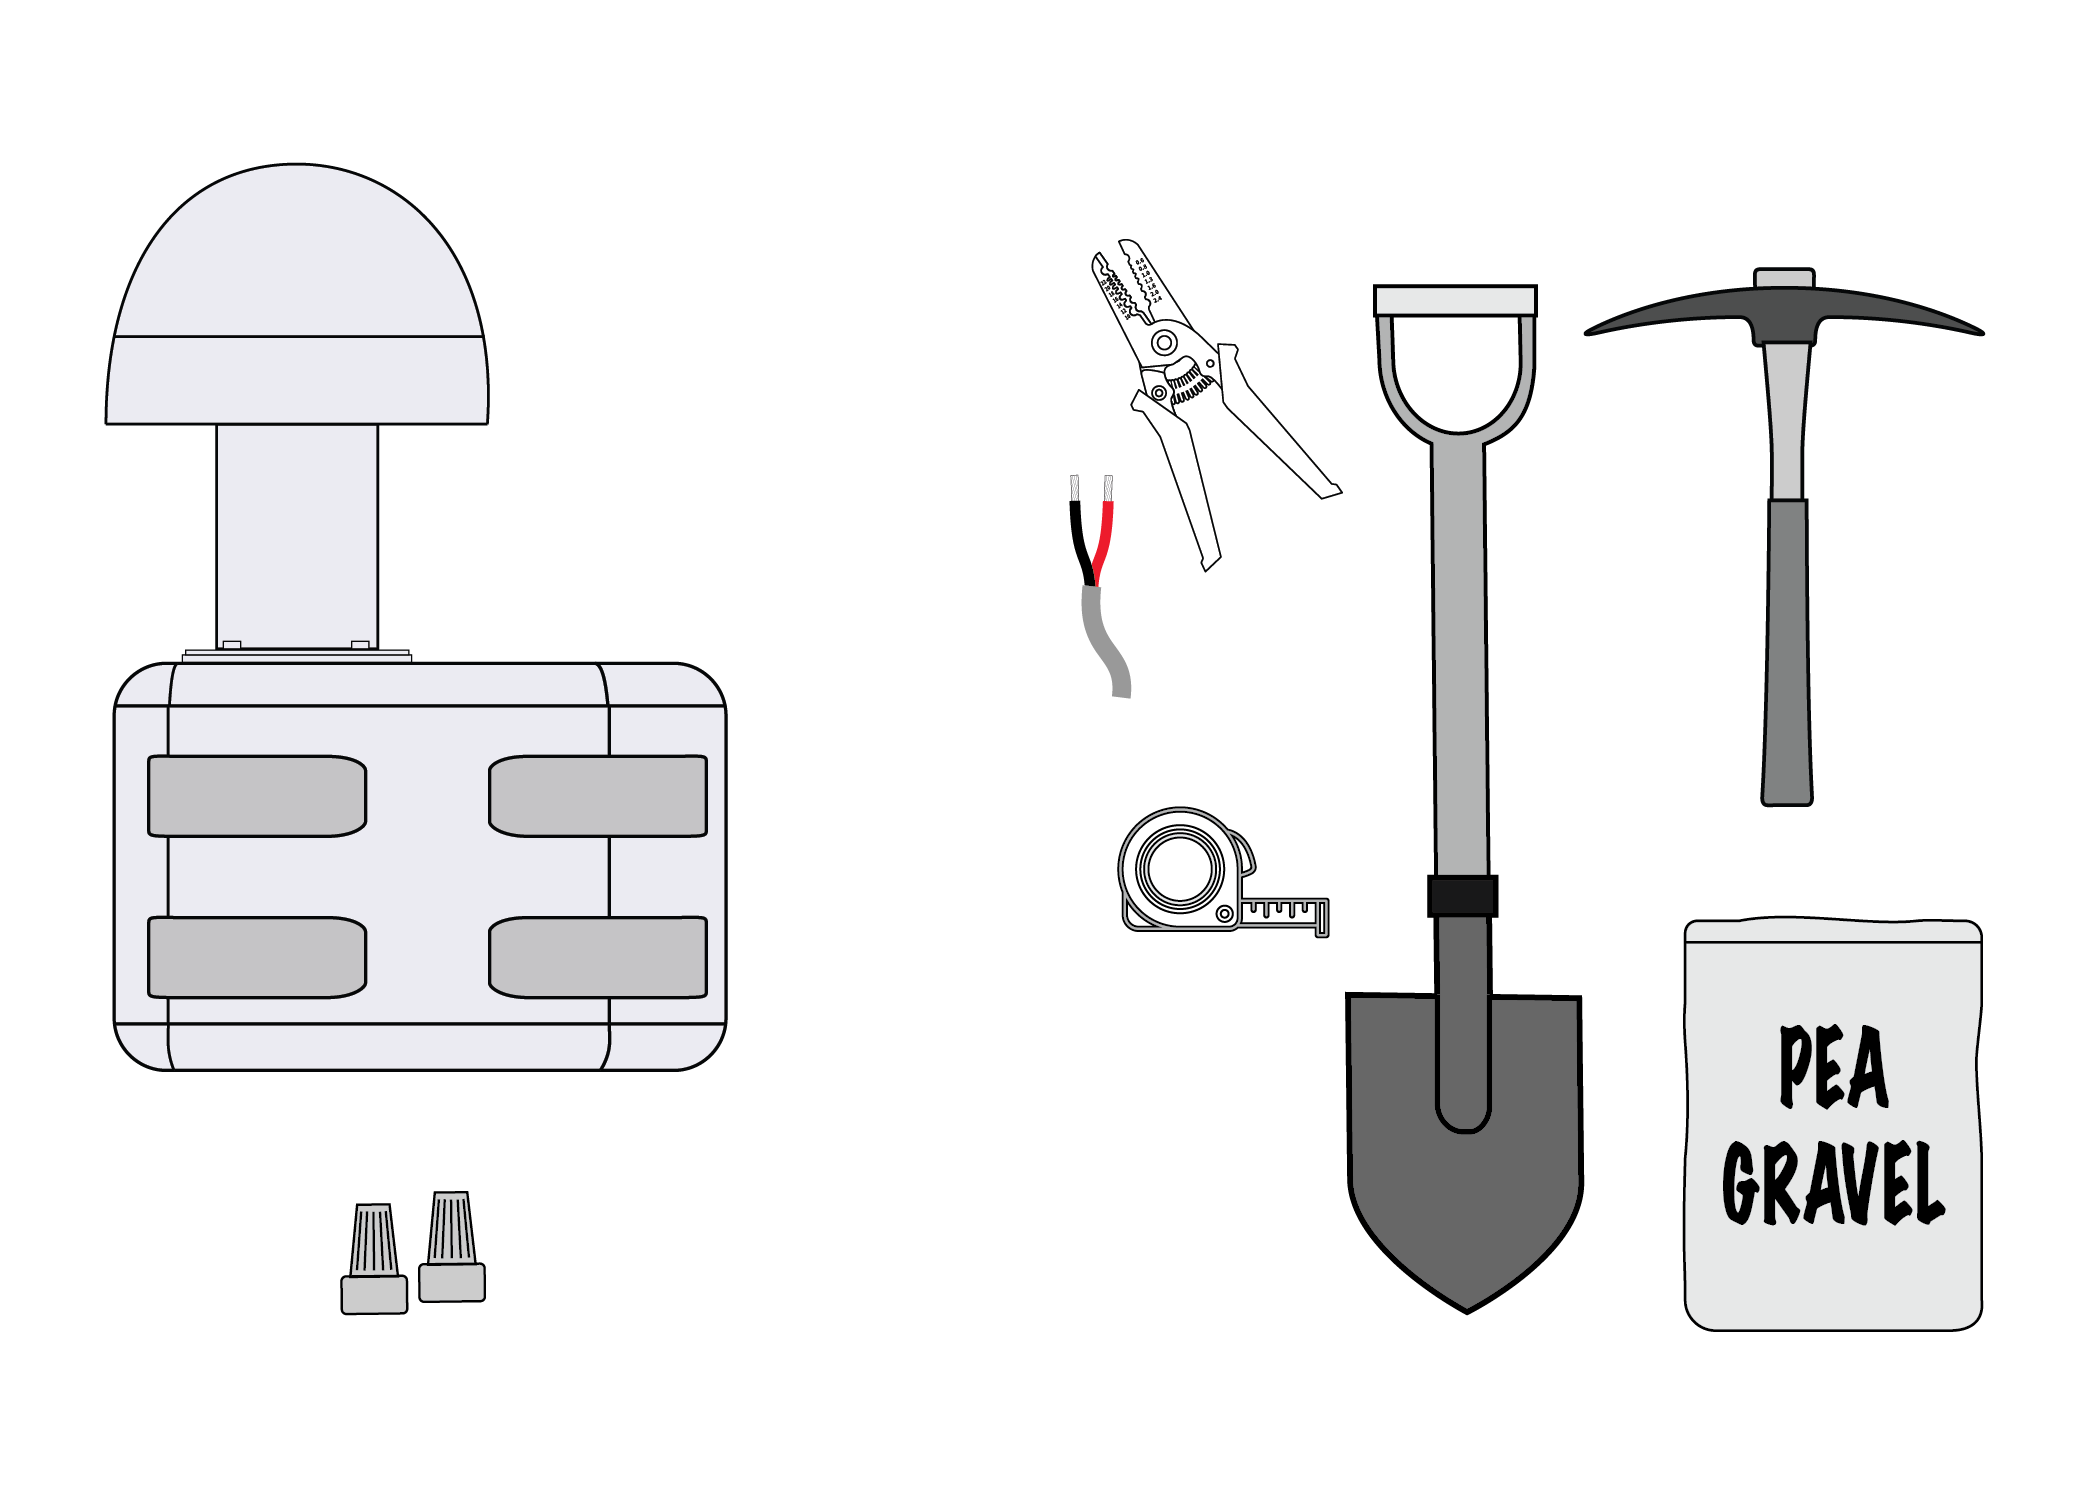
2 × Silicone filled wire nuts
-
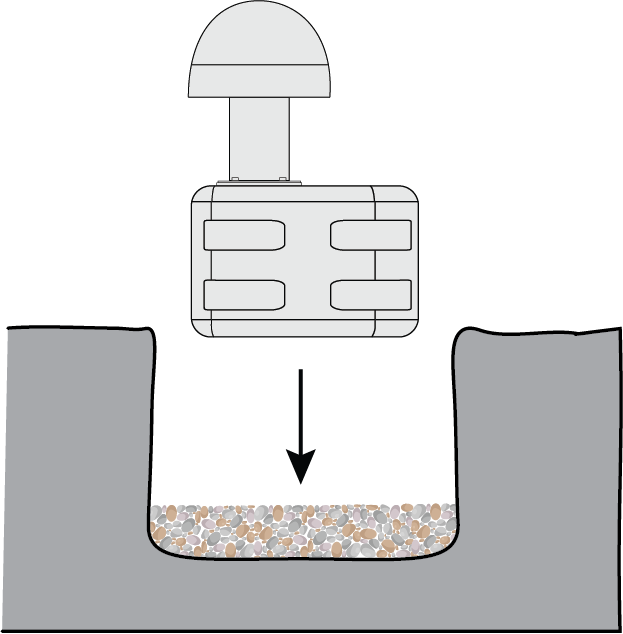
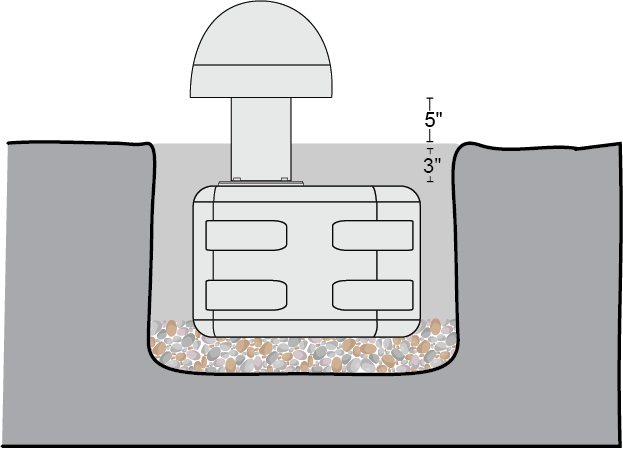
1 × Episode Burial subwoofer
Required tools
-
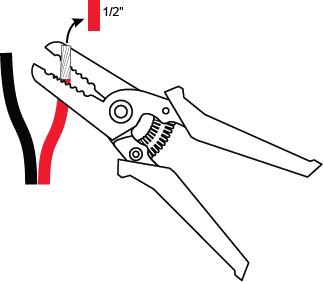
Wire strippers
-
Digging tools (shovel, pickaxe, auger, etc. as needed for the soil type)
-
Tape measure
-
Pea gravel (optional-recommended as a drainage base for high clay content soils)
-
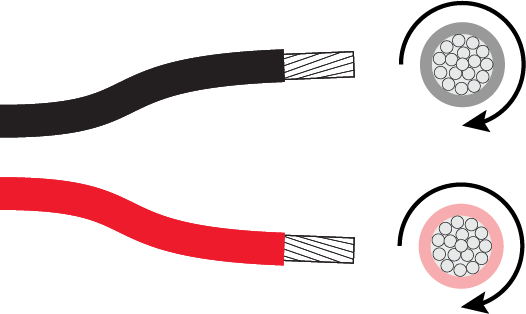
Speaker cable