Configuring MultiView (MV) in Control4 for B-960 MoIP Receivers
Use MultiView (MV) to configure multiple windows with individual sources to a single B-960 receiver. MultiView requires a control system. We've included the instructions to create and program a Control4 Custom Button and MultiView preset below. You must program a button to turn the preset on and off.
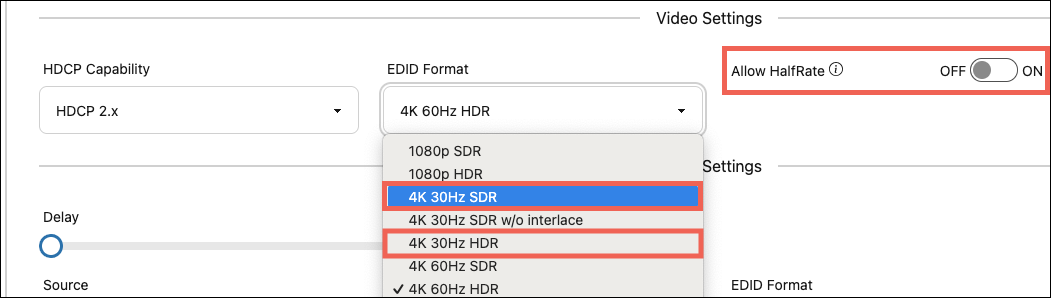
Configure Half Rate or the source EDID
To make sure your system can support Shared MultiView, use the new Half Rate feature or manually adjust the source’s EDID format to 4K30 in the transmitter’s Video Settings.
Note: Half Rate is only available on B-960-MOIP-4K-TX-A devices.
How does Half Rate work?
Half Rate cuts the input stream’s frame rate in half, so a 4K60 stream is downscaled to 4K30. This allows the B-960-MOIP-4K-TX-A to transmit a stream to a MultiView session and another display at the same time.
Half Rate does not work on receivers with the Resolution Scale set to Passthrough.
Note: A Half Rate signal may appear washed out on HDR (High Dynamic Range) displays. We recommend setting the source to SDR (Standard Dynamic Range) to keep the color fidelity.
If you do not want to allow the stream to drop to 4k30, follow these instructions to create a Control4 Macro that drops the streams to make them available for MultiView.
Create the MultiView Preset in the B-960 Receiver driver
-
In the System Design, click on the B-960 MoIP receiver’s driver and go to the Actions tab.
-
Click Add MultiView Preset.
-
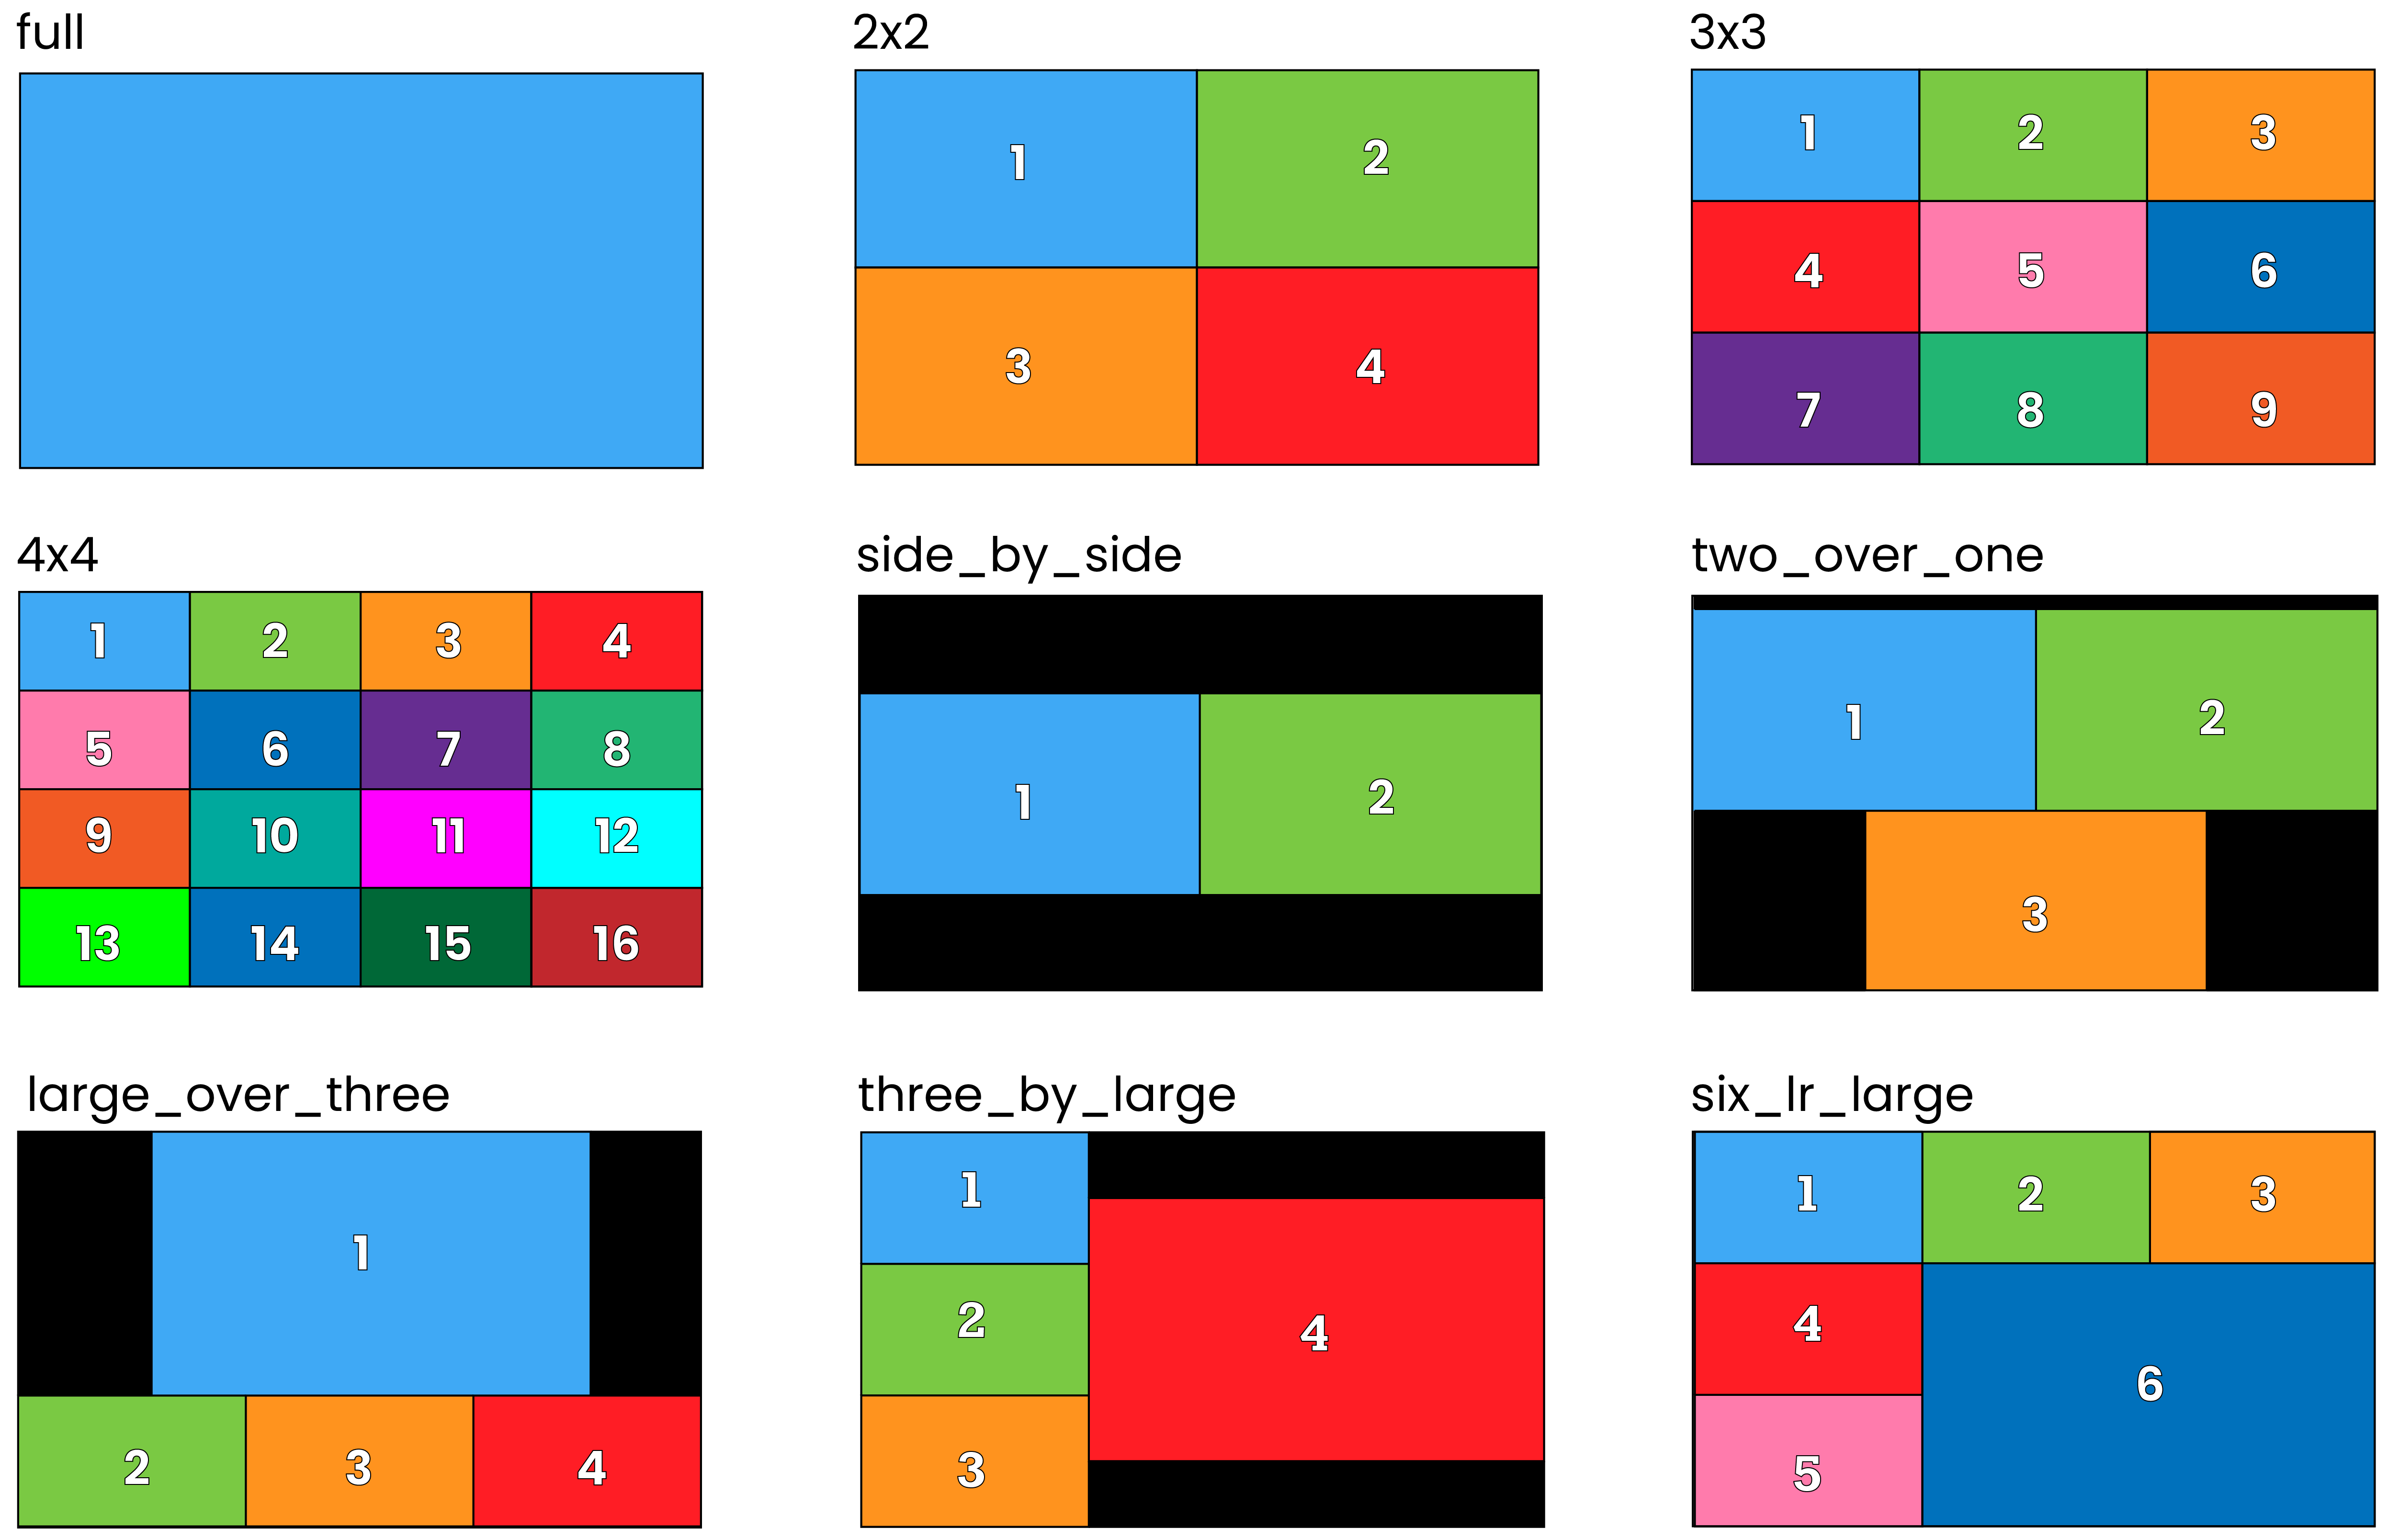
Give the preset a meaningful name, select a Layout, Audio Source, then assign B-960 transmitters/transceivers for each window. Then click OK. The below graphic shows the available MultiView layouts.
Note: Each source can appear in one MultiView window. You cannot use the same source twice.
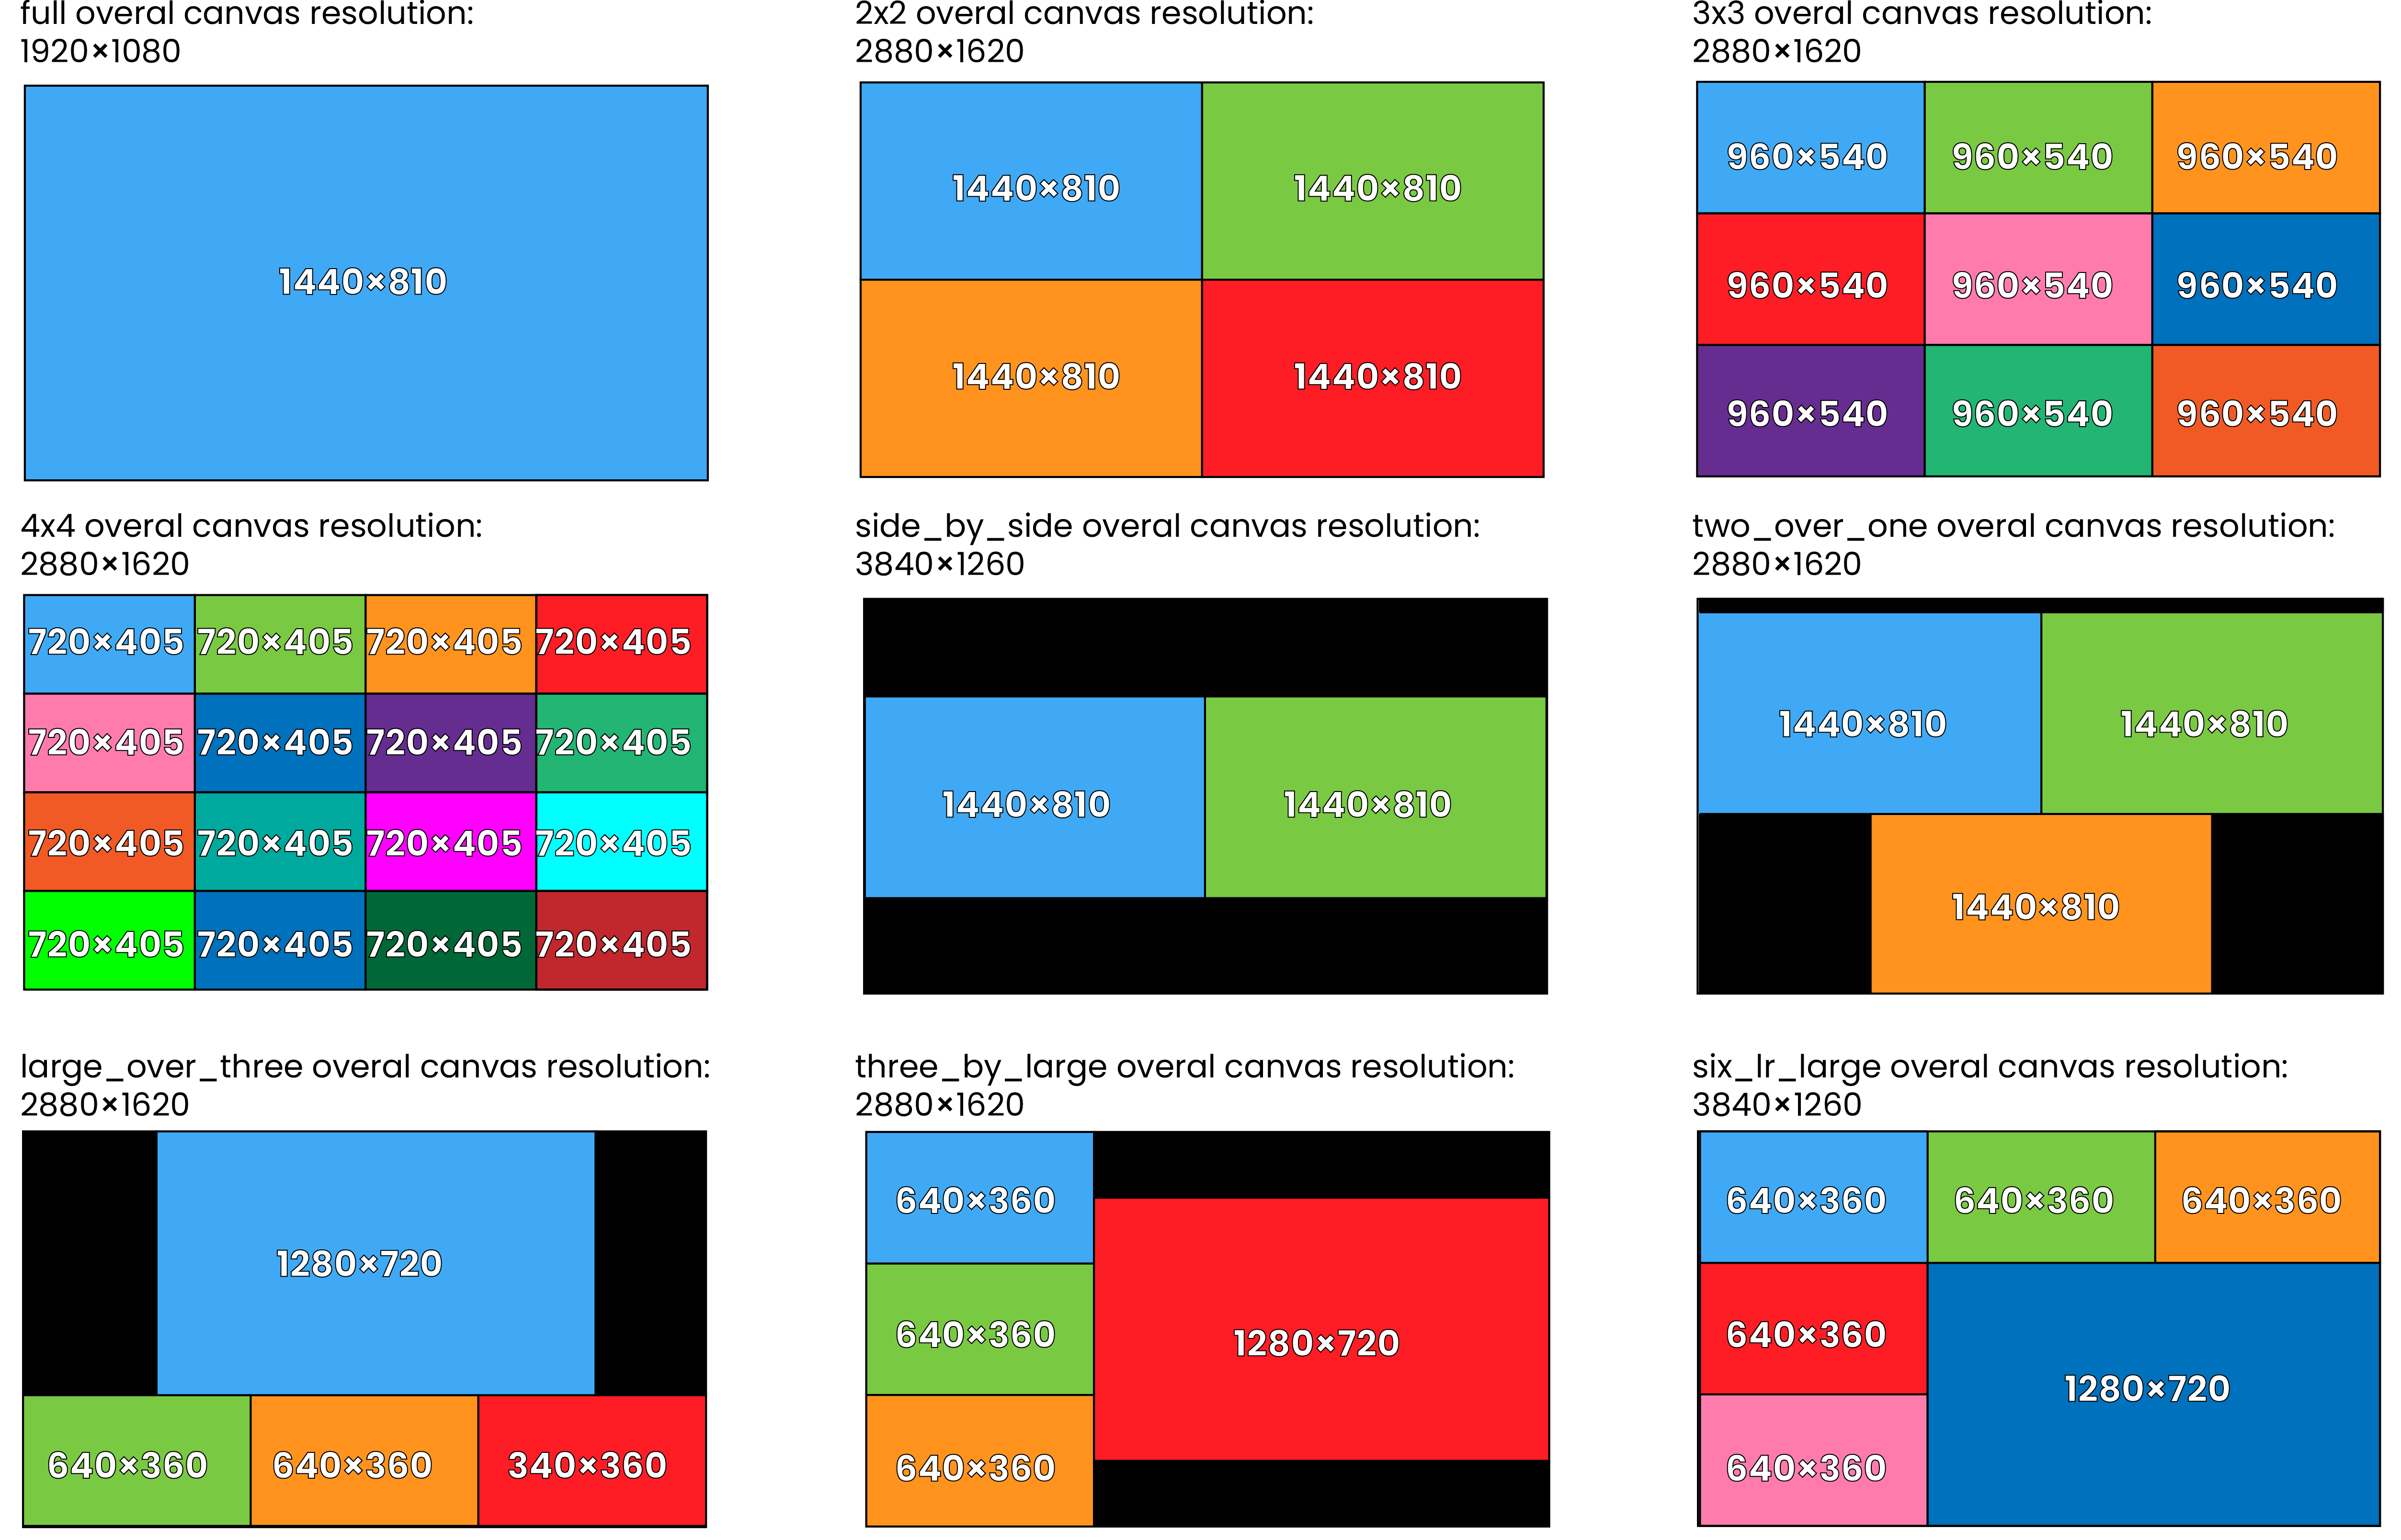
Below are the screen resolutions for each window and overall canvas size of the layouts:
Program the MultiView Preset
-
Go to Agents and add a Custom Button for the MultiView preset. If you don’t have the option for Custom Buttons, use the Add button at the top of the list.
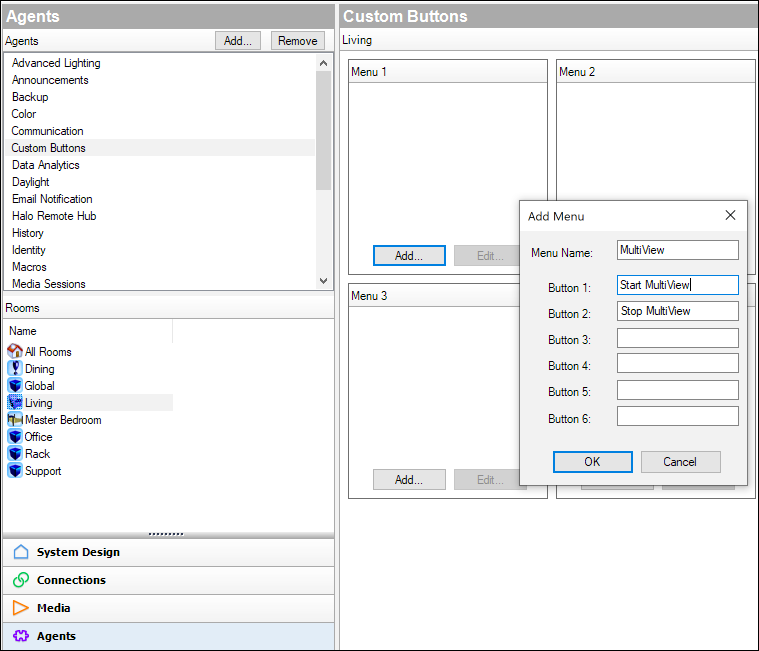
-
Enter "Start Multiview" in the Button 1 field, and "Stop MultiView" in the Button 2 field. Or something similar.
-
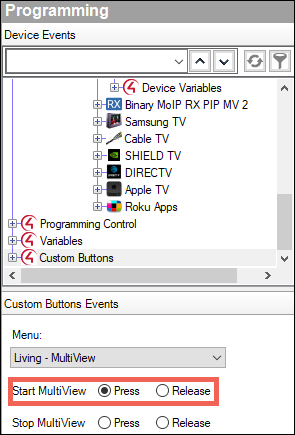
Go to the Programming view, and in the Device Events window scroll down to select Custom Buttons. Use the drop-down to select your MultiView Custom Button.
-
Set Start MultiView to Press.
-
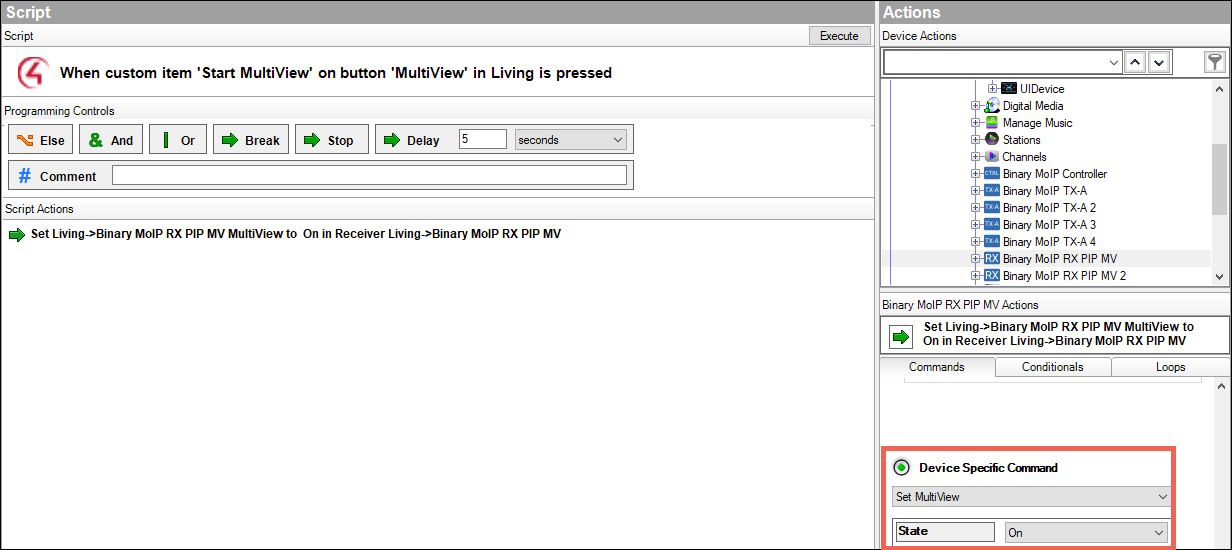
In Device Actions, select the B-960 MoIP receiver you created the MultiView Preset in.
-
Scroll down to Device Specific Command, select Set MultiView, and set the State to On. Then click the Action to add it to the script.
-
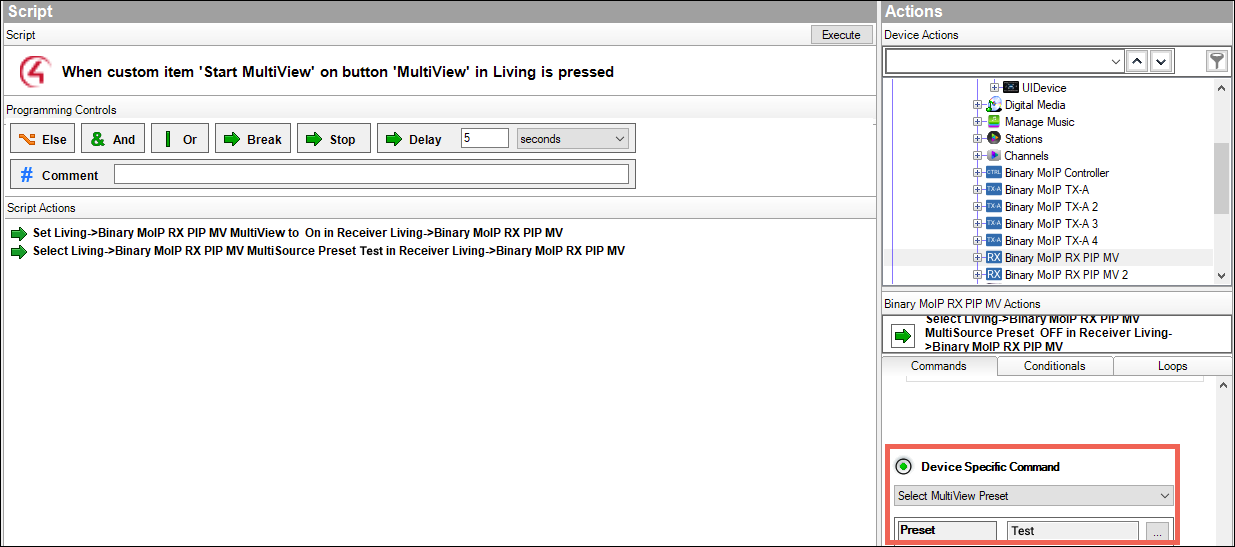
Back in the receiver’s Actions, set the Device Specific Command to Select MultiView Preset, then select the desired Preset. Click to add the Action to the script.
-
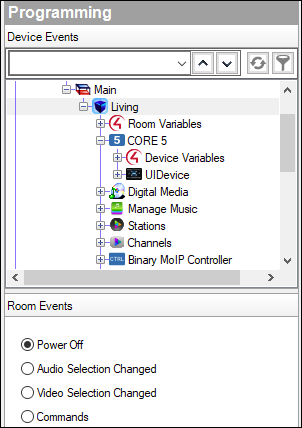
In the Device Events window scroll down to select the Room the MV preset is configured in.
-
In Room Events, select Power Off.
-
Back in the Device Events window, select Custom Buttons and select your MultiView Custom Button again.
-
Set Stop MultiView to Press.

-
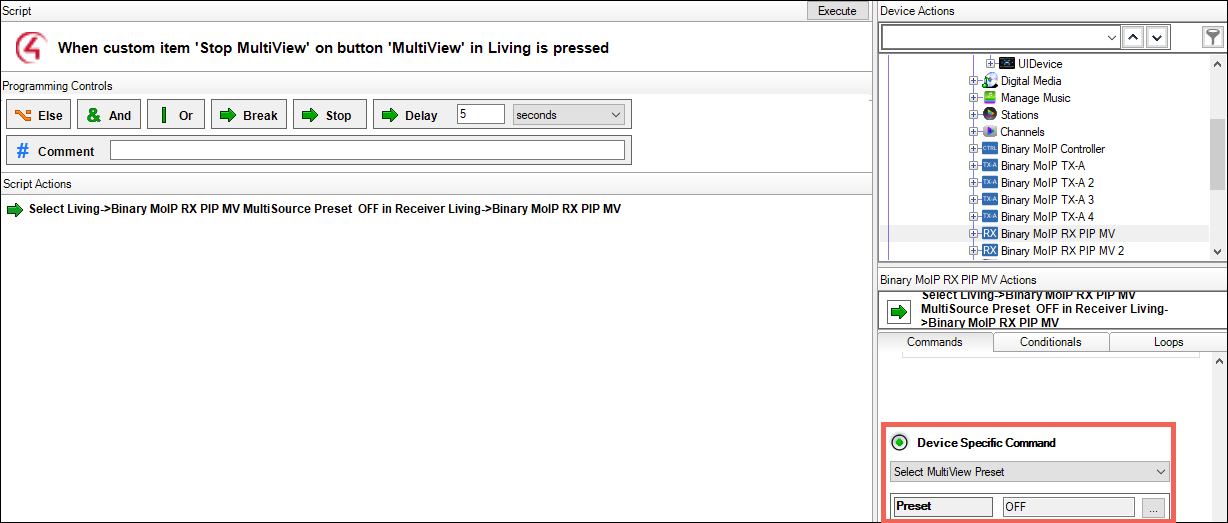
In Device Actions, select the receiver you configured the MV preset on.
-
On the Commands tab, scroll down to select Device Specific Commands and set the drop-down to Select MultiView Preset and select OFF.
-
Click the Action to add it to the script.
-
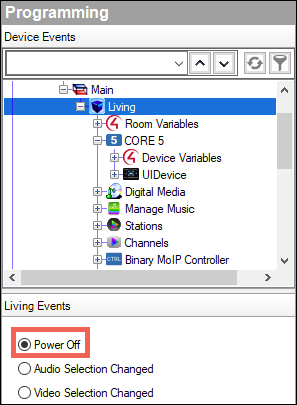
Go back to the Device Events and select the Room again.
-
In Room Events, select Power Off.
-
In Device Actions, select the receiver you configured the MV preset on.
-
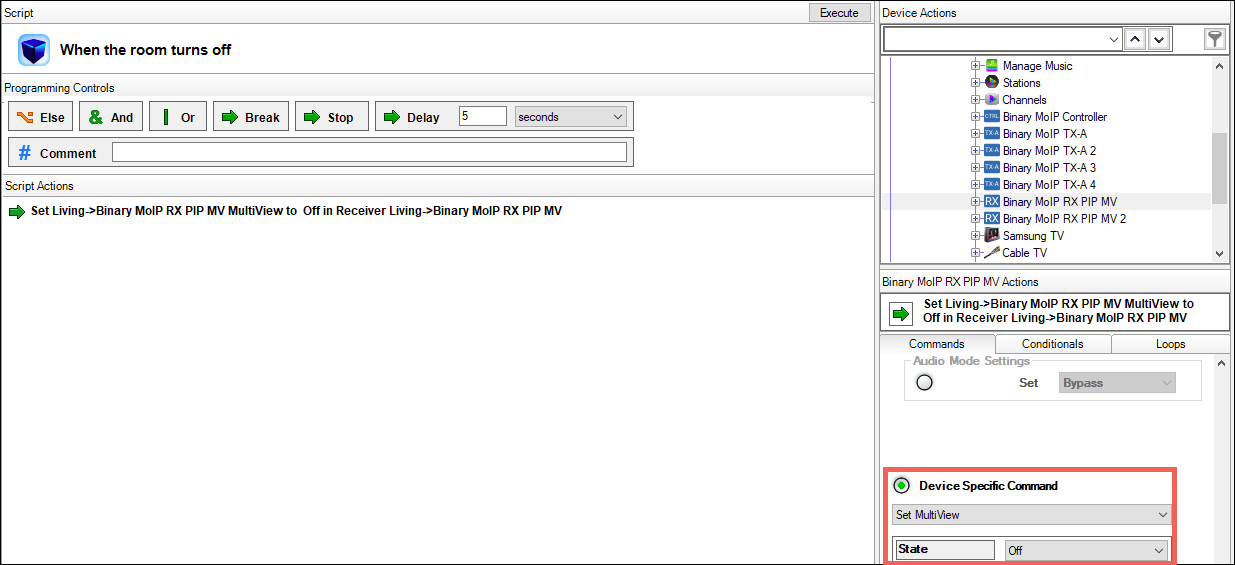
On the Commands tab, select Device Specific Commands and set the drop-down to Set MultiView.
-
Set the State to Off.
-
Click the Action to add it to the script.