Configuring MoIP with the Local UI
MoIP systems are configurable through the MoIP controller's local user interface (UI), which is similar to OvrC's MoIP System Management. The local UI is accessible through OvrC WebConnect or by typing the MoIP controller's IP address into your browser's address bar. The default username and password are both binary. The password must be updated after the initial login.
Use the following tabs to navigate the system configuration:
-
Details — Provides diagnostic modes, individual device configuration, and Video Wall configuration.
-
Configure — Provides whole system settings like Network, Account Access, and Management Access.
-
System Log — View and download system logs.
Note: Most changes are immediate with no Save or Apply button.
Before you begin
-
Verify the network is configured properly before connecting MoIP devices.
-
Document the MAC address and Service Tag of the MoIP devices and notate which input or display they’re connected to.
-
Perform available firmware updates.
Configuring the MoIP system through the local UI
-
Connect the controller to the MoIP switch and use the included power supply to connect it to an AC outlet.
-
Find the MoIP controller's IP address using OvrC, your router's client table, or an IP sniffer, then enter the address in your browser's address bar. The default username and password are both binary. The password must be updated after the initial login.
-
Verify the MoIP controller’s firmware is up to date. If not, you must update the firmware before continuing.

The easiest way to do this is to claim the controller in OvrC. You can also check the Firmware Release Notes and download the latest firmware from the product page on SnapAV.com. Read How to Update the Firmware for more help on this topic.

-
Power off the MoIP switch(es), then make all the necessary audio and video connections to the MoIP devices.
-
Connect the MoIP devices to the MoIP switch(es). If you’re powering any of the MoIP devices with a power supply instead of PoE, connect them to power.
-
The MoIP controller scans for new transmitters and receivers every minute. Once discovered, they appear in the Units list on the Details tab.
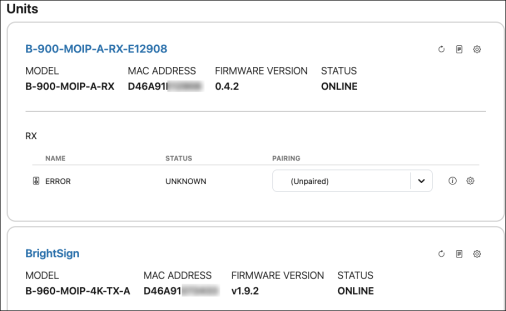
-
The MoIP controller automatically detects if the transmitters and receivers require a firmware update and delivers updates, as needed. The Unit tiles display if an update is in progress or not.
-
When the updates are complete, make a MAC reservation for the MoIP controller or give it a static IP address. For a static IP, click the Configure tab and go to the Network Settings. Turn off Use DHCP, and enter the static address. Then click Apply.
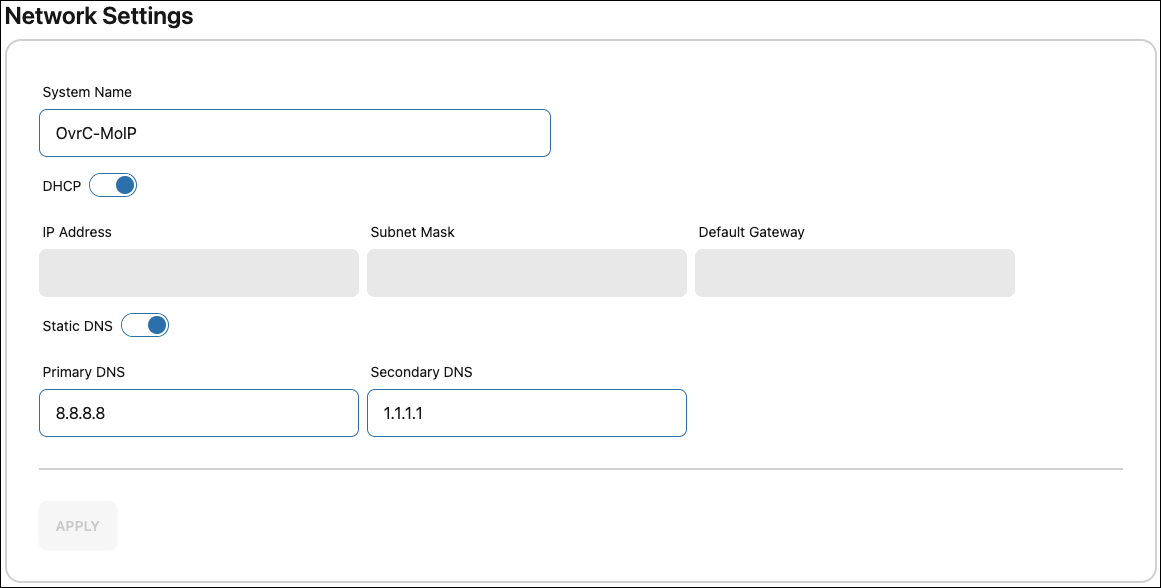
Pro Tip: Use a MAC reservation instead of a static IP address to avoid potential IP conflicts.
-
On the Details tab, give a meaningful name to each device, such as the name of the output or input and where it’s located, by clicking the
 Settings button at the top of the tile.
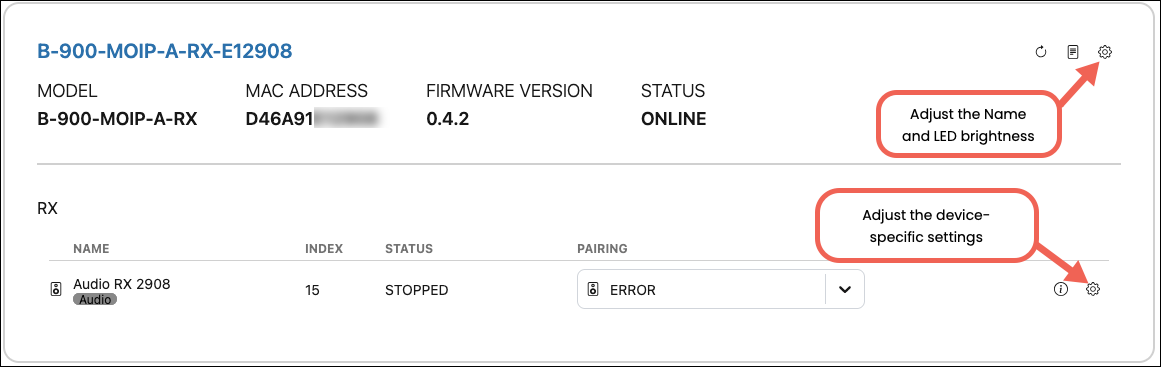
If you’re unsure which receiver is connected to which output, use the Tools section at the top of the page and set the Diagnostic Mode to Identify Mode to display the MoIP device’s MAC address on the display.

Note: B-960 devices do not support Identify Mode.
If you’re unsure which source device is connected to a transmitter, verify the source is powered on and click the
 Display Preview icon to see a snapshot of the stream.
 -
Set the Diagnostic Mode to Cycle Pairings to cycle all the discovered transmitter’s sources through the receivers and their displays.
Note: In test mode, 4K content does not display on a 1080p TV or a 1.4 HDCP connection. To fix this, downscale the receiver’s video passthrough settings by clicking the receiver’s edit icon and using the appropriate drop-down menus. Read more about configuring video receivers.