Creating a B-960 Video Wall in the Local UI
Note: B-960 and B-900 video devices cannot pass video to each other. B-960 devices are compatible with B-900 audio receivers and transmitters.
-
Scroll to the bottom of the
-
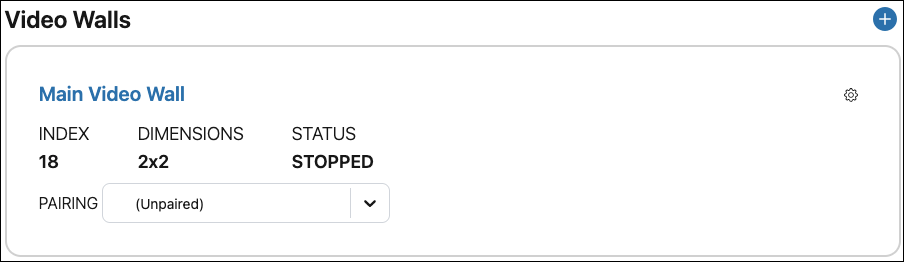
Give the video wall a meaningful Name.
-
-
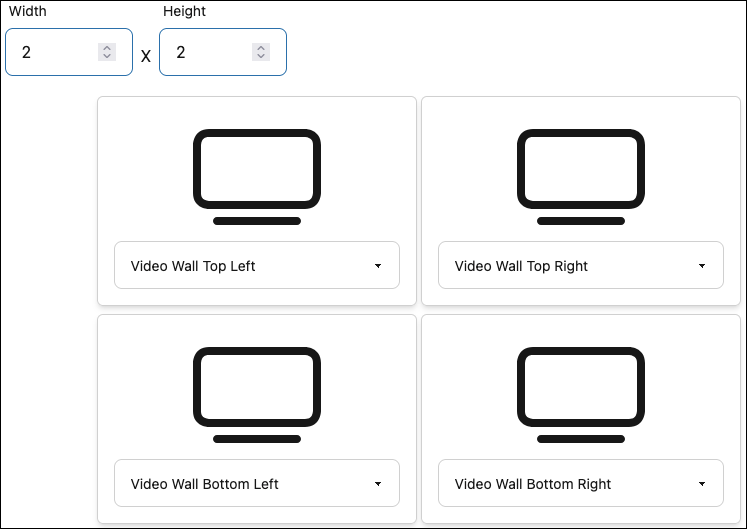
Use each tile's drop-downs to select an RX for each position in the Video Wall.
-
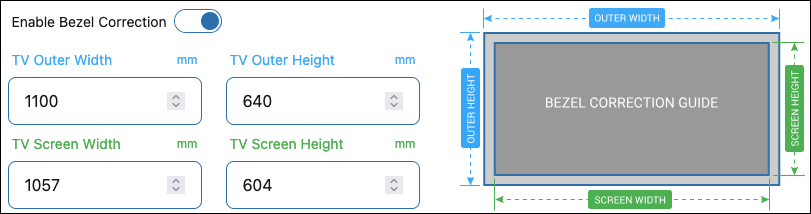
Enable Bezel Correction to adjust the video signal if you’re using displays with visible bezels. Use the guide to help you measure before entering the dimensions.
-
Click Save and the Video Wall appears at the bottom of the
Video Wall updated to Genlock
Firmware v.4.1.2.6 changes the Video Wall feature from Fast Switching to Genlock. This makes the source switching time for Video Walls longer, but there is lower latency in the frame delays. This resolves an issue with 1080i scaling in Video Walls.
With Fast Switching Video Wall, the frame sync was sometimes off because of a large frame delay between MoIP devices. Genlock uses the source transmitter to negotiate the format it’s sending to the Video Wall receivers for true scaling.