Configuring Luma Insights
Configuring Areas of Interest
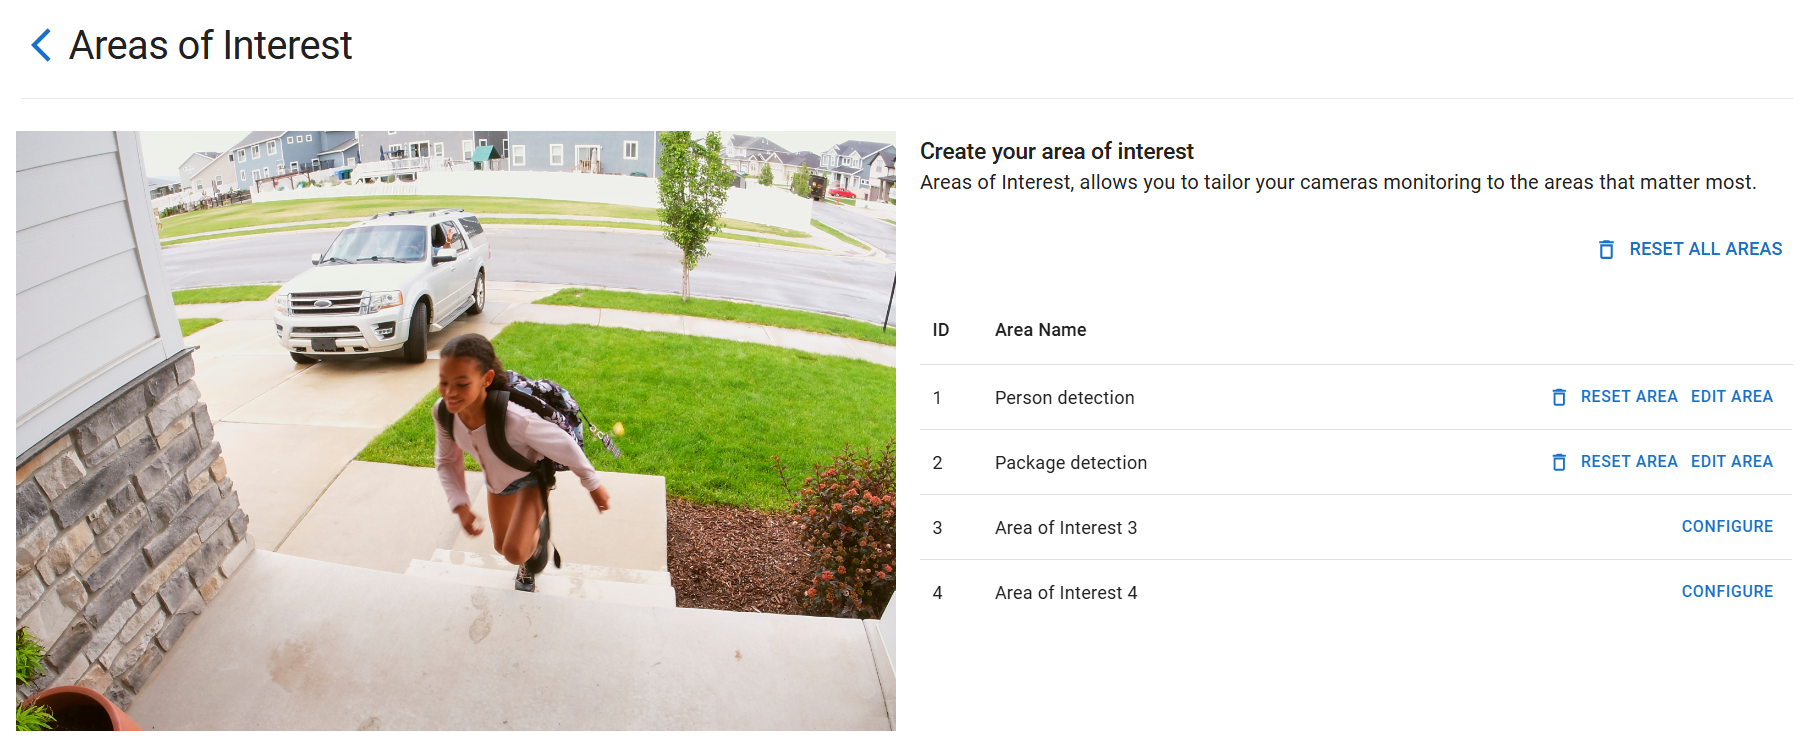
Areas of Interest create zones to monitor with Luma Insights. You can create up to 4 areas of interest on each monitored camera.
Caution: If you don't create an Area of Interest, the entire feed will be monitored and may create false or nuisance notifications.
-
Click on the edit icon in Areas of Interest.
-
Click on 4 to 6 points to outline the desired area and click SAVE.
Pro Tip: When setting a Package Detection Area of Interest, define the area of interest as the place packages are normally left, like the front porch. The AI constantly tracks all objects that might be packages even when not in the defined area of interest; so define the Package Detection area where deliveries are made and not where passersby might be seen with bags or backpacks.
Using History events in the Control4 app
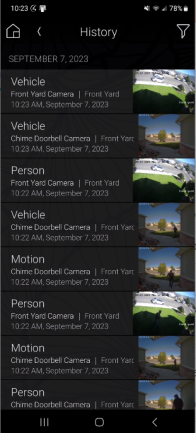
While notifications for vehicle, person, and package detection events are disabled by default, these events are shown in the History agent in the Control4 app (named Vehicle, Person, Package Detected, and Package Removed). The events contain a short video clip of what they have detected. Events are saved for up to 7 days (or up to 100,000 rolling records).
To share or save a video clip, long press on the video.
Turning on push notifications
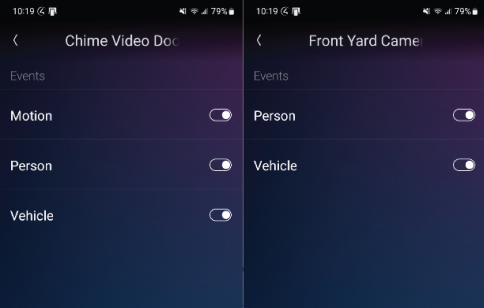
Push notifications to the Control4 app can be enabled for vehicle, person, and package detection and for motion if you are using a Chime VDB. These notifications are off by default. Make sure you have your areas of interest setup, especially if your cameras are by a busy street, before you turn these on.
-
In your Control4 app, go to Settings and select the system.
-
Select Notifications > Cameras and choose the camera.
-
Tap on the toggle to enable push notifications for person, vehicle, package, or motion detection.
Pro Tip: Motion must be configured within the Chime VDB in order to get motion event notifications.