OvrC Wi-Fi Management: Adding a new network
-
For Araknis and Pakedge networks, click the Import Settings button to ensure that OvrC does not overwrite changes made in the AP’s local UI.
-
Click the Add Network button or the Configuration tab.
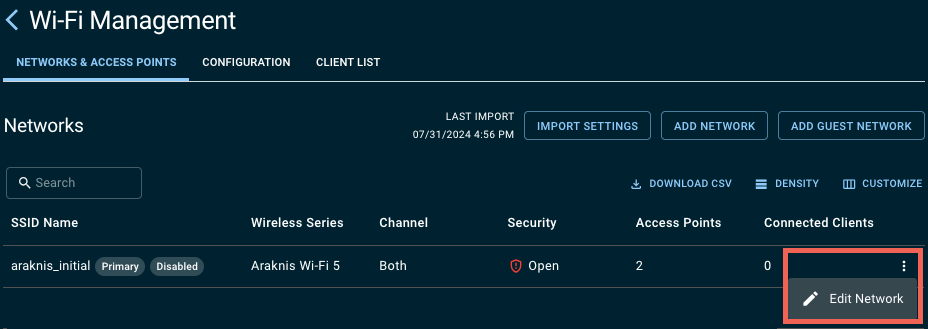
If using Araknis APs you can edit the existing araknis_initial SSID by clicking the three-dot icon and selecting Edit Network.
-
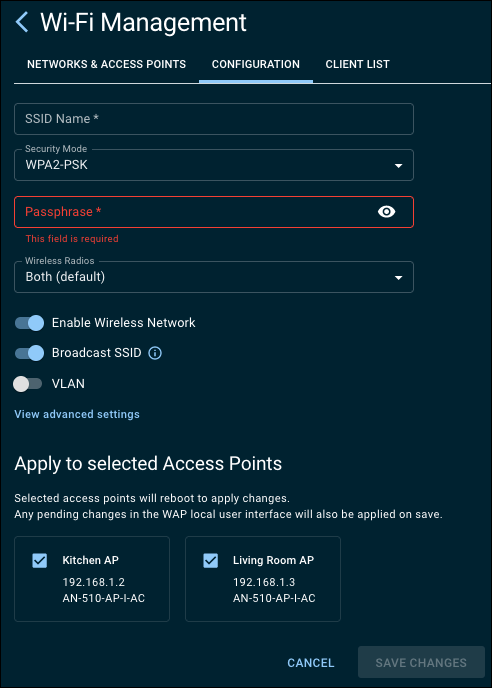
Enter an SSID Name.
-
If desired, select a Security Mode. The default is WPA-PSK2.
-
Enter a Passphrase.
-
Select the wireless radios for the SSID to be broadcast on.
-
By default, the Wireless Network is Enabled and being Broadcast. Use the toggles to turn them off.
-
To tag the SSID with a VLAN, toggle VLAN on and enter the VLAN ID.
-
Click View advanced settings to enable the following:
-
Client Isolation
-
Fast Roaming per SSID
-
Band Steering per SSID
-
Wi-Fi 6
-
OFDM Only
Note: Wi-Fi 5 APs only see Client Isolation.
-
-
Select the access points to apply the SSID to.
-
Click Save Changes.
Note: Any pending changes in the AP’s local interface are also applied when you click the Apply button.
Learn more about OvrC Wi-Fi Management features:


